Pages

Showing posts with label Happiness Abounds Stamp Set. Show all posts

Thursday, August 18, 2022

The Stampin' Up! Happiness Abounds Bundle is Fantastic! Look at the Beautiful Floral Birthday Card You Can Create and Give to Friends or Family!

Do you love floral images? If you do, then the Happiness Abounds Bundle from Stampin' Up! will quickly become your favorite Bundle to work with from the 2022-23 Annual Catalog.

I have created something different for you to try with this Pop-up Front-Step Fun Fold. A piece of Window Sheet is used to create a see-though look. The Window Sheet allows more of the back panel to show where I stamped a variety of black floral images. By doing this, the front floral tea cup layered image POPS off the front of the step fold. 
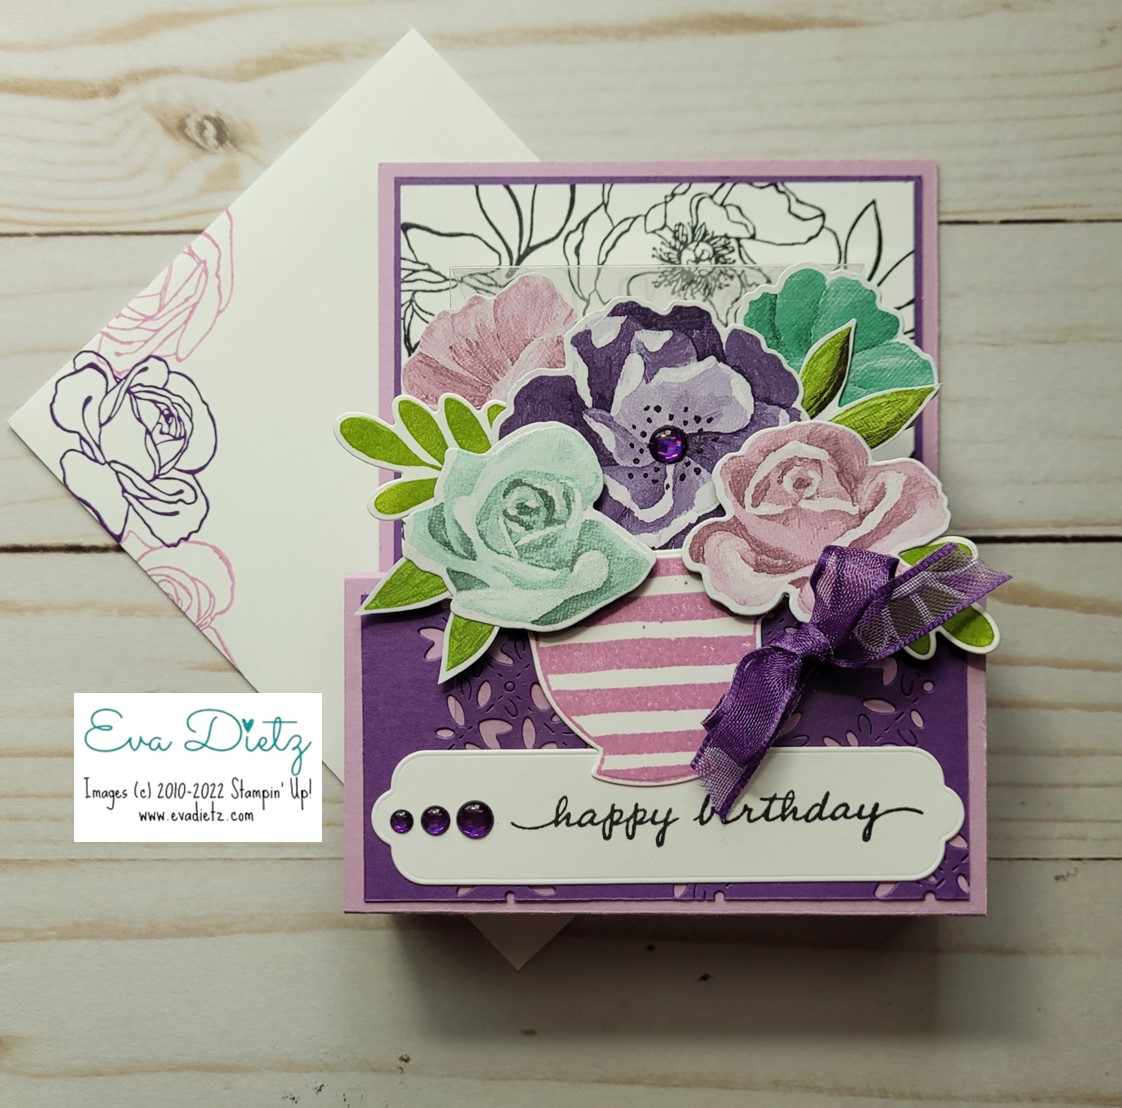

Focus on the envelope design between these two photos, above and below.
 
The front of the envelope had some floral images stamped in two colors. 
The back of the envelope flap has an all over floral design stamped in Memento Black Ink.

This envelope has beauty on both sides!


When the Front Step Card is turned over below, there is a panel on the back for your message. Fussy cut some of the edge florals from the Hues of Happiness Designer Series Paper to incorporate into this lovely floral edge look.


Let's get Creating!

Cutting Measurements

Fresh Freesia cardstock - cut 4 1/4 x 11"
 
Gorgeous Grape cardstock - cut two pieces. Front Upper Panel 4 x 3" 
and Lower Front Die Cut Panel 4 x 2" 

Basic White cardstock - Front Upper Panel - cut 3 7/8 x 2 7/8"
Back of Card Sentiment Panel - 4 x 5 1/4"
For Teacup - cut 3 x 2"
For Happy Birthday tag - cut 4 1/4 x 1 1/4" 
For 2 Leaves - 2 1/2" square piece
 
Window Sheet - 2 3/4 x 5 1/2"


Scoring and Assembly Instructions:


Fresh Freesia card base - score at 5-1/2", 6-3/4", 9", 10-1/4". 
Fold on each score line, use bone folder. 
Add Tear and Tape as shown in diagram. 

Helpful Hint! Practice Fold the card base at the 5-1/2" line, then fold again at the 9" line to the inside. See how that allows the cardbase to lay flat? 
Referring to the side view photo below, peel off the protective layer on the Tear and Tape and 
adhere to create foldable/pop up base, replicating what you just did on your practice fold. 

Gorgeous Grape cardstock piece - adhere to upper front panel section. 

Basic White cardstock upper front panel piece- stamp with variety of floral and leaf images from the Happiness Abounds stamp set in Memento ink. Adhere to Gorgeous Grape Layer. 

Gorgeous Grape cardstock lower front panel piece - use Blossoming Happiness die to create peekaboo look. Adhere to Fresh Freesia lower panel of card base. 


Window Sheet - score at 3/4" and 2". Fold plastic on each score line until there is a good crease but plastic isn't cracking. Position the larger area of the window sheet on top of the die cut Gorgeous Grape panel, centering it from side to side. 

Apply one pass of Stampin' Seal adhesive at the plastic bottom edge only, so it will be covered up by the tag later. Press in place. 

Fold up the card like it will fit in an envelope as shown in the image below. That will give you the placement of where to run the one pass of Stampin' Seal to attach the top section of the window sheet on the basic white stamped floral layer.


Tea Cup image - stamp Basic White with Fresh Freesia ink and die cut out. 

Happy Birthday tag - stamp sentiment as shown in photos using Memento ink. Die cut out. With Stampin' Seal, adhere tag so it covers the bottom edge of the window sheet covering the adhesive line. Add the three Gorgeous Grape Glossy Dots to the tag. 

Prepare floral and leaf images - Die cut out florals and pointy leaves like shown in the photo from the Designer Series Paper. Stamp the two rounded leaf images in Granny Apple Green ink and die cut out. 

Assemble the images using the photo above for reference, as a unit on and behind the tea cup. Use Stampin' Seal and Mini Dimensionals as needed but do not attach to card base yet. Lightly apply some Wink of Stella to flowers. Apply one Gorgeous Grape Glossy Dot in the center of the middle flower. 

Tie 8" ribbon piece around tea cup handle in a bow. Trim excess ribbon as needed. 

Now close the card like it will go into your envelope. Place the prepared floral tea cup on the window sheet and lower section to see how it fits. You want to make sure the flowers do not go above the fold in the window sheet so it will still fit in the envelope. Once you have decided where to place, use the Stampin' Seal and securely attach to window sheet panel. 

Using the photos for reference prepare the back of the card with the fussy cut flower and leaf images glued down on the Basic White cardstock. Stamp the sentiment in Memento Ink. 

On your envelope - stamp front floral images in Gorgeous Grape and Fresh Freesia. 
On back flap stamp multiple floral images in Memento Black ink.

Well Done! You have made a very special birthday card for a loved one or friend.

List of Supplies available to order at my online store. Click each photo to shop.
 

Explore these other Hues of Happiness Suite cards via the links below.


Please contact me anytime if you have an questions 
or email at 
stampinwitheva@gmail.com
Thank you for taking the time to comment on my post, you've made my day!
Wednesday, June 29, 2022

Wonderful World Sale-a-Bration Preview Card - June Stamp and Chat Class

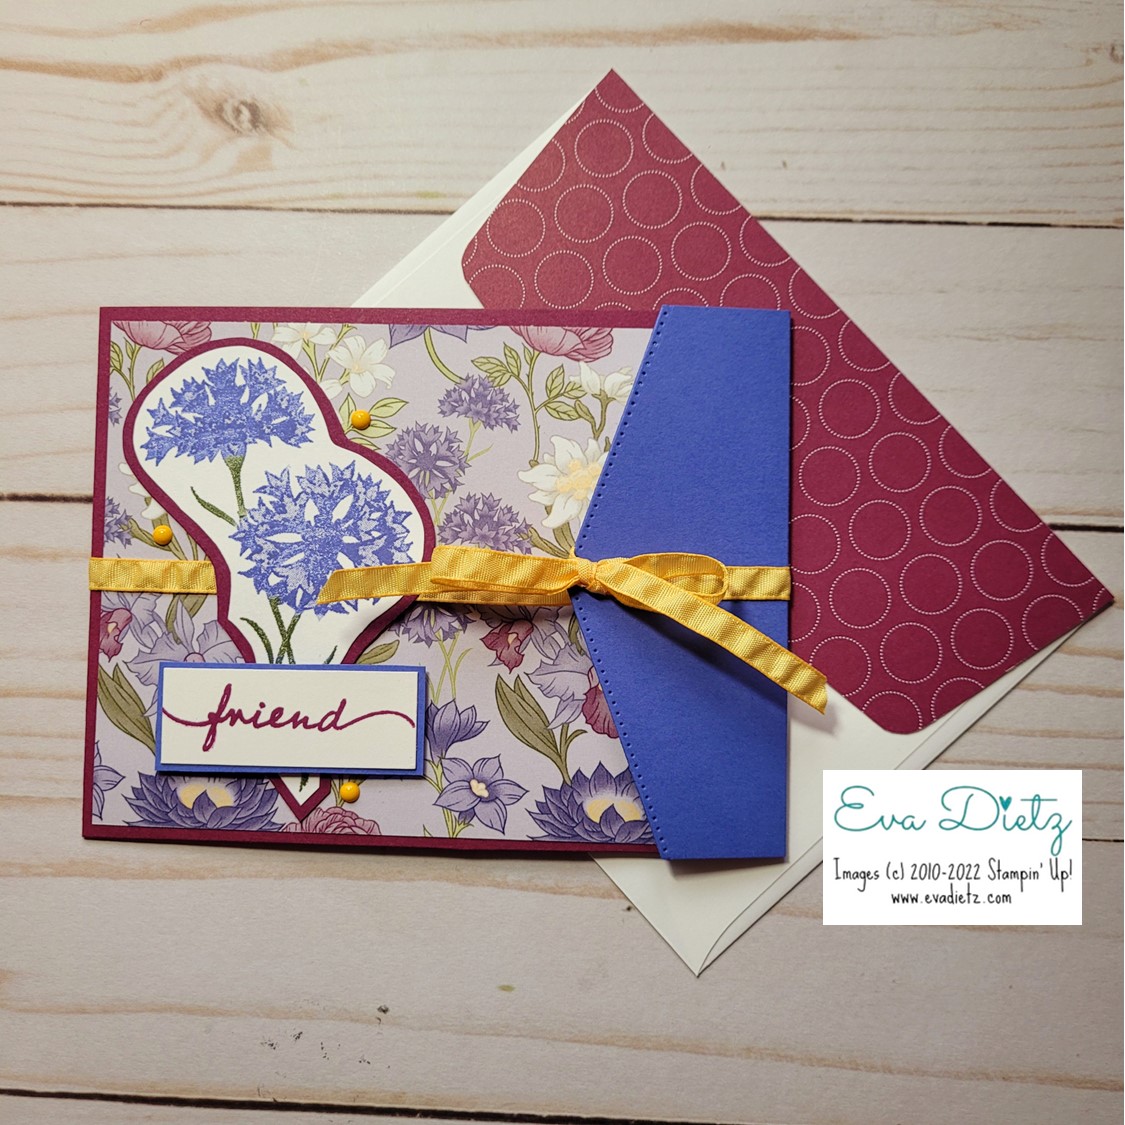
As I was creating cards for my June Stamp and Chat classes, I wanted to share a card from the upcoming (on July 1, 2022) Second Sale-a-Bration offering. This original card design used the Wonderful World stamp set and matching Designer Series Paper which will be free with a qualifying $100 purchase. These two products have a total value of at least $28. 

The bachelor button floral stamp caught my eye first, so I designed with that in mind. I used Orchid Oasis and Mossy Meadow Stampin' Write Markers to color the cling stamp in their individual sections and then gave it "the breath of life" to stamp it on the Basic White cardstock piece. I fussy cut around the image and mounted it on Rich Razzleberry cardstock and mirrored my previously cut edge. Set that aside for a few minutes.


This Rich Razzleberry card base is 4.25" x 11", scored at 5.5". 

The Wonderful World Designer Series Paper layer is 4" x 5.25". Adhere to card front.

Use a 4" x 5.25" layer of Basic White cardstock adhered on the inside of the card to write your personal message.

The Orchid Oasis Flap starts out as a 4.25" x 2.25" piece.  Use the "pocket" edge die from the Basic Borders Die set to create the "flap". Then score 1/2" on the opposite long side which will be attached to the back of the card opening. Using a 1/4" hole punch, punch a hole near the pocket tip of the flap for the ribbon to thread through.

A 22" long piece of Daffodil Delight Ruched ribbon is wrapped around the card. Feed the top piece ot ribbon through the hold in the flap, even up the ends, then tie a bow on the Orchid Oasis flap area.

Now attach your prepared Bachelor Button piece directly to the card front, as that is what will hold the closing ribbon in place.

The Friend tag is a 2" x 3/4" piece of Basic White cardstock stamped in Rich Razzleberry ink, mounted on a 2-1/8" x 7/8" piece of Orchid Oasis cardstock. Raise on dimensionals placing it over the base of the floral image.

Embellish with bling of your choice.

Decorate your Basic White envelope flap with a 2-3/8" x 6" piece of coordinating Designer Series Paper. Adhere and trim off excess.

Now you have a unique, one-of-a-kind card!


Go Straight to My Online Store with Filled Shopping Cart for You

The shopping cart is filled with the current products used to make this card.  You will need to creatively substitute for products not on the list which have retired. The tools listed below are not added, but you sure can. You can delete anything out of the cart you already have or add additional products you need.

Flap Over Fun Fold Card

115316 Rich Razzleberry Cardstock $9.25

159267 Orchid Oasis Cardstock $9.25

155558 Basic Border Dies $29

159238 Happiness Abounds Stamp Set for greeting $23

147091 Rich Razzleberry Classic Stampin’ Pad $8

159276 Basic White Cardstock $10.25

147158 Set of Neutrals including Mossy Meadow Stampin’ Write Marker $30

159219 Set of 5 including Orchid Oasis Stampin’ Write Marker $15

159236 Basic White Medium Envelopes $7.50

Retired – Daffodil Delight Ruched Ribbon

Retired – It’s My Party Enamel Dots (Daffodil Delight)

¼” hole punch – non Stampin’ Up!

9 products without the Sale-a-Bration freebie, cost $141.25
Select 159918 Wonderful World Stamp Set & Wonderful World Designer Series Paper – FREE with $100 purchase before Ship/Tax

If the shopping cart doesn't match my quantity and total above that means some items are currently unavailable, but should be returning to inventory pretty soon when more are received. 


Adhesives

104430 Stampin’ Dimensionals $4.25

144108 Mini Dimensionals $4.25

152803 Stampin’ Seal Adhesive $8

152814 Stampin’ Seal Refill $5.50

103683 Glue Dots $5.25


Tools

152392 Paper Trimmer $25

152391 Cutting Blades Multipack $12

103579 Paper Snips $11

149653 Cut & Emboss Machine $125

150673 Mini Cut & Emboss Machine $63

144107 Take Your Pick Tool $10

147042 Simply Shammy $8.50

Clear Stamp Blocks various sizes on page 149 of Annual Catalog

I'd love to read a comment about my original card design. What do you think of it?

Join my Sunflower Friends team at https://evadietz.stampinup.net/

Please contact me anytime if you have any questions 
or 
stampinwitheva@gmail.com

Monday, June 27, 2022

June Stamp and Chat Class Card + Favor Box

Do you ever have something catch your eye, then you have to go find out what it is, and then purchase it? That is what happened to me with the Split Card Textures Dies. I started noticing other demonstrators using using them in their card creations and I had to get my own set. They were hiding in the 2022-23 Annual Catalog and I'd never noticed them! 

This original card was a popular card this past weekend at my Stamp and Chat classes. 

It is very easy to make with only 5 cardstock pieces, plus ribbon and embellishments.

Start with Evening Evergreen cardstock base cut at 5.5" x 8.5", scored at 4.25". Add inside layer of Basic White cut 4" x 5.25" for handwritten message.

Retired – Beautifully Penned Designer Series Paper (Sale-A- Bration freebie) but you can substitute whatever you think looks best from your stash of Designer Series Papers. Cut 4" x 5.25", then die cut with Split Card Texture die. Glue down to card front.

Pale Papaya cardstock cut at 3.25" x 4.25" and die cut with Scalloped Contours Die.

Stamp greeting from Happiness Abounds stamp set with Evening Evergreen ink near bottom of Pale Papaya piece.

Wrap a 5" piece of Evening Evergreen Organza ribbon around top of Pale Papaya layer. Secure with scotch tape on reverse side. Adhere Pale Papaya layer flat to card front as shown in photo.

Basic White cardstock cut 3" x 4", stamped in Memento Ink with Hand Penned Petals stamp set image. Die Cut out and affix with dimensionals to card front as shown in photo.

Add Evening Evergreen ribbon bow, glue dotted down as shown. Add bling of your choice.

Finish with a matching envelope flap of 2-3/8" x 6" adhered to back of envelope. Trim off excess paper.


The shopping cart is filled with the products used to make this card. The tools listed below are not added, but you sure can. You can delete anything out of the cart you already have or add additional products you need.

Hand Penned Happy Birthday Card

155574 Evening Evergreen Cardstock $9.25

159162 Split Card Textures Dies $35

155668 Pale Papaya Cardstock $9.25

155560 Scalloped Contour Dies $35

155070 Hand Penned Petals $22

155557 Penned Flowers Dies $30

159276 Basic White Cardstock $10.25

132708 Memento Tuxedo Black Ink $6

159238 Happiness Abounds Stamp Set for greeting $23

155576 Evening Evergreen Classic Stampin’ Pad $8

155573 Evening Evergreen 3/8” Open Weave Ribbon $7

159185 In Color Opal Rounds $8.50

159236 Basic White Medium Envelopes $7.50

Retired – Beautifully Penned Designer Series Paper (SAB)

Envelope Flap paper is retired

13 current products in shopping cart - total cost $210.75 before shipping & sales tax.

If the shopping cart doesn't match my quantity and total above that means some items are currently unavailable, but should be returning to inventory pretty soon when more are received. 

--------------------------------------------------------

Every time I hold card classes in my home I always give my stampers a little table favor. This month was a simple one created with items I already had on hand. 

The mini pizza boxes received a top layer of Strawberry Designer Series Paper then I added a Sweet Strawberry stamped in Poppy Parade and Real Red on a punched out Basic White circle. Little greeting was in Memento ink. Heart embellishment was very retired and needed to be used up. Finished circle was raised on dimensionals.


Inside the mini pizza box were two different cards that were created with extra pieces from the June 2022 Pick of the Crop Paper Pumpkin kit I had just received plus other items I had on hand.  My guests loved there treat!


Below are additional tools you will need to cut, die cut, and assemble the card shown.

Adhesives

104430 Stampin’ Dimensionals $4.25

144108 Mini Dimensionals $4.25

152803 Stampin’ Seal Adhesive $8

152814 Stampin’ Seal Refill $5.50

103683 Glue Dots $5.25


Tools

152392 Paper Trimmer $25

152391 Cutting Blades Multipack $12

103579 Paper Snips $11

149653 Cut & Emboss Machine $125

150673 Mini Cut & Emboss Machine $63

144107 Take Your Pick Tool $10

147042 Simply Shammy $8.50

Clear Stamp Blocks various sizes on page 149 of Annual Catalog


Have you joined my email list yet? When you do, you will receive a free 14 card One Sheet Wonder tutorial!

Join my Sunflower Friends team at https://evadietz.stampinup.net/   Join Now

Please contact me anytime if you have any questions 
or 
stampinwitheva@gmail.com

Wednesday, June 1, 2022

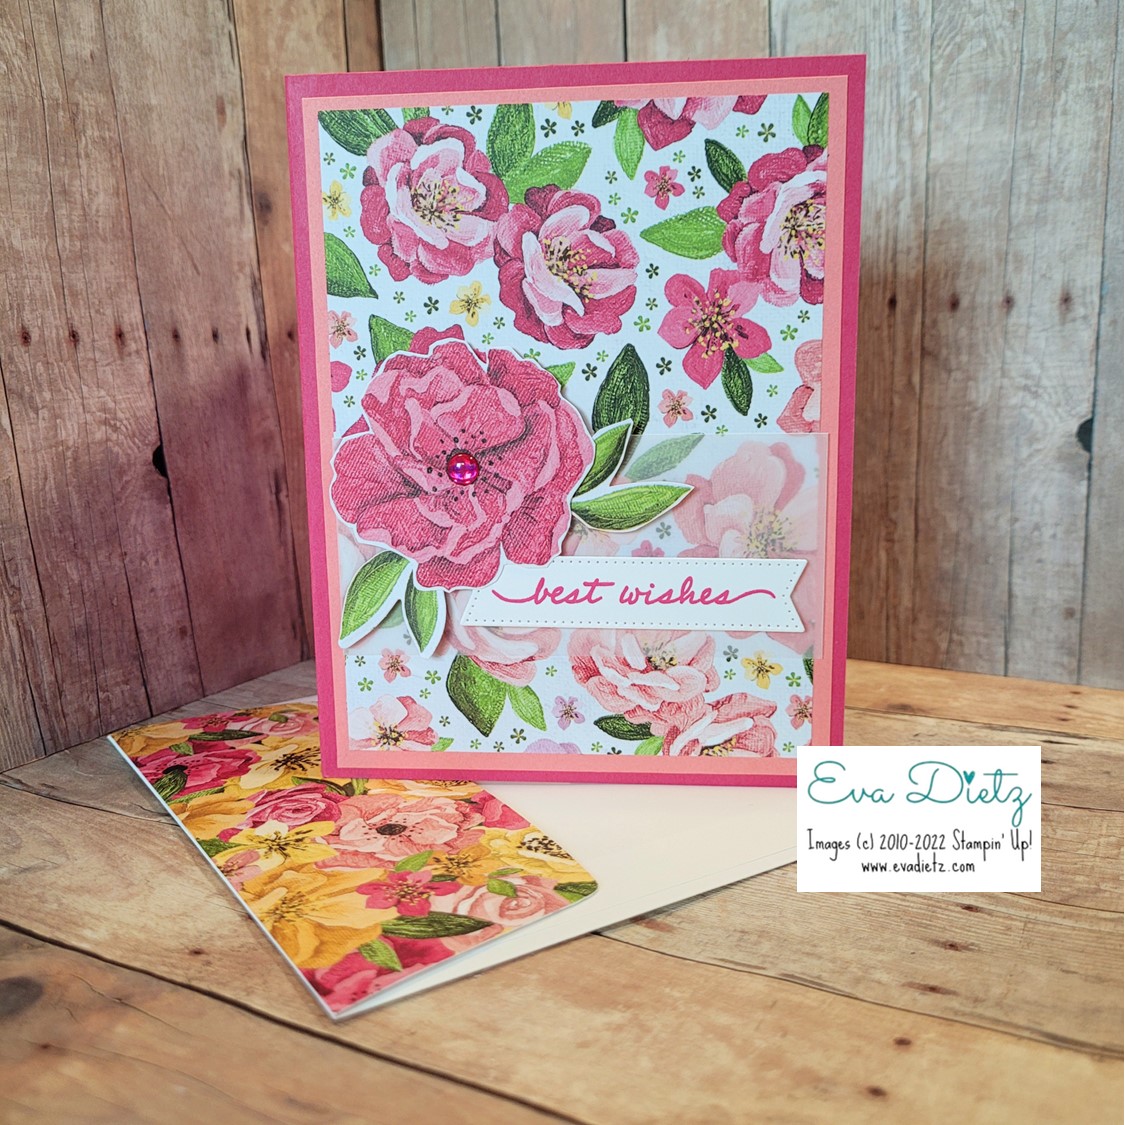
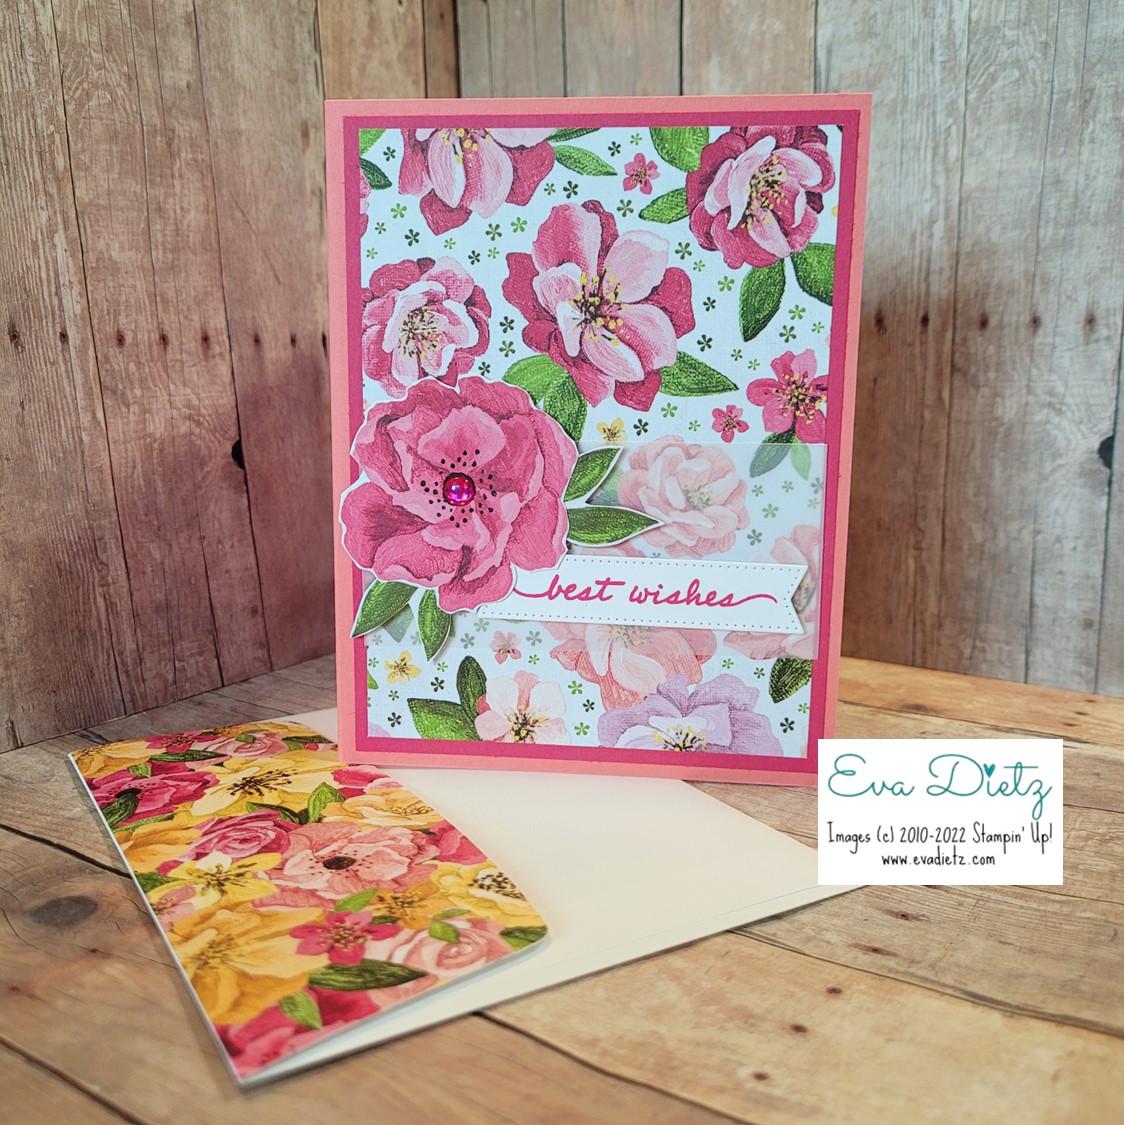
Hues of Happiness Tunnel Fun Fold Best Wishes Card

Recently I held an online Mystery Hostess Party on my business Facebook page. It was quite the positive experience. During the course of the three day event, I did two Facebook Lives. Oh my!  
I have a lot to learn about video making, but I took my live, uploaded it on Canva and went to work editing it down to cut out the "dead" time and streamline the cardmaking process. 
I'd love it if you'd give it a look.


After watching the video, you can see the Tunnel fun fold cards shown within below here in the blog post.

This card design was inspired by Jenny Hayward, but I changed it up some, to make it my own.

First card is the Melon Mambo base with Flirty Flamingo layer.


Second card is the Flirty Flamingo base with the Melon Mambo layer.


Products Used in Creating these Cards:

Happiness Abounds Stamp set 159238 $23
Hues of Happiness Designer Series Paper 158822 $12 (Cut 3-3/4" x 5")
Basic White Cardstock 159276 $10.25 (Cut 5.25" x 8.5", scored at 2-1/8" and 4-1/4", then rotate 180 degrees and score at 2-1/8" from other side) and scrap for best wishes tag
Melon Mambo Cardstock 115320 $9.25  (Card base 5.5" x 8.5", scored at 4.25")
Melon Mambo Classic Stampin' Pad 147051 $8
Flirty Flamingo Cardstock 141416 $9.25  (Front layer cut 4" x 5.25")
Stylish Shapes Dies 159183 $30
Vellum Cardstock 158827 $8  (1-3/4" x 3-3/4")
Glossy Dots Assortment 158827 $8
Mini Dimensionals 144108 $4.25
Stampin' Seal Adhesive 152813 $8
Basic White Envelopes 159236 $7.50
 

Shop or Join Stampin' Up!

Please contact me or email me at stampinwitheva@gmail.com if you have any questions about products, techniques, or card designs.

Tuesday, May 31, 2022

Using New Masking Paper from Stampin' Up!

Since I am still crushing on the Hues of Happiness Designer Series Paper and all the floral images I fussy cut out in my recliner that I wanted to use so...

Over the weekend I decided to try Stampin' Up!s new Masking Paper. It worked with helping me to select an area on my card front that I wanted to stay white, but I wanted to use the blending brush and Soft Sea foam ink on the upper and lower portions of the Basic White layer.

The Masking Paper did a great job giving me the "edge" I wanted.
However, I must have pressed the masking paper down to much because it peeled off a top layer of the basic white paper as I removed it. Luckily the flowers I used covered up the "roughed up" layer.


Additional Products used on above card:
Retired - Holiday Rhinestone Jewels
Retired - Noble Peacock Rhinestone Jewels
Brushed Brass Butterflies 158136 $10


Taking what I learned from the first card up top, I didn't peel off all the backing layer of the masking paper with this next card when I prepared the masking piece I needed. I just tore off a little bit of the backing paper near the edges so the middle of the area wouldn't be stuck down. Again I used the blending brush with the Soft Sea Foam to create the background for this second card.

Unfortunately, even with the narrower edge stuck down to the Basic White, when removing the masking paper, it still "roughed up" the "edge"  where the masking paper was stuck down. Again, I was relieved my flowers were going to cover up the roughness.

Before I call Demonstrator Support to inquire that I might have received a defective product I am going to experiment with it a bit more. 

Products used in creating this Card are listed below.


Both cards have this image stamped inside.

If you missed this video earlier this month, you can view it at this link:


Products used and available to order at the link below:
Happiness Abounds Stamp set 159238 $23
Hues of Happiness Designer Series Paper 158822 $12
Basic White Cardstock 159276 $10.25
Melon Mambo Cardstock 115320 $9.25
Melon Mambo Classic Stampin' Pad 147051 $8
Soft Sea Foam Classic Stampin' Pad 147102 $8
Memento Tuxedo Black Ink 132708 $6
Iridescent Rhinestones 158310 $7.50
Masking Paper 155480 $7
Blending Brushes 153611 $12.50
Mini Dimensionals 144108 $4.25
Stampin' Seal Adhesive 152813 $8
Basic White Envelopes 159236 $7.50
Art Glitter Glue is available from Amazon


Please contact me anytime if you have any questions 
or 
stampinwitheva@gmail.com

With love and gratitude,

Thank you for taking the time to comment on my post, you've made my day!

Saturday, May 28, 2022

Wonderful Hues of Happiness Suite Fun Fold

As we all do, I have a few people I like to "follow" on Instagram. One of those people is the amazing Stampin' Up! Demonstrator Jaimie Babarczy of New York. I really liked this card she created recently (she cased it from @karenksenzakovic), but I have improved it just a bit.

As I was looking at the card, she only put one layer of Basic White inside and I thought to myself, hmmm, writing a message inside that card is going to prove difficult because it will show if you aren't careful. (Not to mention you would have an interesting shaped message inside if you got long-winded!)

My improvement was to use a 4" x 10.5" Basic White piece scored at 5.25". Glue the folded piece inside with the fold at the top. That way you have a spot to write your greeting on the bottom layer inside, but you also have the top white layer that will create the desired effect with this fun fold design. 


You will start with a full sheet of Cardstock and score it both directions at 4-1/4" and 5-1/2". Use the photo above at the cutting diagram for the two angled folds.

Select the piece of Hues of Happiness Designer Series Paper you like and cut a 4" x 5-1/4" piece then slice it diagonally to match the photo above. One piece is glued to the left side flap. Then flip over the other piece to glue to the top flap, thus creating the two tone look.

Adhere your folded Basic White insert inside and fussy cut one flower to glue as decoration to the inner layer.

Finish it up using the photo above for reference for the hexagon tag.


Click on the Online Shopping Link here:

115320 Melon Mambo Cardstock $10.25

158822 Hues of Happiness Designer Series Paper $12.00

159276 Basic White Cardstock $10.25

159283 Happiness Abounds Stamp Set $23.00

147110 Night of Navy Classic Stampin’ Pad $8.00

158046 Beautiful Shapes Dies $29.00

158136 Brushed Brass Butterflies $10

159236 Basic White Medium Envelopes $7.50

Envelope Flap paper is retired

Adhesives

104430 Stampin’ Dimensionals $4.25

144108 Mini Dimensionals $4.25

152803 Stampin’ Seal Adhesive $8.00

152814 Stampin’ Seal Refill $5.50

103683 Glue Dots $5.25

Tools

152392 Paper Trimmer $25.00

152391 Cutting Blades Multipack $12.00

103579 Paper Snips $11.00

149653 Cut & Emboss Machine $125.00

150673 Mini Cut & Emboss Machine $63.00

144107 Take Your Pick Tool $10.00

147042 Simply Shammy $8.50

Clear Stamp Blocks various sizes on page 149 of Annual Catalog


I encourage you to try this card, make several and give to those extra special friends you have! 


Please contact me anytime if you have any questions 
or 
stampinwitheva@gmail.com

With love and gratitude,

Thank you for taking the time to comment on my post, you've made my day!

Tuesday, May 10, 2022

Hues of Happiness Suite Video

Enjoy this short video sharing about this new Suite!


Come back tomorrow, I'll have a Pop Up Front Step card to share with you made with these products.

Thursday, April 21, 2022

Hues of Happiness Suite Floral Card

Say Hello to another amazing Suite coming in the new 2022-23 Annual Catalog which will be available May 3, 2022. 

Hello to the Hues of Happiness Suite.  

The whole suite of stamp set, dies, Designer Series Paper and Glossy Dots Embellishments is $69.50.

 The color scheme of this Suite is amazing! Melon Mambo, Daffodil Delight, Granny Apple Green, Pool Party, Night of Navy and Fresh Freesia are the beautiful colors in the collection. I LOVE them all!


Happiness Abounds Bundle of Stamp set and Blossoming Happiness Dies will be $49.50 
(save 10% with the bundle deal.)


Hues of Happiness Designer Series Paper will be $12.00 
Both photos above and below show you every side of the 12 sheets of paper, two of each double sided design.
The Blossoming Happiness Dies cut out some of the floral images on the Designer Series Paper. 


The card I've designed to share with you today is a simple, stunning card because I've only used Stamp, Ink and Paper plus a few Embellishments.

By using the dies set to die cut the flowers and leaves, it makes for a quick to assemble card. 


Use another die cut flower for the inside liner surprise. Don't forget to do your matching envelope flap too!


Products used in this Card:

Hues of Happiness Suite = Happiness Abounds Stamp Set and Blossoming Happiness Dies and Hues of Happiness Designer Series Paper

Night of Navy Cardstock cut 5.5" x 8.5" scored at 4.25"

Pool Party Cardstock cut at 4" x 5.25"

Hues of Happiness Designer Series Paper 3.75" x 5"

Basic White Cardstock inner layer cut at 4" x 5.25" 

Happiness Abounds Stamp Set and Basic White tag 3/4" x 3.5" stamped in Night of Navy ink

Glossy Dot Assortment, used Pool Party dots

Decorated Flap of Basic White Envelope 2-3/8" x 6"

Adhesives used were Stampin' Seal and Mini Dimensionals

Tools used were the regular Cut and Emboss Machine, Paper Trimmer, Take Your Pick Tool.
******

I'd love to know in the comments if you like this new Suite in the upcoming catalog. There are several floral suites but this one knocked my socks off!

If you don't have your own Stampin' Up! Demonstrator I'd love to be yours! You can request a catalog here at this link.

Have a great day!