Pages

Tuesday, May 31, 2022

Using New Masking Paper from Stampin' Up!

Since I am still crushing on the Hues of Happiness Designer Series Paper and all the floral images I fussy cut out in my recliner that I wanted to use so...

Over the weekend I decided to try Stampin' Up!s new Masking Paper. It worked with helping me to select an area on my card front that I wanted to stay white, but I wanted to use the blending brush and Soft Sea foam ink on the upper and lower portions of the Basic White layer.

The Masking Paper did a great job giving me the "edge" I wanted.
However, I must have pressed the masking paper down to much because it peeled off a top layer of the basic white paper as I removed it. Luckily the flowers I used covered up the "roughed up" layer.


Additional Products used on above card:
Retired - Holiday Rhinestone Jewels
Retired - Noble Peacock Rhinestone Jewels
Brushed Brass Butterflies 158136 $10


Taking what I learned from the first card up top, I didn't peel off all the backing layer of the masking paper with this next card when I prepared the masking piece I needed. I just tore off a little bit of the backing paper near the edges so the middle of the area wouldn't be stuck down. Again I used the blending brush with the Soft Sea Foam to create the background for this second card.

Unfortunately, even with the narrower edge stuck down to the Basic White, when removing the masking paper, it still "roughed up" the "edge"  where the masking paper was stuck down. Again, I was relieved my flowers were going to cover up the roughness.

Before I call Demonstrator Support to inquire that I might have received a defective product I am going to experiment with it a bit more. 

Products used in creating this Card are listed below.


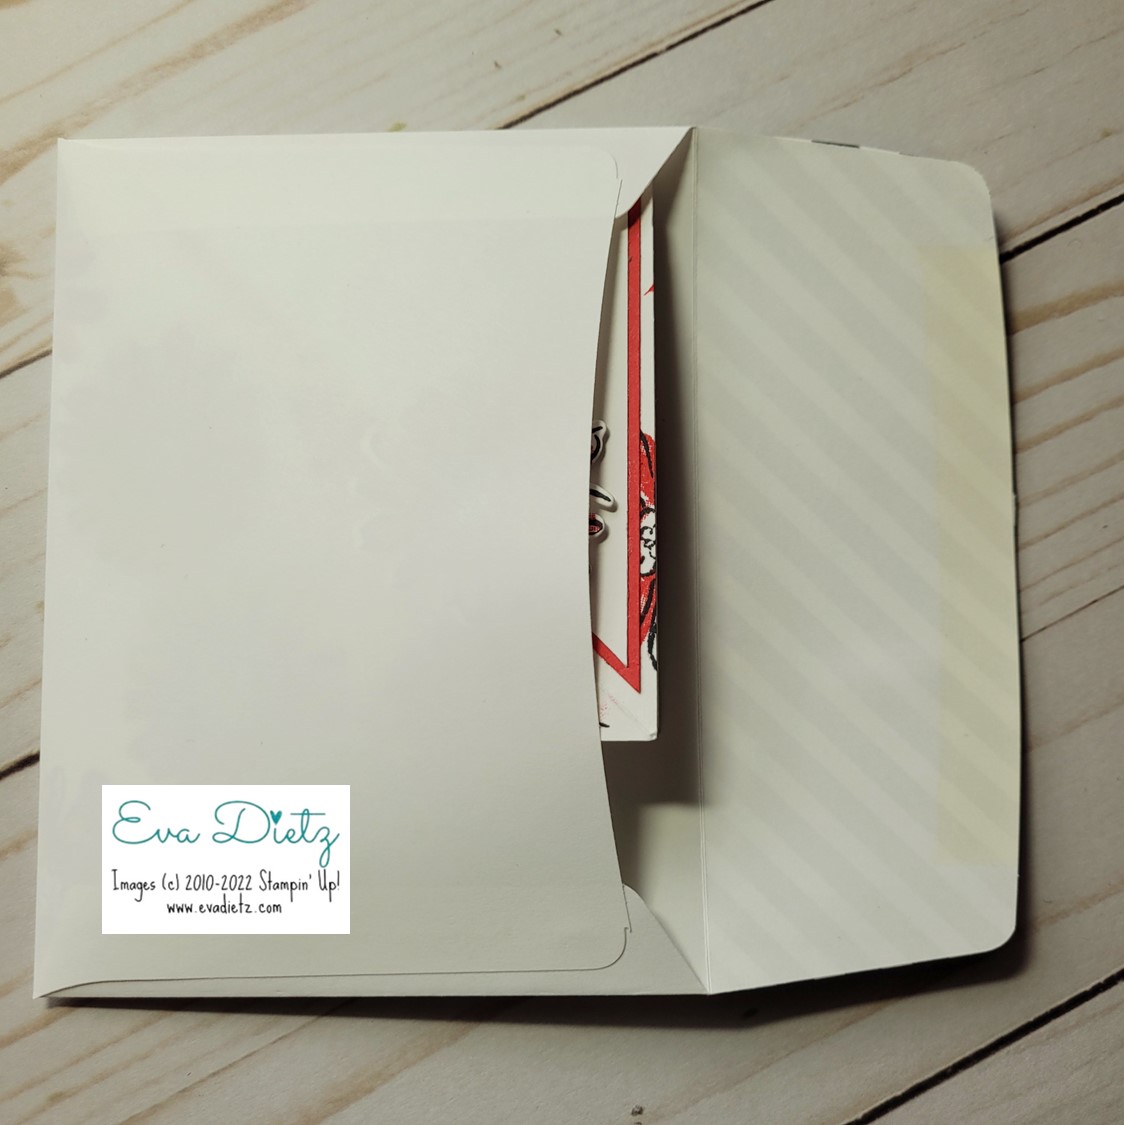
Both cards have this image stamped inside.

If you missed this video earlier this month, you can view it at this link:


Products used and available to order at the link below:
Happiness Abounds Stamp set 159238 $23
Hues of Happiness Designer Series Paper 158822 $12
Basic White Cardstock 159276 $10.25
Melon Mambo Cardstock 115320 $9.25
Melon Mambo Classic Stampin' Pad 147051 $8
Soft Sea Foam Classic Stampin' Pad 147102 $8
Memento Tuxedo Black Ink 132708 $6
Iridescent Rhinestones 158310 $7.50
Masking Paper 155480 $7
Blending Brushes 153611 $12.50
Mini Dimensionals 144108 $4.25
Stampin' Seal Adhesive 152813 $8
Basic White Envelopes 159236 $7.50
Art Glitter Glue is available from Amazon


Please contact me anytime if you have any questions 
or 
stampinwitheva@gmail.com

With love and gratitude,

Thank you for taking the time to comment on my post, you've made my day!

Monday, May 30, 2022

Honoring our Military on Memorial Day 2022

 Our family is remembering those who have given the ultimate sacrifice for America's Freedom

and honoring those who are currently serving and protecting our County today.


Saturday, May 28, 2022

Wonderful Hues of Happiness Suite Fun Fold

As we all do, I have a few people I like to "follow" on Instagram. One of those people is the amazing Stampin' Up! Demonstrator Jaimie Babarczy of New York. I really liked this card she created recently (she cased it from @karenksenzakovic), but I have improved it just a bit.

As I was looking at the card, she only put one layer of Basic White inside and I thought to myself, hmmm, writing a message inside that card is going to prove difficult because it will show if you aren't careful. (Not to mention you would have an interesting shaped message inside if you got long-winded!)

My improvement was to use a 4" x 10.5" Basic White piece scored at 5.25". Glue the folded piece inside with the fold at the top. That way you have a spot to write your greeting on the bottom layer inside, but you also have the top white layer that will create the desired effect with this fun fold design. 


You will start with a full sheet of Cardstock and score it both directions at 4-1/4" and 5-1/2". Use the photo above at the cutting diagram for the two angled folds.

Select the piece of Hues of Happiness Designer Series Paper you like and cut a 4" x 5-1/4" piece then slice it diagonally to match the photo above. One piece is glued to the left side flap. Then flip over the other piece to glue to the top flap, thus creating the two tone look.

Adhere your folded Basic White insert inside and fussy cut one flower to glue as decoration to the inner layer.

Finish it up using the photo above for reference for the hexagon tag.


Click on the Online Shopping Link here:

115320 Melon Mambo Cardstock $10.25

158822 Hues of Happiness Designer Series Paper $12.00

159276 Basic White Cardstock $10.25

159283 Happiness Abounds Stamp Set $23.00

147110 Night of Navy Classic Stampin’ Pad $8.00

158046 Beautiful Shapes Dies $29.00

158136 Brushed Brass Butterflies $10

159236 Basic White Medium Envelopes $7.50

Envelope Flap paper is retired

Adhesives

104430 Stampin’ Dimensionals $4.25

144108 Mini Dimensionals $4.25

152803 Stampin’ Seal Adhesive $8.00

152814 Stampin’ Seal Refill $5.50

103683 Glue Dots $5.25

Tools

152392 Paper Trimmer $25.00

152391 Cutting Blades Multipack $12.00

103579 Paper Snips $11.00

149653 Cut & Emboss Machine $125.00

150673 Mini Cut & Emboss Machine $63.00

144107 Take Your Pick Tool $10.00

147042 Simply Shammy $8.50

Clear Stamp Blocks various sizes on page 149 of Annual Catalog


I encourage you to try this card, make several and give to those extra special friends you have! 


Please contact me anytime if you have any questions 
or 
stampinwitheva@gmail.com

With love and gratitude,

Thank you for taking the time to comment on my post, you've made my day!

Friday, May 27, 2022

Simple Tea Boutique Suite Card

Up next is another card we made at Stamp and Chat Class last weekend. I'm calling this the Bookmark Card. I'm so in love with the Tea Boutique Suite I had to find a way to use it again in class. It was easy when you start with the Tea Boutique Cards and Envelopes.


To create the pocket you will cut diagonally once on one full 6"x6" sheet of the 2022-24 In Color Designer Series Paper. Then you will cut one of the two triangles you created in half again. Amazingly the two smaller triangles fit perfectly on the front of the card base when they are overlapped as shown. With each triangle you will only adhere the side and bottom edges with adhesive to create the pocket effect.


Die cut both your teacups and glue together.

Stamp the stems in Parakeet Party ink and the flowers in Tahitian Tide ink on a scrap of Basic White. Fussy cut around the edges leaving 1/2" at the base to adhere to the back of the assembled tea cut.

When you adhere the finished tea cup to the card front be sure to only put dimensionals on the tea cup portion. The flowers are "loose" so the bookmark can slide in the pocket behind the flowers.

Die cut the bookmark with the largest of the Tailor Made Tags die  on a piece of Basic White as shown. Stamp a second set of flowers and stems at the bottom end of the bookmark. Stamp whatever greeting you choose at the top of the bookmark.

Take a  10" piece of the Parakeet Party Metallic Woven Ribbon and tie at knot at the top of the bookmark, then tie a bow. It will look nice and lay flat if you do it this way.

Finish your masterpiece with three Pearl Jewels, two on the tea cup flowers and one in the open handle space.


Click on the Online Shopping Link here:

159270 Tea Boutique Cards and Envelopes $10.00

159253 2022-24 In Color Designer Series Paper Assortments $12.00

158661 Cup of Tea Stamp Set $23.00

160186 Teacup Dies $27.00

159276 Basic White Cardstock $10.25

155563 Tailor Made Tags $22.00

159259 Parakeet Party Cardstock $9.25

159208 Parakeet Party Classic Stampin’ Pad $8.00

159210 Tahitian Tide Classic Stampin’ Pad $8.00

144219 Pearl Basic Jewels $6.00

159196 1/8” Metallic Woven Ribbon – Parakeet Party $9.00

Adhesives

104430 Stampin’ Dimensionals $4.25

144108 Mini Dimensionals $4.25

152803 Stampin’ Seal Adhesive $8.00

152814 Stampin’ Seal Refill $5.50

103683 Glue Dots $5.25

Tools

152392 Paper Trimmer $25.00

152391 Cutting Blades Multipack $12.00

103579 Paper Snips $11.00

149653 Cut & Emboss Machine $125.00

150673 Mini Cut & Emboss Machine $63.00

144107 Take Your Pick Tool $10.00

147042 Simply Shammy $8.50

Clear Stamp Blocks various sizes on page 149 of Annual Catalog

Have fun making lots of these cards in all five InColors to share with your book club, teachers at school, or your office crowd.


Please contact me anytime if you have any questions 
or 
stampinwitheva@gmail.com

With love and gratitude,

Thank you for taking the time to comment on my post, you've made my day!

Thursday, May 26, 2022

Last Chance Sale starts June 1 - Discounted Items

The fabulous January-June Mini Catalog will be ending on June 30, 2022. Between now and then, Stampin' Up! has marked some of the prices down as much as 50%. Check over the two page list here and get ready to shop on June 1 at Midnight Mountain Time (or May 31 at 11 p.m. Pacific Time.) 

All products are while supplies last, so be sure to order early!!!

As I was looking the list over, I discovered one thing that can save you more money. I noticed a couple bundles that I wanted but hadn't purchased yet. The Bundle price is not discounted beyond the 10% it was in the catalog, but if you buy the stamp set and dies/punch separately you will get them for an even lower price! 

Shop at  https://evadietz.stampinup.net/  click on "Shop Now"


Thanks for taking a look. Share this post with other stampers you know.

Shop at https://evadietz.stampinup.net/  click on "Shop Now"

Please contact me anytime if you have any questions 
or 
stampinwitheva@gmail.com

With love and gratitude,

Wednesday, May 25, 2022

Color & Contour Teepee Fun Fold Card

 A long time ago I was given a Teepee Fun Fold Card similar to my photo below. I set the card on my display shelf and often admired it. For Stamp and Chat class earlier this month I decided to finally give it a go with my customers. My fears and worries were unfounded. Everyone did great making theirs.


Standing with it's coordinating envelope.


A better front view.


Fully open, laying flat. Notice the location of the white brad closure.

Cutting Dimensions:
The base is made from three 4" squares of Basic White cardstock, scored diagonally and glued as shown.
With the Sweet Sorbet ink, stamp the floral image randomly all over the card base.
Follow with the Memento ink with floral outline image matched each previously stamped flower.
The Sweet Sorbet triangle is cut diagonally from a 3-3/4" square. Adhere to card front.
The Basic White triangle is cut diagonally from a 3-1/2" square. Stamp the sentiment on the Basic White Triangle. Then adhere to Sweet Sorbet triangle.
Finish with the embellishment.
The extra flower needs a 2" square scrap of Basic White raised with dimensionals after stamping and die cut.

Form the teepee, mark a small pencil dot where you want the mini hole punch to be, punch the hole, and place the brad.

During class we discovered it was very hard to have the greeting be level, due to the teepee shape when assembled. It doesn't matter in my opinion, but if it does to you, just draw a light pencil line to help you aim the sentiment stamp. Then erase with a white eraser after you have allowed the ink to dry well.


When folded in half to make this shape, it fits perfectly into our A2 envelope.


Products used to create this card and available at my online store (link below):

159276 Basic White Cardstock $10.25

154994 Color & Contour Stamp Set $21.00

155560 Scalloped Contour Dies $35.00

159268 Sweet Sorbet Cardstock $9.25

159216 Sweet Sorbet Classic Stampin’ Pad $8.00

132708 Memento Tuxedo Black Ink $6

159236 Basic White Medium Envelopes $7.50

132708 Memento Tuxedo Black Ink $6

159186 2022-24 In Color Matte Decorative Dots $8.00

Retired White Brads

1/16" hole punch - not SU

Adhesives

104430 Stampin’ Dimensionals $4.25

144108 Mini Dimensionals $4.25

152803 Stampin’ Seal Adhesive $8.00

152814 Stampin’ Seal Refill $5.50

103683 Glue Dots $5.25

Tools

152392 Paper Trimmer $25.00

152391 Cutting Blades Multipack $12.00

103579 Paper Snips $11.00

149653 Cut & Emboss Machine $125.00

150673 Mini Cut & Emboss Machine $63.00

144107 Take Your Pick Tool $10.00

147042 Simply Shammy $8.50

Clear Stamp Blocks various sizes on page 149 of Annual Catalog


Please contact me anytime if you have any questions 
or 
stampinwitheva@gmail.com

With love and gratitude,

Thank you for taking the time to comment on my post, you've made my day!

Tuesday, May 24, 2022

Introducing the Wisteria Wishes Stamp Set

 Have you ever grown Wisteria? I haven't, but I have always admired those that can. So when Stampin' Up! placed the Wisteria Wishes stamp set in the new Annual Catalog, I had to get it. That way I can "grow' some beautiful Wisteria cards instead! You can "grow" some too!


Cutting and Assembly Directions:
1. Basic White cardbase 5.5" x 8.5" scored at 4.25"
2. 4" x 5.25" Gorgeous Grape cardstock embossed with the Pretty Flowers folder. Adhere to cardbase.
3. Die Cut Basic White cardstock 3.5" x 4.25" with Scalloped Contour Die as shown. 
4. With Pear Pizzazz ink stamp branch.
4. With Highland Heather ink stamp triple flower stamp.
5. With Gorgeous Grape ink stamp triple flower stamp over just a smidge.
6. With Memento ink stamp greeting.
7. With Dimensionals raise Scalloped stamped layer on Gorgeous Grape layer.
8. Add gold bow and butterfly
9. Decorate envelope flap with 2-3/8" x 6" piece of matching Designer Series Paper.

One thing I learned is you have to pay attention to stamp the leaf branch so the wisteria stems hang vertically. Stamp  the triple floral image first in Highland Heather, then again moved just a bit to the right in Gorgeous Grape ink.


Products Used to Create this Card:

159434 Wisteria Wishes $18.00 

159276 Basic White Cardstock $10.25

146987 Gorgeous Grape Cardstock $9.25

155428 Pretty Flowers Embossing Folder $7.50

155560 Scalloped Contour Dies $35.00

132708 Memento Tuxedo Black Ink $6

147099 Gorgeous Grape Classic Stampin’ Pad $8.00

147103 Highland Heather Classic Stampin’ Pad $8.00

147104 Pear Pizzazz Classic Stampin’ Pad $8.00

158136 Brushed Brass Butterflies $10

Retired – Fine Gold Cording

159236 Basic White Medium Envelopes $7.50

Envelope Flap paper is retired

Adhesives

104430 Stampin’ Dimensionals $4.25

144108 Mini Dimensionals $4.25

152803 Stampin’ Seal Adhesive $8.00

152814 Stampin’ Seal Refill $5.50

103683 Glue Dots $5.25

Tools

152392 Paper Trimmer $25.00

152391 Cutting Blades Multipack $12.00

103579 Paper Snips $11.00

149653 Cut & Emboss Machine $125.00

150673 Mini Cut & Emboss Machine $63.00

144107 Take Your Pick Tool $10.00

147042 Simply Shammy $8.50

Clear Stamp Blocks various sizes on page 149 of Annual Catalog


Please contact me anytime if you have any questions 
or 
stampinwitheva@gmail.com

With love and gratitude,

Thank you for taking the time to comment on my post, you've made my day!

Monday, May 23, 2022

Father's Day Card Using He's the Man Suite

At stamp class this past weekend we made this manly card.  I'm still crushing on the He's the Man Suite with this latest creation. Super easy to make with very few pieces, the result is simple yet striking! Your guy would love this for Father's Day or his Birthday, I bet. 


If you would like to revisit a similar blog post about these products, click the link below:


Current Products List available at my Online Store (see link below):

121043 Sahara Sand Cardstock $10.25

159068 He’s the Man Specialty Designer Series Paper $15.00

119684 Cajun Craze Cardstock $10.25

159276 Basic White Cardstock $10.25

159071 He’s All That Cling Stamp Set $22.00

147085 Cajun Craze Classic Stampin’ Pad $8.00

 159078 All That Dies $28.00

159082 Rustic Metallic Adhesive Backed Dots $8.00

159236 Basic White Medium Envelopes $7.50

Adhesives

104430 Stampin’ Dimensionals $4.25

144108 Mini Dimensionals $4.25

152803 Stampin’ Seal Adhesive $8.00

152814 Stampin’ Seal Refill $5.50

103683 Glue Dots $5.25

Tools

152392 Paper Trimmer $25.00

152391 Cutting Blades Multipack $12.00

103579 Paper Snips $11.00

149653 Cut & Emboss Machine $125.00

150673 Mini Cut & Emboss Machine $63.00

144107 Take Your Pick Tool $10.00

147042 Simply Shammy $8.50

Clear Stamp Blocks various sizes on page 149 of Annual Catalog


Please contact me anytime if you have any questions 
or 
stampinwitheva@gmail.com

With love and gratitude,

Thank you for taking the time to comment on my post, you've made my day!

Sunday, May 22, 2022

Very Sour Cherry Filled Sweet Favor Box

At every Stamp and Chat class, I  provide a little table favor for my customers. They love being surprised with what they find at the table. I usually forget to take a photo and post about it, but this month I remembered!  


I combined the new Sweetest Cherries Bundle with the "You're the Sweetest" sentiment from the retired Little Ladybug stamp set for a darling result.


Using 2" acetate cubes I had on hand (but can be purchased from Amazon), they were filled with Sour Cherry Candies I purchased at my local Safeway store. 


A  belly band strip 1-3/4" x 12" of Pattern Party Designer Series Paper (retired) wrapped the box after it was filled. (It can be slipped off to eat the candies.) It was hand creased at each box edge and overlapped at the bottom and adhered with Stampin' Seal adhesive to itself, but not the acetate box.


Using the two stamp sets above, the Cherry Builder punch, Basic White cardstock, Real Red ink, Parakeet Party ink, and Memento Black ink, plus Amazon purchased Glitter Glue (the best glue ever with a fine tip applicator) these cherries went together pretty quickly. They were attached to the belly band with dimensionals.

Here's a few hints to share:
1) Stamped the greeting prior to gluing the two cherries together.
2) I used the whole cherry stamp twice, so when they were punched out, I'd have something to glue together. (Notice the stamp set above has a partial cherry, I didn't use that one.)
3) I ended up fussy cutting some of the cherry stems because it was hard for me to see the ink color inside the punch. I should have used brown ink for "normal" stems.
4) The stems were sandwiched between the two leaves to hide them.

Current Products List linked to my Online Store for purchase:

This favor idea can be adapted for a variety of party occasions. I encourage you to give it a try!


Please contact me anytime if you have any questions 
or 
stampinwitheva@gmail.com

With love and gratitude,
Thank you for taking the time to comment on my post, you've made my day!

Thursday, May 19, 2022

Don't Miss Out on the InColor Starter Kit Offer

This InColor Starter Kit Promotion is INCREDIBLE. It will end on May 31st. The value you will receive is over the top! Let me answer some questions you may have about joining the Stampin' Up! family.


One of the most common questions I get asked is about the Stampin' Up! sales requirement. Maybe you were wondering too! So here's the deal without any fluff!

The minimum retail sales to stay active is $300 per quarter. So yeah, about a $100 per month for the budget if you'd like to join for the discount only. However, I recommend planning two orders of $150 each so you can earn an additional $15 worth of Stampin' Rewards for more FREE products with each order! Or if you'd rather save up and do a $300 order once per quarter, your Stampin' Rewards would be $30 in products free!

It's not hard to meet the minimum at all, especially if you know just 1-2 friends who would like to order regularly.

Some other cool stuff about the minimums:

Everything YOU personally buy (except catalogs or business supplies) counts towards that minimum. So you can be your own (and only!) customer if you want. I currently have two teammates, one is happily building her collection and and enjoying all the perks just ordering for herself. The other is holding classes with friends a couple times a month and has no problem meeting her minimums and enjoying all the perks.

You never have to place another order or recruit unless YOU want to. So you wouldn't stick out if you joined us just for the fun and discount.

And as for what happens if you don't sell or buy $300 in a quarter? You have a "grace" month to fix that and stay active. If after the month is out and you are still short, you drop as a demonstrator, but there's no penalties and you never have to return anything.

I know this is a lot of info, but there's one more tidbit you should know about Stampin' Up!s minimum sales requirements. The quarter in which you join us is free! So your first $300 doesn't have to be sold/bought until the end of the next quarter. 

Say you decide to join with this month's amazing InColor Starter Kit offer in the April-May-June quarter. You'd want to make sure your totals were at least $300 by the end of the July-August-September quarter. It's awesome to have a little more time to get your plans together and work on your shopping list. Not to mention you would get to see the July-Dec. Mini Catalog and second Sale-a-Bration offerings in June, a month early! 

I'm here to help you every step along the way! This $99 deal will give you over $200 worth of value!

Come join the fun right here!

Wednesday, May 18, 2022

New Item - Masking Paper - Learn the Technique

This great video will show you about a new product Stampin' Up! has available in the new Annual Catalog and how to use it. 


I got some to try, if you'd like to too, shop here.

Tuesday, May 17, 2022

Learn about Stand Alone Dies from Stampin' Up!

I don't know about you, but I love NEW products!. Stampin' Up! has come out with three new dies, that they are calling "stand alone" because they can be used in a variety of ways and with many of their stamp sets. Check out the 2 minute video below.


Here's some closer up photos and links to my online store to purchase them.


Can be cut with the Mini Cut and Emboss Machine.

What can your imagination create with these three new products? I see some fabulous possibilities ahead in my cardmaking.

Have a lovely day!