Pages

Showing posts with label pool party. Show all posts

Monday, July 24, 2023

Celebrating Stampin' Up!s Zoo Crew Designer Series Paper in a Z Fold Easel Style Birthday Card That's Fun to Make

Over the last week, I've shared some fun card ideas using the Zoo Crew Designer Series Paper (DSP) by Stampin' Up! If you love to fussy cut like I do, you can get so many fun creatures out of one of the two sheets of each design. The remaining sheets become the background layers of your cards. That's a lot of cards for a $12.50 USD pack of 12" x 12" paper. I've made 8 cards in the last week and I have A LOT of creatures left to make more fun cards with.

This card today also features extra coloring on the animals done with Stampin' Blends and watercolor pencils. I think that really brings them to life. Using the Double Oval Punch helps provide the "spotlight" for the animals to stand on to wish the recipient a very cheerful Happy Birthday. 

In addition to the animals having extra color added with Stampin' Blends and watercolor pencils, I did the same with the polka dot background. Using Stampin' Up!s wonderful Blending Brushes, it was easy to apply Pool Party ink to get just the right shading I wanted. Being able to add additional color is a wonderful technique to use from time to time.


The card above shows the Z Fold closed, as it would go in an envelope.


The card is now open in it's easel fold. I used three layers of the white polka dot ovals glued together to make the easel stopper that is raised on dimensionals. No fear of the easel sliding closed. It is securely behind the oval stopper when on display.


I always add a coordinating matching envelope to complete the card set.


Here's the side view of this card. I wanted to leave room on the inside layer for a personal message to be added. On the card base you would score at 2 1/8" and 4 1/4" to create the Z fold easel.


Using the Celebrate with Tags stamp set was fun to use, because it comes with those darling balloons that I stamped in Granny Apple Green and Pool Party Inks. Happy Birthday was stamped in Memento Tuxedo Black Ink.


As a bonus for you if you live in the USA - I have prepared a product shopping list, just click the blue bar below. You can uncheck any item on the list you already have, or say add all to the cart if you are a newer card maker. 


 If you enjoyed this post, please be sure to . . . 

  • Leave Kind comments below.
  • Subscribe to my twice monthly newsletter here, and in my thank you email, you can download a FREE 14 Card One Sheet Wonder PDF tutorial. 
  • Click for my Monthly Host Code and how you can earn up to a $40 shopping spree with my Loyal Shopper Rewards.
  • Check out my Online Store clearance rack and save up to 70%.
  • Save 10% on coordinating product bundles!
  • The $99 Starter Kit is the best deal of ALL! Discounts & benefits here. I'd love to have you join my growing team.
  • Explore all the blog posts here for over 1,000 paper crafting and greeting card ideas to enjoy.
  • Follow me on PinterestFacebook, & Instagram
  • Subscribe to my YouTube paper crafting video tutorials.
  • If you don't already have your own Stampin' Up! Independent Demonstrator, I'd be honored to be yours! Let me help you be creative and proud of your cards that you make and send.
  • Please contact me if you have any questions about products, techniques, or card designs.


Friday, July 21, 2023

Stampin' Up!s Zoo Crew Designer Series Paper Makes the Cutest Z-Fold Baby Cards - Make Some for Yourself!

 When I opened my package of the Zoo Crew Designer Series Paper (DSP) and saw the cute dancing hippos, I immediately thought "I should make a baby card with that hippo!" So that is what I am sharing with you today! 

Using the Z-fun fold allows for more fussy cut dancing animal images to be used within the card. Let's take a look!


In the top photo with the card closed, you could almost infer "Hello Hippo!" and not even think it is a baby card. The double stamped "Hello" comes from the Biggest Wish stamp set. Because that stamp set is made of photopolymer it is very easy to stamp a second hello in Pool Party for a subtle 3D look in the lettering.


When you open up the card you see it is meant as a baby card with three dancing animal images. I added some additional subtle color with the Pool Party Stampin' Blends pens on the assorted animals as needed.

Using the Alphabet A La Mode diesPool Party cardstock was die cut to make for a fun "BABY" in the center of the card. Gold sequins embellish the card a little bit.


I put the personalized greeting layer on the back of the card so it wouldn't disrupt the design on the front. Adding one more dancing tiger seemed like a fun idea to try. The Congratulations comes from the Something Fancy stamp set.


The next three photos shows you another version done in Petal Pink cardstock. On this card I used a lot more Petal Pink sequins for a bit more sparkle. The rest of the process is the same as the first version.


The paper pieces you'll need for this Z Fold Card are:

Cardbase 5 1/2 x 8 1/2, scored at 2 1/8" and 4 1/4"
1" band from same cardstock scored the same as above

Zoo Crew DSP 1 piece 4" x 5 1/4" and two pieces 1 7/8" x 5 1/4"
DSP for the band is 1 piece 3/4" x 4" and 2 pieces of 3/4" x 1 7/8"

Basic White for Back greeting Layer 4 x 5 1/4"

Scraps of the colored cardstock for die cutting the letters.
Scraps of Basic White for the hello.


If you enjoyed this post, please be sure to . . . 

  • Leave Kind comments below.
  • Subscribe to my twice monthly newsletter here, and in my thank you email, you can download a FREE 14 Card One Sheet Wonder PDF tutorial. 
  • Click for my Monthly Host Code and how you can earn up to a $40 shopping spree with my Loyal Shopper Rewards.
  • Check out my Online Store clearance rack and save up to 70%.
  • Save 10% on coordinating product bundles!
  • The $99 Starter Kit is the best deal of ALL! Discounts & benefits here. I'd love to have you join my growing team.
  • Explore all the blog posts here for over 1,000 paper crafting and greeting card ideas to enjoy.
  • Follow me on PinterestFacebook, & Instagram
  • Subscribe to my YouTube paper crafting video tutorials.
  • If you don't already have your own Stampin' Up! Independent Demonstrator, I'd be honored to be yours! Let me help you be creative and proud of your cards that you make and send.
  • Please contact me if you have any questions about products, techniques, or card designs. 


Wednesday, July 19, 2023

Quick & Easy Set of 4 Cards using Go To Greetings and Zoo Crew Designer Series Paper

 Are you looking for a cute, but easy card idea today? I give you the Zoo Crew Designer Series Paper (DSP) and Go To Greetings combination to try. It was so fun to design these cards for you. The Zoo Crew DSP coordinates with Pool Party, Petal Pink, Pumpkin Pie cardstocks, with a pop of Basic Black. 

This set of 4 cards would be very easy to make as gift sets for your friends or to write a note to a grandchild. So many possibilities. The best part is these cards will mail easily and should only need one USPS forever stamp.

Enjoy the photos, supplies list, but be sure to go all the way to the bottom as there is a surprise there for you!


Stampin’ Up! Supplies:

STAMP – Go To Greetings

PAPER –Zoo Crew Designer Series Paper (DSP), Pumpkin Pie Cardstock, Basic White Cardstock, Basic Black Cardstock, Pool Party Cardstock, Petal Pink Cardstock, Thick Basic White Cardstock, and one Basic White Envelope

PUNCHES – Decorative Circle, Retired 2 ½” Circle

INK – Memento Tuxedo Black Ink, Pool Party and Basic Black Stampin’ Blends

EMBELLISMENTS – Your choice

TOOLS – Paper Trimmer, Paper Snips, Take Your Pick Tool

ADHESIVES - Dimensionals, Tombow Multipurpose Liquid Glue


I hope  you'll give this layout a try as it is easy to mass produce. 

I made a You Tube Video about this card set too. Enjoy!


If you enjoyed this post, please be sure to . . . 

  • Leave Kind comments below.
  • Subscribe to my twice monthly newsletter here, and in my thank you email, you can download a FREE 14 Card One Sheet Wonder PDF tutorial. 
  • Click for my Monthly Host Code and how you can earn up to a $40 shopping spree with my Loyal Shopper Rewards.
  • Check out my Online Store clearance rack and save up to 70%.
  • Save 10% on coordinating product bundles!
  • The $99 Starter Kit is the best deal of ALL! Discounts & benefits here. I'd love to have you join my growing team.
  • Explore all the blog posts here for over 1,000 paper crafting and greeting card ideas to enjoy.
  • Follow me on PinterestFacebook, & Instagram
  • Subscribe to my YouTube paper crafting video tutorials.
  • If you don't already have your own Stampin' Up! Independent Demonstrator, I'd be honored to be yours! Let me help you be creative and proud of your cards that you make and send.
  • Please contact me if you have any questions about products, techniques, or card designs. 


Thursday, February 2, 2023

Seven Cute Stampin' Up! Snowmen Form a Winter Sampler Home Decor Piece to Share with You

Last year, a small group of my customers agreed that they wanted to make several 12" x 12" Wall Samplers that would fit in a Shadow Box Frame to use as a Home Decor item. I had lots of fun designing them from retired and current products in my stamp room.

As we got further along in the year, the group asked if they could make a couple more in 2023. I said sure! So here is our Winter Sampler we made recently. I love how it turned out and the ladies were very pleased as well. 


We started with a 12" x 12" piece of Basic White cardstock.

The measurements for the six squares were Pool Party Cardstock at 3-1/4" square, and retired Let it Snow Specialty Designer Series Paper (DSP) 3" square. The middle section was Pool Party at 3-1/4" x 10-1/4" and the Let It Snow DSP at 3" x 10". There is a 7/8" border all the way around and the squares/rectangle are spaced approximately 1/4" apart.

The Stamp Sets used were Spirited Snowmen (from 2018 Holiday catty), Snowman Season (2019 Holiday catty), and Snow Day (very old 2010 maybe?).

The bases for the stamped snowmen were made from Thick Basic White cardstock and Real Red cardstock. Retired Layering Circles Dies were used.

The assorted Snowmen were stamped in Memento Tuxedo Black Ink and colored with Stampin' Blends Alcohol Markers. The Blends colors used were Pool Party, Pumpkin Pie, Smoky Slate, Basic Black, Old Olive, and Soft Suede. The one snowman has a red felt hat and scarf that Stampin' Up! sold but I can't remember what the product name was.

The retired Large Letter Dies used more of the Let It Snow DSP to cut the word WINTER.

The Snow Day Snowman next to the WINTER word was stamped on a piece of Pool Party cardstock using White Craft Ink and a Heat Tool to speed drying. The rest of the snowman images were stamped in Real Red Ink, Pumpkin Pie ink, Memento Tuxedo Black Ink and Early Espresso ink. Then the entire snowman was fussy cut out and mounted on a White Glimmer Paper Oval cut from the Layering Ovals dies and adhered directly on the base using Stampin' Seal adhesive.

All the snowmen circle pieces and letters were raised up from the square bases using Adhesive Foam Sheets (current product) cut to the needed size.

Once all the snowmen and WINTER are adhered to the base, then it is time to die cut some snowflakes from White Glimmer Paper using the retired Snowfall Dies (2018 Holiday catty). With Tombow Multipurpose Glue, adhere the snowflakes by sliding under the snowmen and WINTER as shown in the photo above. Finish your masterpiece with Red Rhinestones and Rhinestone Jewel embellishments.

Then put your Sampler in a Shadow Box Frame and you are all set for the rest of Winter!


If you'd like to explore the Samplers we made last year, the links are below.


Grateful Wall Sampler (This link is for Nov. 5, but the rest of the posts are Nov. 2, 3, 4, 2021)


**************************
Learn how to get more done in less time by signing up for my exclusive "Insider" bi-monthly newsletter. Twice a month the news will share card class information, Stampin' Up! promotions, hot tips from me, and free tutorials! Subscribe to my Bi-Monthly Newsletter today. Plus you’ll receive a FREE 14 Card One Sheet Wonder Tutorial to download when you receive my thank you email for signing up.


Please contact me or email me at stampinwitheva@gmail.com if you have any questions about products, techniques, or card designs. Comments below are welcomed and appreciated too!

Thursday, September 1, 2022

Use Stampin' Up!s Jingle Jingle Jingle Stamp Set along with Sweetest Christmas Designer Paper to Create the Most Darling Holiday Card for Your Most Favorite People!

 This Jolly Holiday card filled with a Santa Hippo and a giant Candy Candy will work its magic this Christmas Season! I was inspired by a simiilar design from Hammond & Penny.

A child or grandchild would love to receive this darling card in their Christmas stocking, I'm sure!

Design Tips:

After you prepare your Garden Green card base, the Pool Party layer is cut with the Deckled Rectangles and dry embossed with the Tasteful Textures Embossing Folder. Onto that goes the silver and white polka dot layer. Both those layers are adhered directly to the card front. 

The Hippo is colored with Stampin' Blends then die cut out with the Hippo Dies. The Santa hat on the Hippo was fussy cut out from the Jingle (x3) stamp set and stuck to his head with a glue dot. The hippo is raised up with dimensionals.

The Sweetest Christmas Designer Series Paper had one of its Candy Canes fussy cut out close to the striped design. Then a Garden Green die cut candy cane was cut. The two were adhered together to help it "pop" off the card front. Tie a bow around the candy cane with a piece of the silver Simply Elegant trim. Affix the candy cane so it appears the Hippo is holding it.

The little "you're so" tag used the "you're so HIP" stamp from the Hippest Hippos stamp set. All you need to do is color the "you're so" words with the Garden Green Stampin' Write Marker by hand and stamp on a scrap of Basic White. Fussy cut out the small tag. Do not attach it to the candy cane until you have the "JOLLY" placed as shown in the photo.

Stamping the JOLLY from the Jingle (x3) stamp set goes together from two separate stamps. I recommend you stamp the Black outline stamp first. Then before inking the Real Red ink onto the decorative JOLLY stamp, do a trial run of seeing how you need to position it to get the stamp inside the black border lines. Once you have a feel for it, go ahead and stamp. After a couple moments to dry, you may begin fussy cutting the individual letters out. Each letter has halves of mini dimensionals on the back so they can be placed on the card front as shown. Then add the "you're so" tag that you have already prepared.

Finish up with the Adhesive Backed Seasonal Sequin.  Add a coordinating piece of Designer Series Paper for the envelope flap. Adhere and trim off the excess.


Cutting Dimensions

Garden Green Cardstock  4-1/4" x 11", scored at 5-1/2"

Pool Party Cardstock  3-1/2" x 5"

Silver & Gold 6”x6” Designer Series Paper  3" x 4-1/4"

Garden Green Cardstock  for Candy Cane base  1-1/2" X 4"

Basic White Cardstock for inner layer 4" x 5-1/4"

Basic White Cardstock for hippo, hat, Jolly, and mini tag  3" x 4"

Envelope Flap - 2-3/8" x 6"


This list of Supplies are available to order at my online store. Click each photo to shop.


Retired items used - Silver & Gold 6” x 6” Designer Series Paper & Hippest Hippos Stamp Set and  Hippo Dies were in the second Sale-a-Bration offering for July-August, 2022. The Tasteful Textures Embossing Folder is a little older than that. You may find these items offered on Ebay or Etsy, or feel free substitute what looks pleasing to you.

Would YOU like to receive a couple exclusive "Insider" card tutorials each week in your email inbox? Subscribe to my Weekly Newsletter!. Plus you'll receive a Free14 card One Sheet Wonder Tutorial as a Subscriber bonus! 

Please contact me or email me at stampinwitheva@gmail.com if you have any questions about products, techniques, or card designs.

Monday, August 22, 2022

Send Hugs to Those You Care About With Stampin' Up!s Splendid Thoughts Bundle Handmade Card Created in a Monochromatic Pool Party Color Scheme

 The soft colors and plant images of the Splendid Day Suite in Stampin' Up!s July to December Mini Catalog is sure to warm your heart. This card is a quick and easy one to make multiples of to send to your friends or family that could use some encouragement. And that is what Happy Mail is for, right?, to cheer people up, and this card will do just that!


Splendid Thoughts Bundle - Stamp set and Splendid Stems Dies


Splendid Day 12" x 12" Designer Series Paper 
This is a paper you must see in person, it is SO gorgeous!


Close up of the images in the Splendid Thoughts Stamp Set.


Project Directions:

Prepare Pool Party Cardstock card base 5-1/2" x 8-1/2", score at 4-1/4"

With the eucalyptus leaf stamp and Pool Party ink, stamp two columns of images on the card base right front side.

Adhere the Splendid Day Designer Series Paper 2-3/4" x 5-1/4"to left side of card front (you may cover some portions of the stamped images.)

Cut the next Pool Party Cardstock layer 3-1/4" x 4-1/4"

Also cut two pieces of Basic White Cardstock - front layer 3" x 4" and inner layer 4" x 5-1/4"

Again with the Pool Party ink, stamp the greeting and plant images shown on the card front. On the inner card layer stamp two bee images in the lower right corner, then adhere that layer inside of card.

Adhere the two smaller front layers together, then raise up with Dimensionals at a slant on the card front.

Thread an 8" piece of 1/8" wide ribbon through the top  circle of the Open Leaf Trinket charm. Tie a bow, trim tails as needed. Use two glue dots to affix to card front as shown.

Add three sparkly embellishments of your choice.

Cut a coordinating piece of Designer Series Paper 2-3/8" x 6" and adhere to the exterior of the envelope flap. Trim off excess with your paper snips.


This short list of Supplies are available to order at my online store. Click each photo to shop.


Retired Products used – Genial Gems & 1/8” Gold Ribbon.You may find these items offered on Ebay or Etsy, or feel free substitute what you think looks pleasing to you.

Here's some more great projects with this Suite!

Splendid Thoughts Card Idea #1

Splendid Thoughts Bundle Card #2

Splendid Thoughts Card Idea #3

Splendid Thoughts Bundle Card #4

A Gift Bag to Hold the 4 Cards

Would YOU like to receive a couple exclusive "Insider" card tutorials each week in your email inbox? Subscribe to my Weekly Newsletter!. Plus you'll receive a Free14 card One Sheet Wonder Tutorial as a Subscriber bonus! 

Shop or Join Stampin' Up!

Please contact me or email me at stampinwitheva@gmail.com if you have any questions about these products, techniques, or card designs.

Monday, August 8, 2022

Sharing My Stampin' Up!s July Paper Pumpkin Card Designs with YOU!

I had a lot of fun with the July Paper Pumpkin Kit and I thought I'd share my designs with you! In case you have a kit you haven't opened yet, these ideas may inspire you to break open the box and get started creating!

The Kit was called Sending Good Thoughts! So I have to say I was surprised by the name on the paperwork that Stampin' Up! released about the kit.  Yes it is a message in a bottle, but that wasn't the name used in advertising the kit. Oh well, no big deal really.


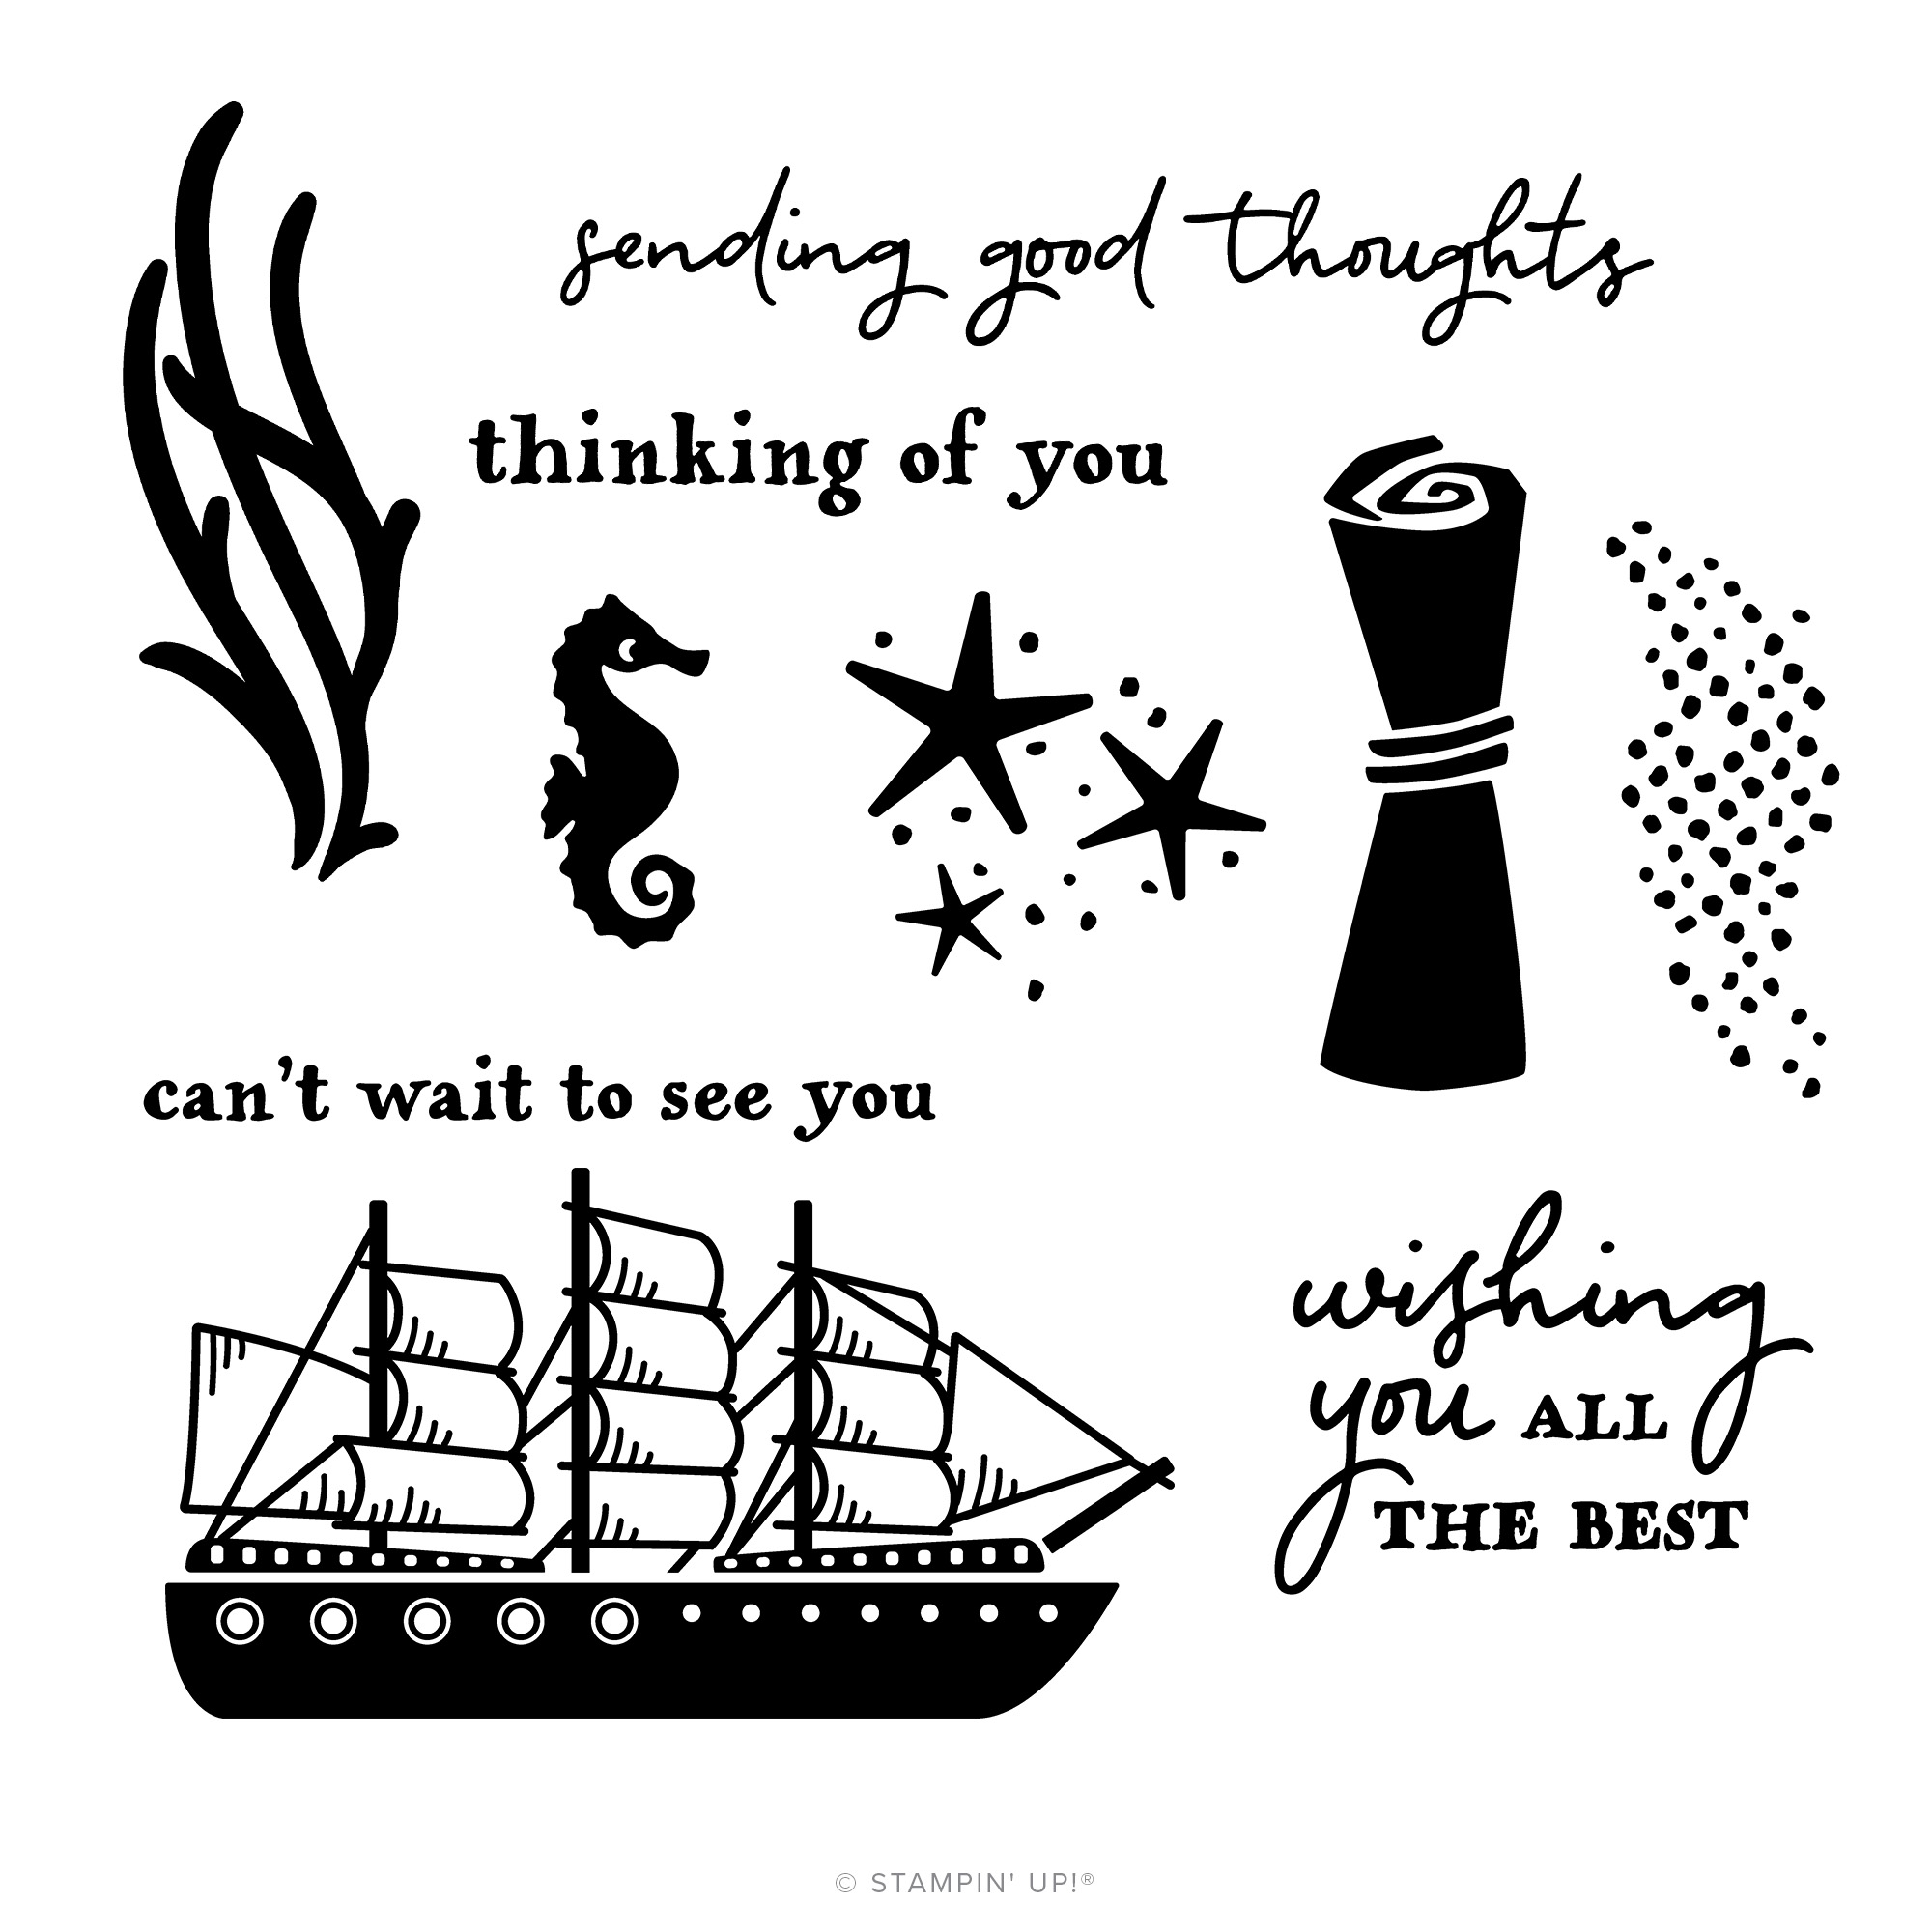
The included stamp set had a lot of fun possibilities. I think the rolled up message also looks like a diploma. That stamp will come in handy next June! What do you think?


The first trio of my cards were cased from a demo who's name I didn't write down and Vy Tran. The first smart cookie suggested sanding the embossed waves, so I used an emery board and did just that.
Vy Tran had the brilliant idea to use an exacto knife to cut along the wave edges and slip a bottle in the  cut slit with the message hidden on the bottle. The trick was to only adhere the edges of the wave layer to the card base. That way the bottle will come out easily and return easily.


On the next trio of cards, I dusted off my White Craft ink pad and used a Q-tip to daub on the white ink onto the clouds carefully. Followed by setting the craft ink with my heat tool. That didn't take too long.
Stamped the schooner image on Basic White cardstock  with Memento Tuxedo Black Ink and fussy cut them out, then raised on mini dimensionals on top of the bottle punch out. The long skinny tag was also raised on mini dimensionals. Linen twine used for a bow on the bottle neck.


For the trio below, I used the Vintage Bottle Punch and punched out the bottle image to make a template on a scrap of Bermuda Bay cardstock. I could trace the bottle shape on the back of the kit banner punch out that I had stamped on the front with the irregular stamp image. With a 1/4" hole punch, I punched a starting hole inside my tracing on the banner back, so I could fussy cut with my paper snips the bottle shape for the Vintage Bottle Shaker Domes to be inserted. 

After inserting and testing for a good fit, I trimmed the shape as needed. When the shape was ready, I peeled off the bottle dome adhesive and attached the shaker dome to the banner. I had a variety of shaker materials I filled the bottle domes with. Then I peeled off the other side of adhesive on the dome. I lay the punched out Bermuda Bay bottle in the opening and  used a few small pieces of scotch tape to seal it long enough to apply glue and flip it over to securely adhere to the card front. No chance of the bottle shaker pieces escaping!

The linen twine was doubled and tied into a small bow and affixed with a glue dot. Assorted gems and sequins were applied to the individual cards as shown.


For the final three photos, I used the punch out frames from the kit for the three bottle sizes. I made stencils to extend my ability to have a variety of bottle sizes for additional card making. Then I used either a blending brush or sponge dauber to apply Bermuda Bay ink to the included envelopes and to the additional cards I created as shown below.


I'd love to read in the comments if you would make cards like these. Which is your favorite?

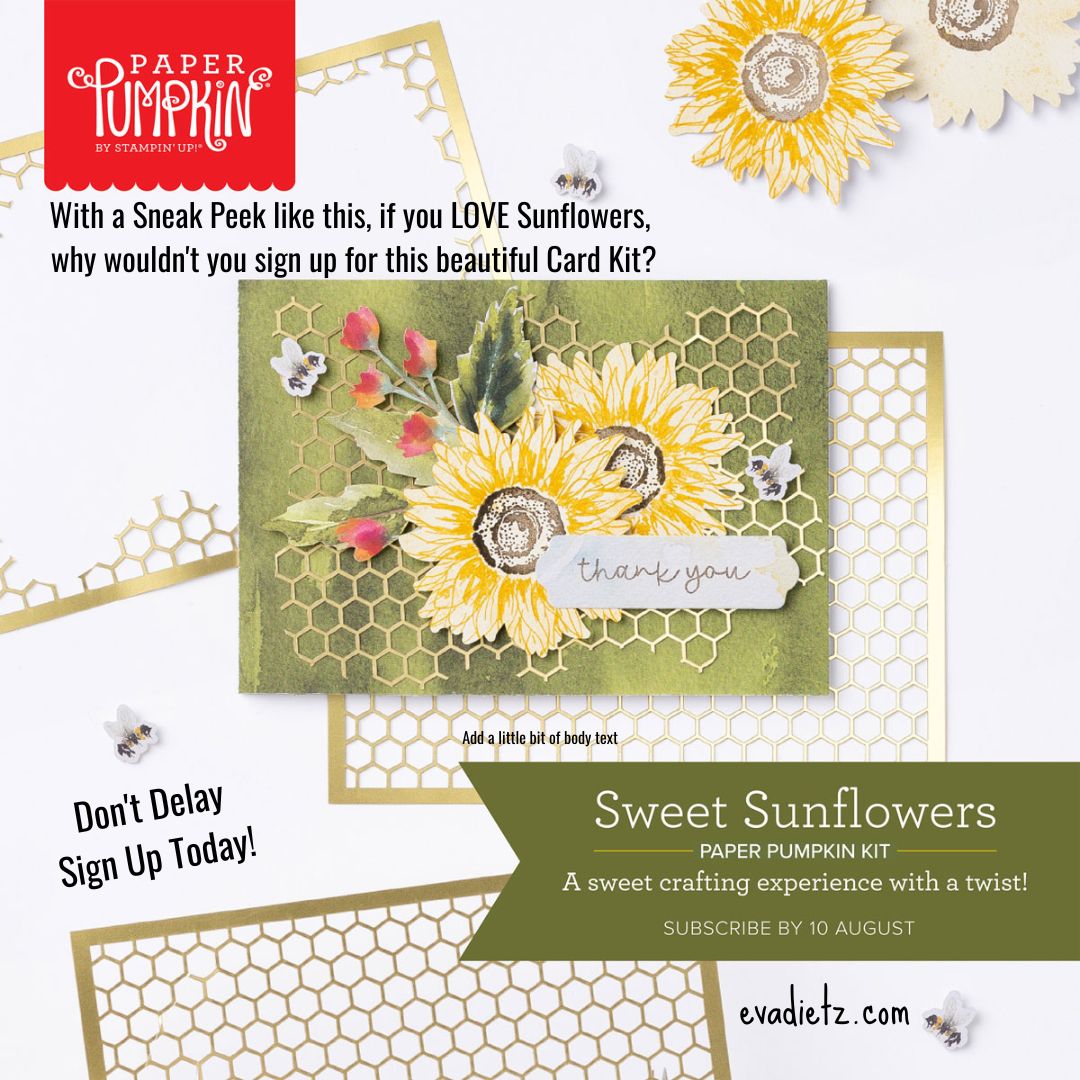
The Deadline is fast approaching for the August Sweet Sunflower Kit. August 10 is the last day to sign up to receive the kit this month. 


Don't miss out! Click the link below!

Please contact me anytime if you have any questions 
or  email me at
stampinwitheva@gmail.com

Friday, July 8, 2022

Nourish & Flourish Kit


Each year, Stampin’ Up! supports a designated cause through special limited-edition products or promotions. This tear they have chosen to support organizations that are working to end food insecurity by releasing a special Nourish and Flourish Kit (item 160230).

  • It will be available 1 July 2022 – 4 January 2023


The Nourish & Flourish Kit is made of your spring picnic dreams. With a deliciously bright color palette you’ll love creating the springtime/summery cards while knowing your crafting is making a difference! 
  • This Kit includes 9 embossed card bases—3 each in 3 designs—and 9 coordinating envelopes
  • Includes sticker sheets, die cuts, and die-cut labels
  • Finished card size: 5-1/2" x 4-1/4" (14 x 10.8 cm)
  • Coordinating colors: Calypso Coral, Daffodil Delight, Old Olive, Petal Pink, Pool Party, Shaded Spruce
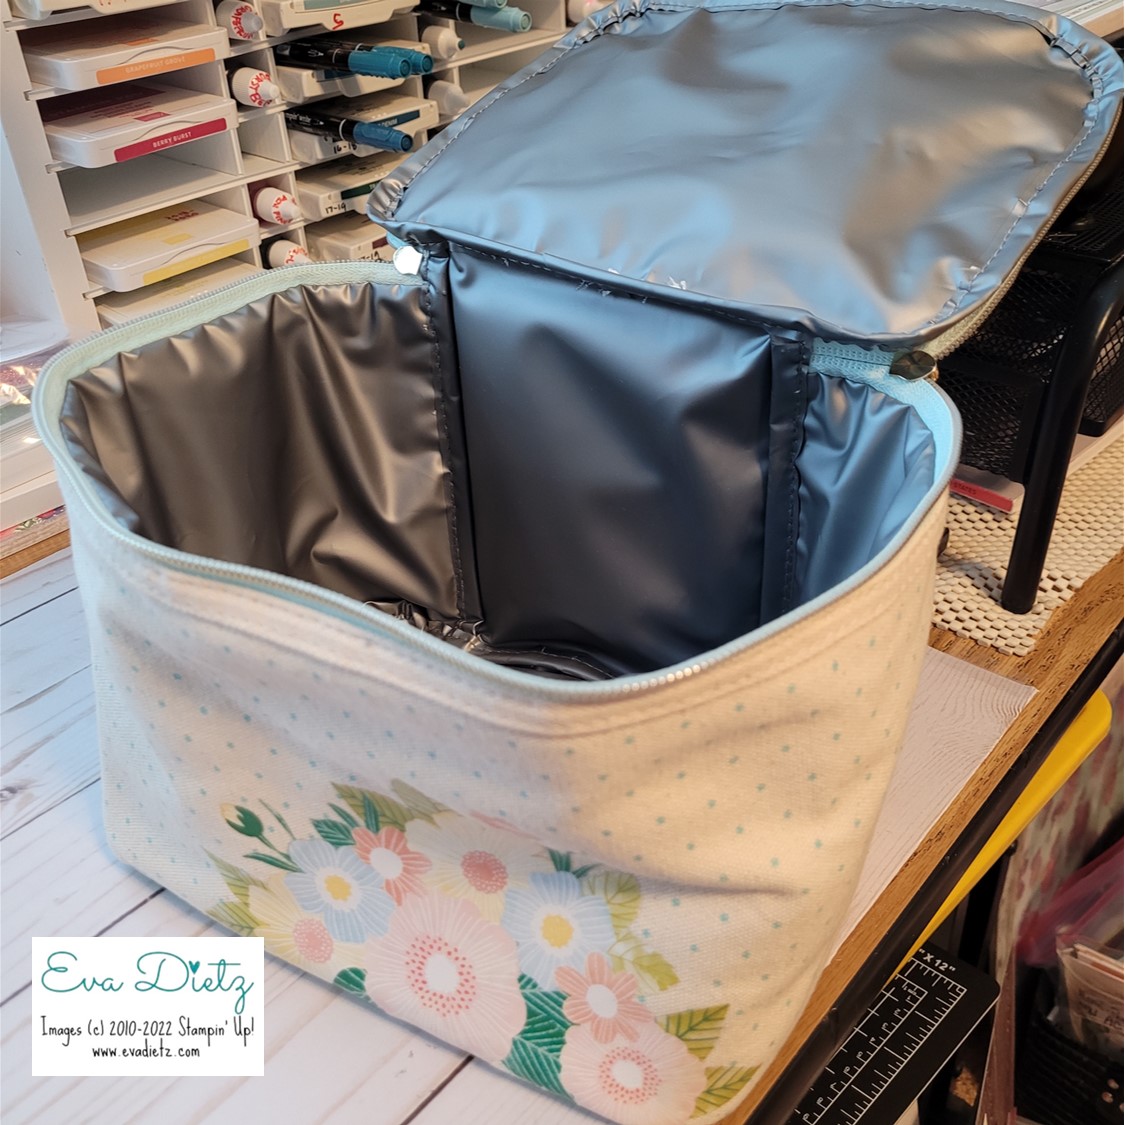
  • Plus the kit comes in an insulated 9" x 6-1/2" x 6-1/4" (22.9 x 16.5 x 15.9 cm) lunch bag! It's so cute and very well made!


I had fun assembling the cards that come in the kit and they are very easy to do! No stamping needed at all! Punch out the artwork and layer following the directions and Voila! You have 9 beautiful cards before you know it!


If you add another $11 worth of products to your order you would be eligible to select a free Level 1 Sale-a-Bration product (from now through August 31, 2022) when you are checking out online. Who doesn't love a Freebie?!  Besides you know you'll be helping a good cause of ending food insecurity.

Shop or Join at https://evadietz.stampinup.net/

Please contact me anytime if you have any questions 
or 
stampinwitheva@gmail.com