Pages

Showing posts with label cardstock vellum. Show all posts

Wednesday, June 1, 2022

Hues of Happiness Tunnel Fun Fold Best Wishes Card

Recently I held an online Mystery Hostess Party on my business Facebook page. It was quite the positive experience. During the course of the three day event, I did two Facebook Lives. Oh my!  
I have a lot to learn about video making, but I took my live, uploaded it on Canva and went to work editing it down to cut out the "dead" time and streamline the cardmaking process. 
I'd love it if you'd give it a look.


After watching the video, you can see the Tunnel fun fold cards shown within below here in the blog post.

This card design was inspired by Jenny Hayward, but I changed it up some, to make it my own.

First card is the Melon Mambo base with Flirty Flamingo layer.
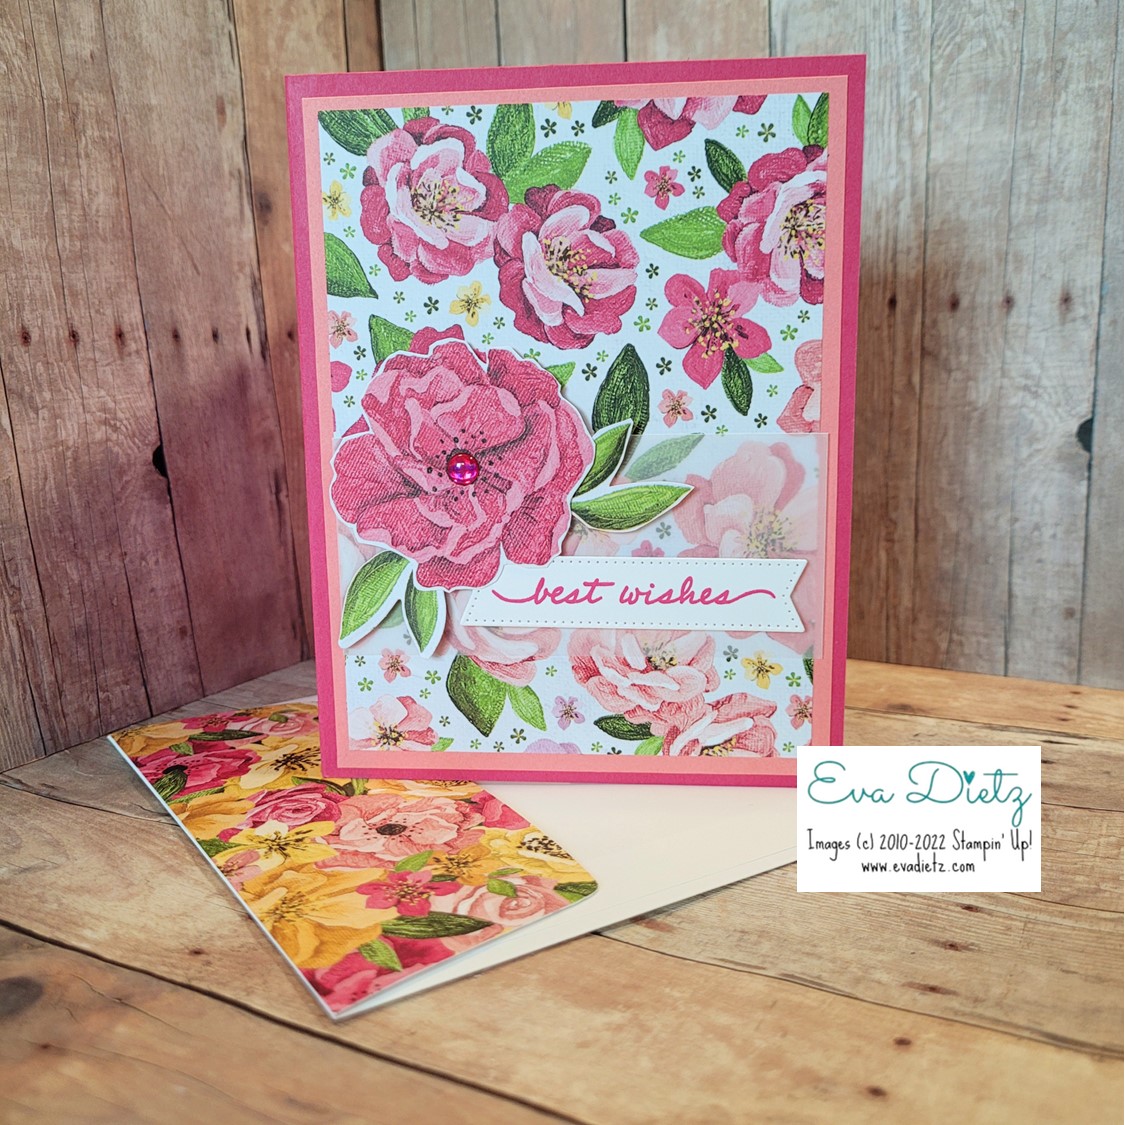


Second card is the Flirty Flamingo base with the Melon Mambo layer.
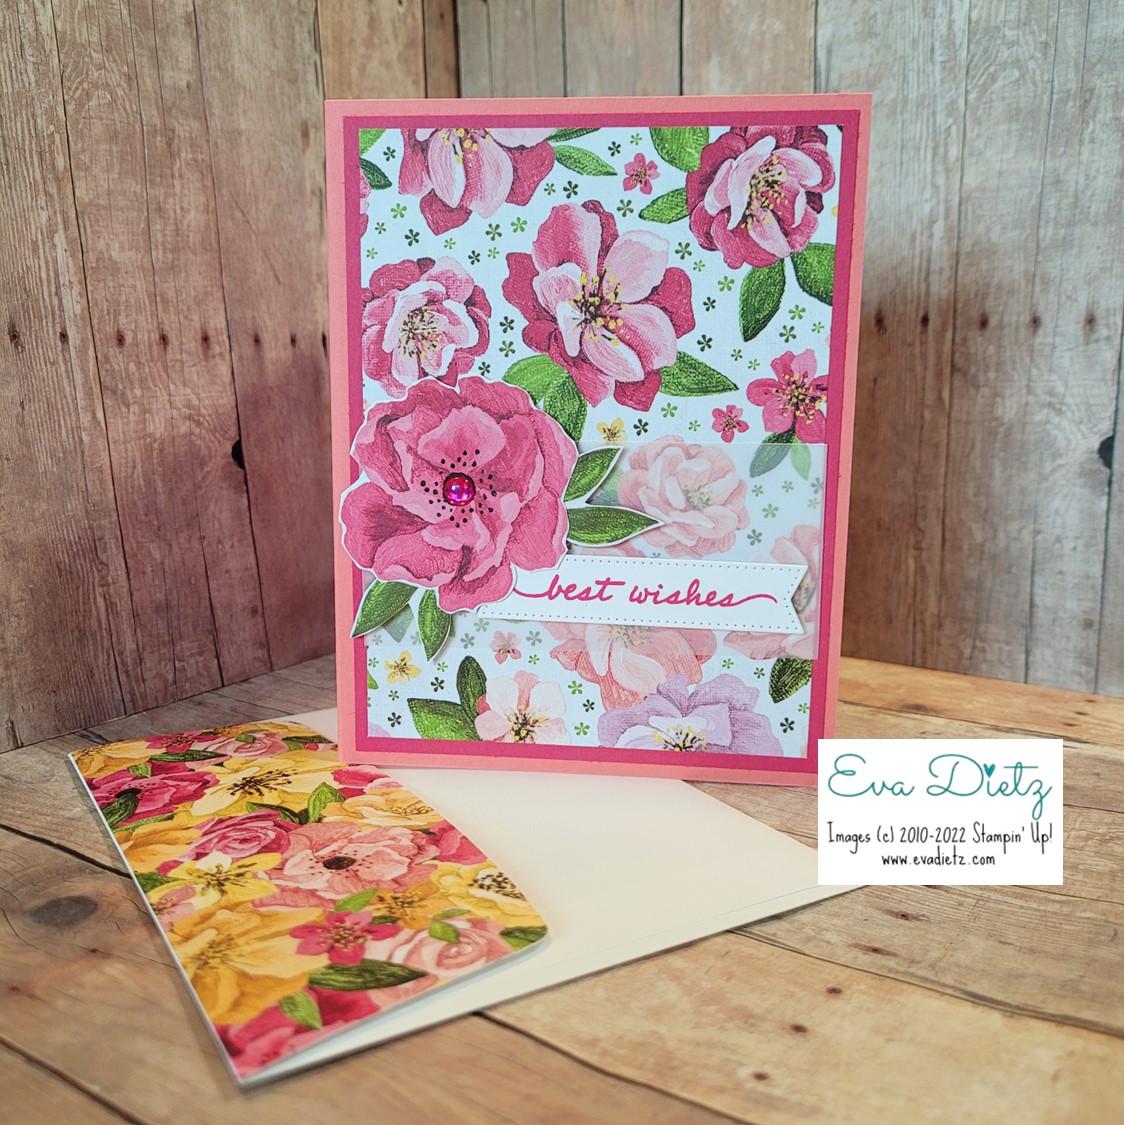


Products Used in Creating these Cards:

Happiness Abounds Stamp set 159238 $23
Hues of Happiness Designer Series Paper 158822 $12 (Cut 3-3/4" x 5")
Basic White Cardstock 159276 $10.25 (Cut 5.25" x 8.5", scored at 2-1/8" and 4-1/4", then rotate 180 degrees and score at 2-1/8" from other side) and scrap for best wishes tag
Melon Mambo Cardstock 115320 $9.25  (Card base 5.5" x 8.5", scored at 4.25")
Melon Mambo Classic Stampin' Pad 147051 $8
Flirty Flamingo Cardstock 141416 $9.25  (Front layer cut 4" x 5.25")
Stylish Shapes Dies 159183 $30
Vellum Cardstock 158827 $8  (1-3/4" x 3-3/4")
Glossy Dots Assortment 158827 $8
Mini Dimensionals 144108 $4.25
Stampin' Seal Adhesive 152813 $8
Basic White Envelopes 159236 $7.50
 

Shop or Join Stampin' Up!

Please contact me or email me at stampinwitheva@gmail.com if you have any questions about products, techniques, or card designs.
Monday, January 31, 2022

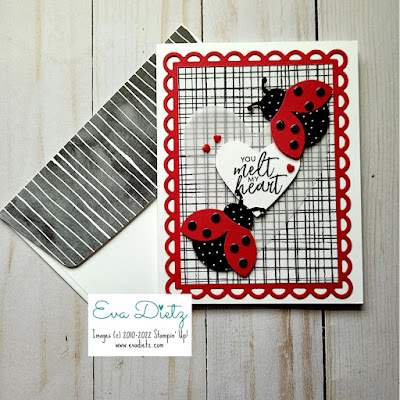
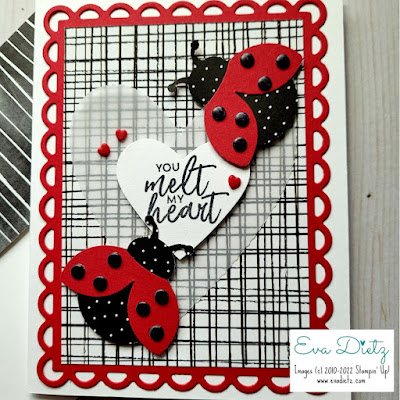
Hello Ladybug Valentine to Melt For

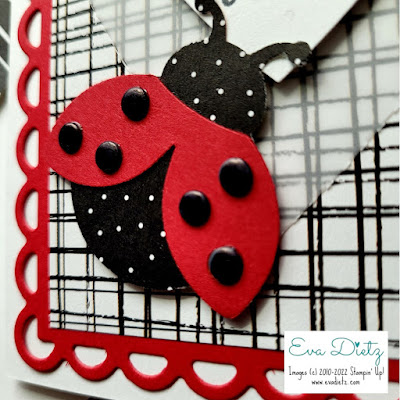
Have you ever caught a ladybug? These Ladybugs are easy to catch and make into a beautiful card. 

Ladybugs are a promise that spring is just around the corner. But in the meantime, they sure make a fun Valentine to give family or friends. This card was inspired by Christie Redding but I made it my own with a different greeting and different black dots on the wings.


Don't you just love the bold color combination of Black, White and RED? It is one of my favorites!


Products used in creating this card:

Basic White cardstock for card base
Real Red cardstock for layer and ladybug wings
Scalloped Contour Dies
Ladybug Builder Punch
Pattern Party Designer Series Paper for plaid layer (3-1/4" x 4-9/16") and ladybug bodies
Cardstock Vellum
Retired Stitched Be Mine Dies
Sweet Ice Cream stamp set for greeting
Memento Tuxedo Black Ink
Retired Heart Punch
Resin Hearts embellishments
Mini and Regular Dimensionals
Paper Trimmer
Take Your Pick Tool
Paper Snips for trimming Vellum Heart
Your favorite Adhesives

Envelope Flap - 2-3/8" x 6" piece of Hand Penned Designer Series Paper


A little story...

This ladybug's spots are actually very retired flat metal adhesive dots that came in a variety of color families at least 7-8 years ago when I was a newish demonstrator. As the years have passed, I have used a few here and there, but for this class card I needed 12 dots per card and my customers wanted a total of 22 cards over those three class sessions I had last weekend. So I needed 264 dots! I didn't have 264 black dots! So what did I do? I pulled out my black Sharpie pen and started coloring those dots. That worked perfectly! So I solved two problems at once - use up some old dots and create plenty of black ones for those ladybugs! Once again - Sharpies came to the rescue!

I encourage you to give this card layout a try and make it your own! The majority of the products used in this card are current and available at my online store at the yellow box link below.

Happy Stamping!


#stampinwitheva #sudemo

Wednesday, December 15, 2021

Christmasy Luminary Lantern

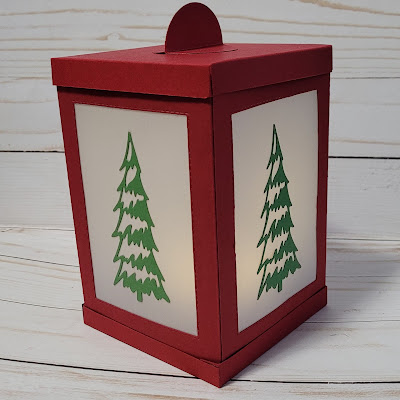
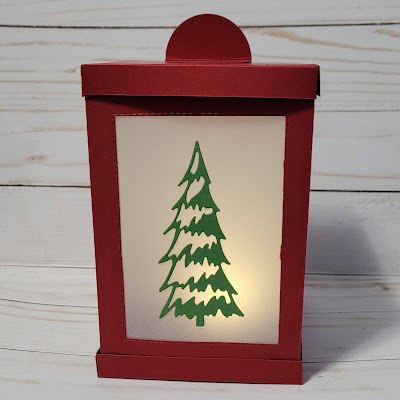
Anne, my downline, shared this cool holiday paper and vellum lantern with me when we were together last month. It glows with a flickering battery-powered candle inside.


Here are the basics on how to construct this lantern:
Cherry Cobbler cardstock - 2 pieces cut 6" x 8-1/2", score at 4" and 8" on the long side. That 1/2" section will be what connects the two sections together later. 
Use the bone folder to fold the score lines well on each piece. 

With more Cherry Cobbler for the top and bottom- cut 2 pieces 5-1/8" square. 
Score at 1/2" on all 4 edges. (We will come back to this in a bit.)

You'll need the 3rd largest Stitched Rectangles Die to die cut the "window" in each lantern section before you assemble the lantern pieces into one unit.

Cut 4 pieces of vellum cardstock for windows - size 3-3/4" x 5" 
The windows will be attached on the inside with tear and tape around all 4 edges of the window opening. Use the bone folder to guarantee good adhesion.

Using the Christmas Tree Dies, select which tree you'd like to use and die cut four matching trees out of Garden Green cardstock. Using the Tombow Liquid Multipurpose Glue, very carefully apply small dots of glue to your tree die cuts. Let the glue dry thoroughly.

To assemble the lantern you will put tear and tape on each 1/2" section. Line up the section carefully and attach the two sections together. Use the bone folder to guarantee good adhesion.

Now for the lid and base. Use the bone folder to fold the score lines well. Cut into the 1/2" corners to create a tab for gluing the edges together. Use a paper clip on each corner to let the glue dry well and hold the shape for both the lid and base pieces.

With a 1-3/4" circle punch, punch out two pieces of Cherry Cobbler that will become the "pull" for the top lid, so you can turn your battery-operated candle on and off easily. Score the circle through the middle on each circle piece. Only glue one-half of the circles together to form a "tab" and the other half will be glued to the lantern top when it is finished drying.

To attach the base to the lantern, put some pieces of tear and tape around the inside of the entire 1/2" lip and set the lantern inside the base when you've peeled the protective strip off the tape. Put your hand inside the lantern and gently press the sides to the 1/2" section until well secured.

Attach your lid tab with glue. Let dry. Set your battery-operated candle inside and place the lid on top of the lantern.  All done! So pretty! These would be fun to make and set in your window sills on Christmas Eve!


#stampinwitheva #sudemo #christmaslantern

Tuesday, March 30, 2021

Pretty Perennials Card #2

Here's another card layout idea to share using the Pretty Perennials stamp set that is available until June 30th. I was inspired by the Creativity Cave and also Tristan Dawes layouts.

I had forgotten how easy it is to heat emboss on the vellum cardstock with the white embossing powder after you stamp the vellum with Versamark ink. It is easy-peasy! What I love about this card layout is the fact that you can wrap the vellum around the top paper layer, so you don't have to worry about any glue dots or other adhesive showing. I love the transparent look of vellum over those flowers. There's something just so cool about it!

 I made my card brighter using Mango Melody and Basic White cardstocks. I used the new Blending Brushes to create the "cloudy" background in Balmy Blue ink. Those Blending Brushes work so well. HOT TIP:  just go in a circular motion on the ink pad, but don't press too hard, and then go in the reverse circular direction on the cardstock. (Think Wax On! Wax Off! from the Karate Kid movies of long ago!) Go easy on the ink at first until you get the hang of how the brush feels in your hand. It's going to feel pretty good to you I think. It feels very solid in my hands. I love them! HINT: When you are all done, just rinse your blending brush under the faucet (no soap) and let it dry thoroughly before using it again.

 The flowers and leaves were done in Mango Melody, Flirty Flamingo and Granny Apple Green inks. I love how easy it is to just let the stamps run off the edge of your cardstock. By doing this you can combine more images on the front of your card. The final touch was the Tuxedo Black Memento ink flower centers.

Then stamp your "happy" on Vellum cardstock with Versamark ink. Carefully sprinkle white embossing powder on and tap off the excess. Use your heat tool to make the embossing magic happen. Then assemble your layers as shown in the photo below.
 

Paper Dimensions:
Mango Melody card base - 5-1/2" x 8-1/2"
Inner Card Basic White Layer - 4" x 5-1/4"
Basic White layer - 3-3/4" x 5"
Stamped on Basic White layer - 3-1/2" x 4-3/4"
Vellum Cardstock - 1-1/2" x 5-3/4"


Don't forget to add a little flower to the card interior. It's a little surprise when you open it!

It would be really cute to stamp a few flowers on the lower left corner of your envelope too!


Pretty Perennials Bundle is available in my online store.
The hyperlinked items will also take you to my online store.

I hope you love this card as much as I loved making it to share with you. 
I'd love to read your comments and thoughts.

Until next time, happy stamping!


If you enjoyed this post, please be sure to click on the buttons below…


#stampinwitheva #stampinupproducts 

Thursday, February 18, 2021

Paper Chart Reference and Cutting Card Bases Diagrams

Hurray! You've made the decision to add Papercrafting to your list of hobbies. 
You've started to think about what to purchase first from yesterday's post. 

Becoming knowledgeable about the types of paper in the Stampin' Up! world is a must. I put together this reference chart for you to know how each paper can be used. In basic terms, the weight of each paper refers to it's thickness and sturdiness, not what one package of paper weighs. Thank goodness that's not the case, because postage would be cost prohibitive. LOL!

Please note that Stampin' Up! sells dyed cardstock, meaning when you tear the cardstock it is the same color throughout. That's a very good thing! 

When you purchase cardstock from the big box craft stores, sometimes those papers have a white core when you tear it. That's not so good for die-hard papercrafters. We love solid colored core paper!

The quality of Stampin' Up! paper is excellent, because you don't have to worry about ever having to deal with any white peeking through when you cut it to size, EVER!

----------------------------

After you purchase your Stampin' Up! cardstock, you'll need to know how to cut it correctly with your new Paper Trimmer to make card bases for your cardmaking.

There are two ways to cut cardstock into basic card bases. Two card bases can be made from one sheet of 8-1/2” x 11”  “letter size” cardstock. You can fold the card by hand and crease using your fingernail, or you can use a scoring board


with stylus to create the indentation, then align the edges, fold and crease with a bone folder.


By cutting the sheet of cardstock in half, then folding in half again you have created a card base. This folded quarter sheet look is called an A2 size.

 “Portrait” cards, stand 4-1/4” wide by 5-1/2” tall. The fold can either be on the left side (opens like a book) or at the top (stands like a tent.)


 “Landscape” cards, stand 5-1/2” wide by 4-1/4” tall. The fold can either be on the left side (opens like a book) or at the top (stands like a tent.)


For both diagrams below:

Red Line is cutting line.

Dashed Line is scoring and folding line.
This cutting diagram above makes portrait/book cards, or landscape/tent cards.  


This cutting diagram makes portrait/tent cards, or landscape/book cards.

------------------------------------

I hope by providing this information it will be helpful to your papercrafting journey.
Come back tomorrow to learn about proper stamping procedures, so you'll be successful (practically) every time!

Thanks for visiting today!


If you enjoyed this post, please be sure to…

Leave a comment, I love to read them! 

You Bet! I’ll Be a Follower of this Blog

Sure I’ll Connect with your Newsletter and Receive a FREE PDF tutorial

Yes!  I’m Ready to Shop to Earn Loyalty Points for FREE Products!

Stop by Facebook to Visit homemadewithheartstampinwitheva       

See What I’m Up to on Instagram at stampinwitheva

Discover My Pinterest Boards at Homemade with Heart—Stampin’ with Eva

Watch Informative You Tube Videos at Homemade with Heart-Stampin' with Eva  

Buy on Etsy at homemadewithheartUS

Friday, September 25, 2020

Double Joy Card

Do you see the double joy in this card design? Sometimes its fun to imagine new ways to use your stamp sets. Just like you can imagine pictures in clouds, well I saw letters in these stamps. 

I was inspired by a design from Mikaela Titheridge, but I gave it a twist with the double joy using the Tag Buffet and Peace & Joy stamp sets. I hope you'll give this card design a try.


Let's Create This Card!
  • Cut Old Olive card base 5-1/2" x 8-1/2", scored at 4-1/2".
  • Affix Trimming the Town Designer Series Paper (DSP) cut at 4" x 5-1/4".
  • Cut Soft Sea Foam card stock with the Stitched So Sweetly Dies of the Scalloped Rectangles, then affix on card front as shown.
  • Cut Whisper White cardstock to 2-1/2" x 3-5/8" and dry emboss with the Tasteful Textiles 3D Embossing Folder on the Cut & Emboss Machine. Then affix as shown.
  • On Thick Whisper White cardstock stamp the stocking, holly, and ornament images with Tuxedo Black Ink. Fussy Cut out the stocking and ornament images. Color images as shown with Stampin' Blends.
  • On Old Olive cardstock, stamp 3 of the leaf branches and fussy cut them out. Assemble into "Y" as shown with glue dots.
  • On a small strip of Whisper White stamp the greeting in Real Red. Fussy cut out. Affix to DSP as shown.
  • Take a small piece of Red Foil and add a piece of the adhesive sheet to the back and then cut out the Joy word die on the Cut & Emboss Machine.
  • Take a small piece of vellum cardstock and the next larger joy outline die and cut out that layer.
  • Peel the protective sheet from the adhesive on the red foil joy and affix to the vellum cardstock.
  • Add mini dimensionals to each of the 3 images and affix to Whisper White layer.
  • With Vellum adhesive (non SU product) affix Joy layer to ornament image.
  • Add Red Rhinestones to holly on stocking.
  • Add a Whisper White cardstock layer for the card lining. You did it!

Product List  - to purchase these items just click on each picture and you will be shopping at my online store.
Joy Dies
[153530]
$32.00
Paper Snips
[103579]
$10.00
I love hearing from you! Please leave your questions or comments below.
Follow me on this Blog over in the right column.

                     Follow me on Pinterest.

                     Follow me on Instagram.

                     Subscribe to my You Tube Channel for paper crafting tutorials.

Need a card? Ask me and I can create one for you. Want the supplies to create your own, let me know and I can help you with that too!  If you like what you see here, please follow me in the right margin.

 Thank you for visiting today! As always, thank you for choosing me as your Stampin’ Up! Demonstrator!!