Pages

Showing posts with label brushed brass butterflies. Show all posts

Monday, March 27, 2023

Flip the Script! Use Stampin' Up!s Picture This Die to Make This Easter Card Background! So Easy, Give it a Try!

Here's a fun and modern Easter card idea for you!

You do ever have a moment where a new idea of something to try just pops in your brain? That's what happened with this card design. I was using the Picture This Dies for another project, and it occured to me to use the left over circles in a new card design. So that is how this Easter card came into being. 

It was one of the cards my customers made in my March Card classes. We used the reverse side of a sheet of the Rain or Shine Designer Series Paper. One side was gray with rain drops but the other side was this glorious watermarked pattern in mainly Flirty Flamingo. I fell in love with the paper and especially how these circles look once they were die cut out.


The Circle Die from the Picture This Die Set

Images © 2023 Stampin' Up!

 
SUPPLIES USED:
Soft Suede cardstock 4 1/4" x 11", scored at 5 1/2"
Flirty Flamingo cardstock layer 3 7/8" x 5 1/8"
Basic White cardstock layer 3 3/4" x 5"
Rain or Shine Designer Series Paper 4" x 5" with pattern shown in photo.
Picture This Dies to result in the six circles (use the left over frame for a new card!)
Basic White cardstock for inner layer 4" x 5 1/4"

Easter Bunny Stamp Set - piece of Soft Suede cardstock 3" square stamped with Soft Suede ink for bunny. Then use the Easter Bunny Punch to punch out the bunny.

Soft Suede ink using whatever Easter stamp set you own for greeting in upper right corner of the front Basic White layer.

Scrap of Basic White, Memento Tuxedo Black Ink, Colored pencils for floral bunny collar, then fussy cut it out and glue to bunny neck.
Add Brushed Brass Butterflies - use two or three
Linen Thread tied around the fold of the "tent" card 

Don't forget to add a 2 3/8" x 6" piece of matching Designer Series Paper for the exterior envelope flap, adhere, and trim off excess.

I encourage you to explore your creativity using a repeated geometric shape in your card making designs.
---------------------

If you don't already have your own Stampin' Up! Independent Demonstrator, I'd love to be yours! Let me know if I can be of any help to you!

Learn how to get more done in less time by signing up for my exclusive "Insider" bi-monthly newsletter. Twice a month the news will share card class information, Stampin' Up! promotions, hot tips from me, and free tutorials! Subscribe to my Bi-Monthly Newsletter today. Plus you’ll receive a FREE 14 Card One Sheet Wonder Tutorial to download when you receive my thank you email for signing up.


Please contact me or email me at stampinwitheva@gmail.com if you have any questions about products, techniques, or card designs. Comments below are welcomed too!

Friday, June 10, 2022

Putting Hues of Happiness Flowers to Good Use

Hello! When I fussy cut one of the sheets of the beautiful Hues of Happiness Designer Series Paper (DSP) a few weeks ago, I would never have believed I would still end up with a bunch of flowers (pun intended) I needed to use in a card design. Today's card share presents an idea of what to do with all the big edge flowers you haven't used yet. 

I started with a 3-7/8" x 5-1/8" piece of Basic White cardstock and laid the edge flowers around the edge of the cardstock until I had a color combination that was pleasing to my eye. Once I was happy, then I adhered and overlapped the flowers until all were glued down. With paper snips trim off any edge problems.

I went back to the Go To Greetings stamp set and pulled the large Happy Birthday out that I used on Monday's card. The greeting was stamped in Night of Navy ink. However I needed to get out my Night of Navy Stampin' Write Marker to fill in the few gaps that showed when I stamped on the flowers and the white. With the fine tip end it was an easy fix to close the gap.

Next came the layer of Melon Mambo cardstock. Tie the bow around both those layers and then used dimensionals to raise those layers off the Coastal Cabana cardbase. Finished up with a few Brushed Brass Butterflies. 

Do you like this idea? Would you or Have you tried something like it yet? It really is a great way to use up any edge floral you may have.


Products used in this Card Design:

Coastal Cabana cardstock
Melon Mambo cardstock
Basic White cardstock
Hues of Happiness Designer Series Paper
Go To Greetings Stamp Set
Night of Navy Ink
Night of Navy Stampin' Write Marker
Retired - 3/8" Coastal Cabana and Granny Apple Green Reversible Ribbon
Brushed Brass Butterflies
Glue Dots
Foam Adhesive Sheets
Paper Snips
Basic White Envelope with decorated flap

Visit my online store (link below) to shop almost all of the products above. I find it is very fast to use the search function then add the item to your shopping cart.

Shop or Join Stampin' Up!

Please contact me or email me at stampinwitheva@gmail.com if you have any questions about products, techniques, or card designs.

Saturday, May 28, 2022

Wonderful Hues of Happiness Suite Fun Fold

As we all do, I have a few people I like to "follow" on Instagram. One of those people is the amazing Stampin' Up! Demonstrator Jaimie Babarczy of New York. I really liked this card she created recently (she cased it from @karenksenzakovic), but I have improved it just a bit.

As I was looking at the card, she only put one layer of Basic White inside and I thought to myself, hmmm, writing a message inside that card is going to prove difficult because it will show if you aren't careful. (Not to mention you would have an interesting shaped message inside if you got long-winded!)

My improvement was to use a 4" x 10.5" Basic White piece scored at 5.25". Glue the folded piece inside with the fold at the top. That way you have a spot to write your greeting on the bottom layer inside, but you also have the top white layer that will create the desired effect with this fun fold design. 


You will start with a full sheet of Cardstock and score it both directions at 4-1/4" and 5-1/2". Use the photo above at the cutting diagram for the two angled folds.

Select the piece of Hues of Happiness Designer Series Paper you like and cut a 4" x 5-1/4" piece then slice it diagonally to match the photo above. One piece is glued to the left side flap. Then flip over the other piece to glue to the top flap, thus creating the two tone look.

Adhere your folded Basic White insert inside and fussy cut one flower to glue as decoration to the inner layer.

Finish it up using the photo above for reference for the hexagon tag.


Click on the Online Shopping Link here:

115320 Melon Mambo Cardstock $10.25

158822 Hues of Happiness Designer Series Paper $12.00

159276 Basic White Cardstock $10.25

159283 Happiness Abounds Stamp Set $23.00

147110 Night of Navy Classic Stampin’ Pad $8.00

158046 Beautiful Shapes Dies $29.00

158136 Brushed Brass Butterflies $10

159236 Basic White Medium Envelopes $7.50

Envelope Flap paper is retired

Adhesives

104430 Stampin’ Dimensionals $4.25

144108 Mini Dimensionals $4.25

152803 Stampin’ Seal Adhesive $8.00

152814 Stampin’ Seal Refill $5.50

103683 Glue Dots $5.25

Tools

152392 Paper Trimmer $25.00

152391 Cutting Blades Multipack $12.00

103579 Paper Snips $11.00

149653 Cut & Emboss Machine $125.00

150673 Mini Cut & Emboss Machine $63.00

144107 Take Your Pick Tool $10.00

147042 Simply Shammy $8.50

Clear Stamp Blocks various sizes on page 149 of Annual Catalog


I encourage you to try this card, make several and give to those extra special friends you have! 


Please contact me anytime if you have any questions 
or 
stampinwitheva@gmail.com

With love and gratitude,

Thank you for taking the time to comment on my post, you've made my day!

Tuesday, May 24, 2022

Introducing the Wisteria Wishes Stamp Set

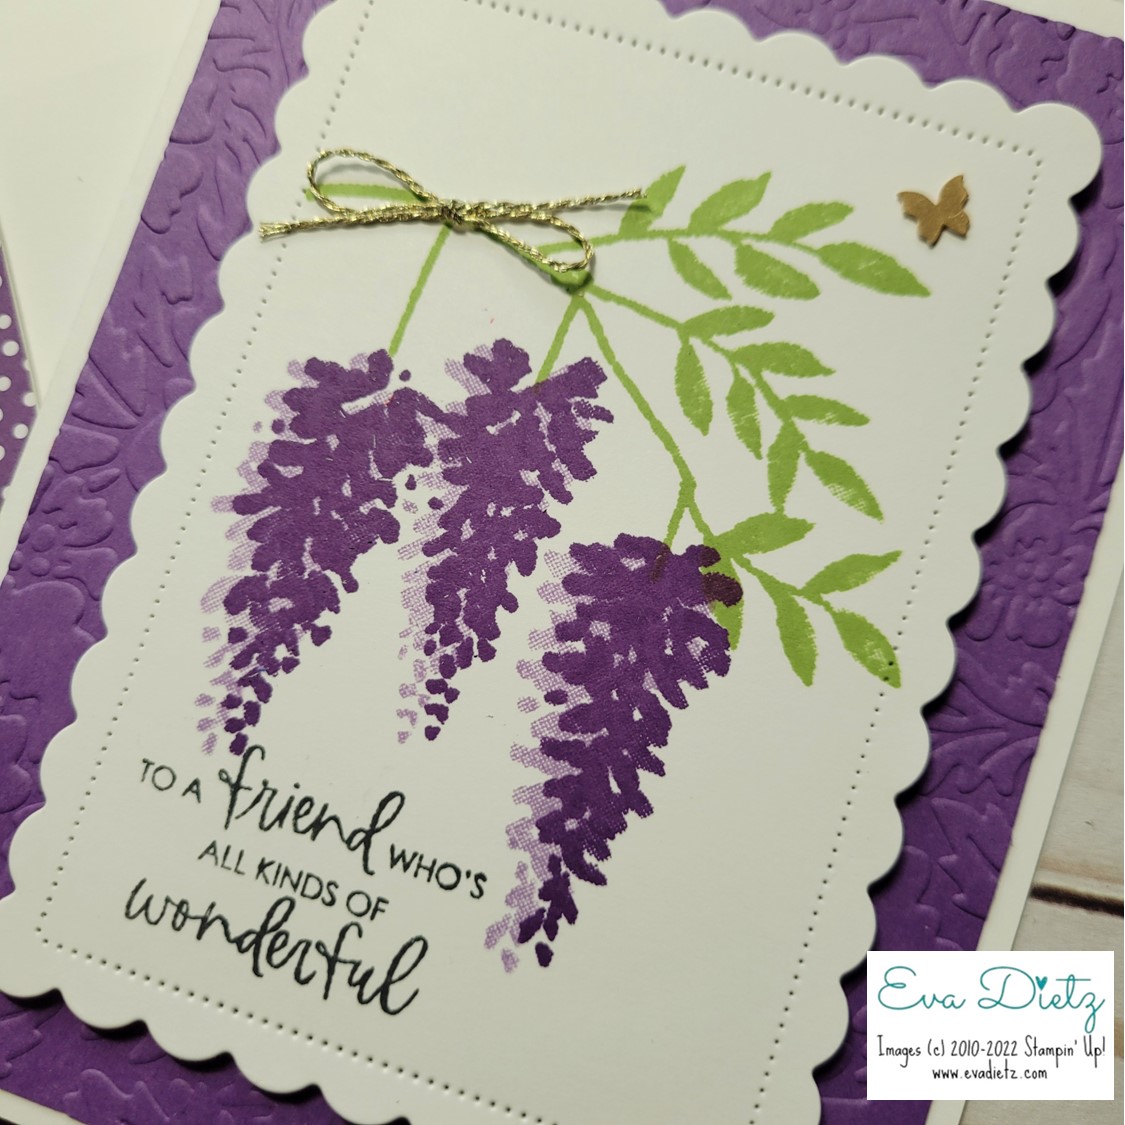
 Have you ever grown Wisteria? I haven't, but I have always admired those that can. So when Stampin' Up! placed the Wisteria Wishes stamp set in the new Annual Catalog, I had to get it. That way I can "grow' some beautiful Wisteria cards instead! You can "grow" some too!


Cutting and Assembly Directions:
1. Basic White cardbase 5.5" x 8.5" scored at 4.25"
2. 4" x 5.25" Gorgeous Grape cardstock embossed with the Pretty Flowers folder. Adhere to cardbase.
3. Die Cut Basic White cardstock 3.5" x 4.25" with Scalloped Contour Die as shown. 
4. With Pear Pizzazz ink stamp branch.
4. With Highland Heather ink stamp triple flower stamp.
5. With Gorgeous Grape ink stamp triple flower stamp over just a smidge.
6. With Memento ink stamp greeting.
7. With Dimensionals raise Scalloped stamped layer on Gorgeous Grape layer.
8. Add gold bow and butterfly
9. Decorate envelope flap with 2-3/8" x 6" piece of matching Designer Series Paper.

One thing I learned is you have to pay attention to stamp the leaf branch so the wisteria stems hang vertically. Stamp  the triple floral image first in Highland Heather, then again moved just a bit to the right in Gorgeous Grape ink.


Products Used to Create this Card:

159434 Wisteria Wishes $18.00 

159276 Basic White Cardstock $10.25

146987 Gorgeous Grape Cardstock $9.25

155428 Pretty Flowers Embossing Folder $7.50

155560 Scalloped Contour Dies $35.00

132708 Memento Tuxedo Black Ink $6

147099 Gorgeous Grape Classic Stampin’ Pad $8.00

147103 Highland Heather Classic Stampin’ Pad $8.00

147104 Pear Pizzazz Classic Stampin’ Pad $8.00

158136 Brushed Brass Butterflies $10

Retired – Fine Gold Cording

159236 Basic White Medium Envelopes $7.50

Envelope Flap paper is retired

Adhesives

104430 Stampin’ Dimensionals $4.25

144108 Mini Dimensionals $4.25

152803 Stampin’ Seal Adhesive $8.00

152814 Stampin’ Seal Refill $5.50

103683 Glue Dots $5.25

Tools

152392 Paper Trimmer $25.00

152391 Cutting Blades Multipack $12.00

103579 Paper Snips $11.00

149653 Cut & Emboss Machine $125.00

150673 Mini Cut & Emboss Machine $63.00

144107 Take Your Pick Tool $10.00

147042 Simply Shammy $8.50

Clear Stamp Blocks various sizes on page 149 of Annual Catalog


Please contact me anytime if you have any questions 
or 
stampinwitheva@gmail.com

With love and gratitude,

Thank you for taking the time to comment on my post, you've made my day!

Monday, April 4, 2022

Introducing the Good Feelings Stamp Set

As a demonstrator one of the perks you get is to see the new catalog early and be able to order some of the products. When I do this, I get so excited! I can get a head start of designing cards for all of you! 


I love the new stamp sets I've seen and this Good Feeling Stamp Set #158737 will be available to customers starting May 3rd, when the 2022-23 Annual Catalog goes LIVE! Starting today through Friday, I'll be sharing card ideas using all the stamps in this fun set. 


Today we are starting off with the largest stamp in the set. I love this saying! It is perfect for any occasion really. Get Well, Happy News, A New Job, you get the idea.


Every product I've used in this card will continue into the new catalog except for the Pattern Party Designer Series Paper.  The great thing about card layouts, you can substitute with some new Designer Series Paper that will be in the new catalog.


Tried out the idea of using the Stitched with Whimsy Dies for the inner card liner to add some pizzazz to the inside. These stitching lines give a whole new meaning to "margins"!


Products Used to Make this Card:

#153081 Misty Moonlight Cardstock 5" x 8.5", scored at 4.25" and Ink, plus one scrap 1" x 3"
#155426 Pattern Party Designer Series Paper 4" x 5.25", plus one scrap 5/8" x 3"
 #141416 Flirty Flamingo Cardstock 2-7/8" x 3-5/8"
#159276 Basic White Cardstock 2-5/8" x 3-3/8" and for inner liner 4" x 5.25"
#158737 Good Feelings Stamp Set
#155314 Stitched with Whimsy Dies
#153608 Banners Pick a Punch
#158136 Brushed Brass Butterflies
#151326 Crinkled Seam Binding Ribbon
#159236 Basic White Envelope with matching 2-3/8" x 6" exterior envelope flap

The Corner Rounder I used is a Creative Memories tool that is quite old. If you happen to own the Stampin' Up! Envelope Punch Board, it has a corner rounder built in. You may have another corner rounder in your collection you can use.

Adhesives - #149699 Stampin' Seal, #104430 Dimensionals, and #103683 Glue Dots
Tools - #152392 Paper Trimmer, #103579 Paper Snips, #144107 Take Your Pick Tool, #149653 Full size Cut and Emboss Machine and #147042 Simply Shammy.

I want you as a customer! Purchase the items you need now (except for the stamp set) by copying and then pasting the item number into the search box in my online store. That is the fastest way to navigate the store.  Shop here.

If your order is over $50 please use the host code here to receive an extra gift from me!

If you'd like to watch my Instagram Reel on the making of this card that I posted April 3, 2022, visit this link https://www.instagram.com/stampinwitheva/

I encourage you to come back here to see more fun and easy card layout ideas using the Good Feelings set this week!

Thanks for stopping by!

Monday, February 28, 2022

Simply Marbleous Rainbow Birthday Card

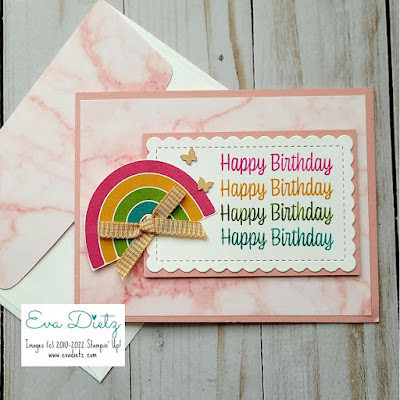
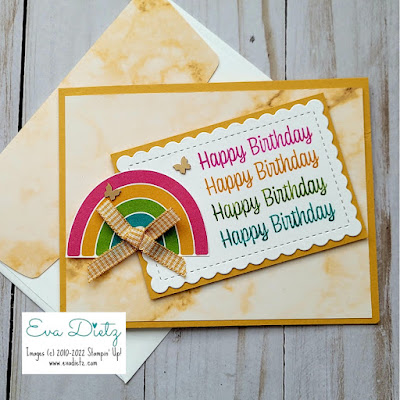
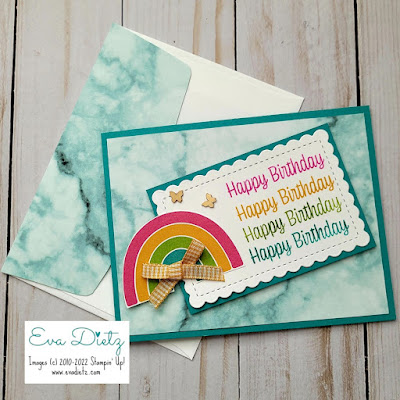
Wahoo! I have made another YouTube video! These cute cards I'll be sharing today are made with the Sunshine & Rainbows Designer Series Paper and the Simply Marbleous Designer Series Paper from the current Sale-a-Bration brochure. 

If you love these cards, then you won't want to miss out on getting the products I used, since today is the last day to select Jan. & Feb. 2022 Sale-a-Bration rewards with a purchase of $50 before shipping and tax.  You can order using the link at the end of this post.

Cutting Sizes and Supplies needed to make these cards:

Blushing Bride or Bumble Bee or Bermuda Bay cardstock for the card base
 cut 4-1/4" x 11", score at 5-1/2"

Simply Marbleous Designer Series Paper (DSP) layer cut at 4" x 5-1/4"

Blushing Bride or Bumble Bee or Bermuda Bay cardstock cut at 2-5/8" x 3-7/8"

Basic White cardstock cut at 2-3/4" x 4"
Scalloped Contour Dies - 3rd size die
Cut and Emboss Machine

Stamp Happy Birthday greeting from Sweet as a Peach photopolymer stamp set 
using clear stamp block H with Magenta Madness, Bumble Bee, Granny Apple Green, and Bermuda Bay ink pads.

Fussy cut the rainbow image from the Sunshine and Rainbows Designer Series Paper.

Adhere the smaller cardstock rectangle to the stamped scalloped rectangle, the with liquid glue affix the rainbow to the side as shown in the photo at whatever angle you think looks best. Raise this grouping up with Dimensionals.

Tie a bow with the 1/4" Bumblebee Gingham ribbon and affix it with a glue dot to raised layer.

Using a Take Your Pick tool add two Brushed Brass Butterflies to finish the card front.

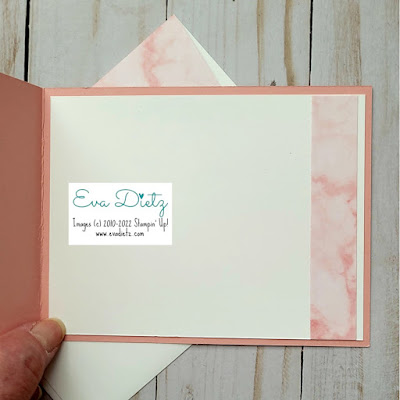
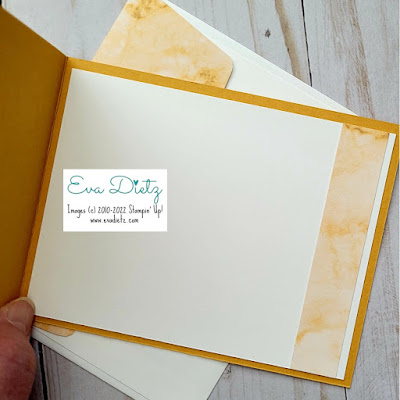
For the inside of the card - cut a piece of Basic White 4" x 5-1/4" and a strip of the Simply Marbleous DSP cut 3/4" x 4" to the side of the inner layer as shown in photos.

Be sure to stamp your name stamp on the back of your card.

For the matching envelope flap, use the Simply Marbleous DSP cutting a piece 2-3/8" x 6", adhere securely to the exterior of the Basic White envelope flap, then trim off excess using paper snips.

All done! 


Have fun creating these cards. Leave me a comment too!


Monday, December 27, 2021

Sneak Peek of New January - June Mini Catalog Products

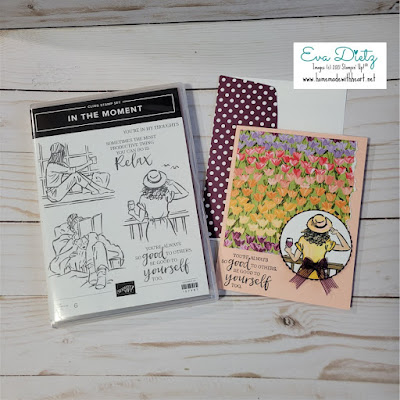
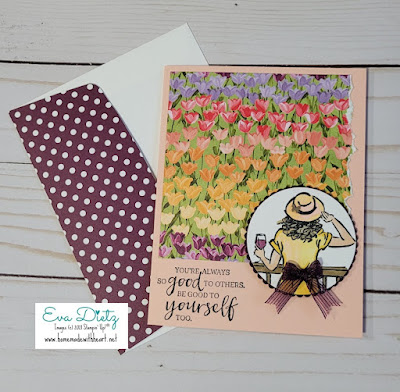
This In the Moment stamp set was one I received as part of OnStage at Home last month. I haven't been a big fan of these types of sets, but after this card, I'm sharing today, I have changed my mind! I hope you like it too!


I just love fields of flowers, especially tulips! So the new Flowering Fields Designer Series Paper (DSP) really spoke to me. I immediately saw the looking-out lady stamp being the perfect one to coordinate with this DSP.  I didn't want to cover up too much of the DSP, but wanted a little torn edge. The lady is the focal point with the use of the Layering Circles Dies. That little scalloped circle of Blackberry Bliss gives it the "pop" it needed. 


On the lady's hat is one of the new Brushed Brass Butterflies. Then I couldn't resist trying the Blackberry Bliss 3/8" striped ribbon (retired) folded in half and using the "meat fork" technique to tie the bow, so it would be the proper scale for the image. I just love how it turned out!

The Blackberry Bliss DSP on the envelope flap is very retired, but just what this set needed!

The stamp set, DSP, and the Brass Butterfly embellishment will be available for purchase starting January 4th at my online store.
Thanks for stopping by!


#stampinwitheva #sudemo #springcards