Pages

Friday, July 29, 2022

Choosy Cardmakers Choose Stampin' Up! Products for Their Card Making Because Only the Best Will Do!

If you don't mind I am going to step up on my "soap box" today and share why I think Stampin' Up! is the best papercrafting company out there and why you should be choosy when making your papercrafting purchases.

It is my hope that every papercrafter that sees my projects online or meets me in person will see how passionate I am about Stampin' Up!s products. I've been using their products for over twenty years now and have been one of their Independent Demonstrators for 11-1/2 years.  Which means I have a lot of their products, and I have a lot of experience using their products in my papercrafting projects.

I know first hand use how high quality their products are. Color Coordinated products makes designing your projects easy. Their stamp sets, dies, punches, and tools are durable, well made, and if there ever is even a small problem, all you need to do is contact their amazing customer service department, and they will do their best to make it right. 

I know some people may think their product prices are on the high side, but you get what you pay for. You are also supporting small business in your local community by going through an Independent Stampin' Up! Demonstrator such as myself. 

By purchasing quality products from Stampin' Up! and your local demonstrator, you are assured they will last a very long time and you have a local expert to help you learn how to use the items you buy. There is good resale value too should you decide to part with something you are tired of. 

If you believe high quality equals a product that lasts a long time, then by all means Stampin' Up! is the company you should be purchasing your products from via a local Independent Demonstrator. 

The big box craft stores have a variety of papercrafting supplies and sometimes their prices are a little lower or you can use a coupon. But in my experience, especially when purchasing individiual cardstocks and paper stack books, yes, they might go together in their own line, but trying to match them with other products can be frustrating, because they are not color coordinated with a large variety of products. 

One thing you should never do in my opinion, is buy any stamp sets or dies from shady Chinese companies who steal Stampin' Up!s intellectual property every time a new catalog comes out. These awful companies tarnish Stampin' Up!s quality name with their cheaply made and undersized stamp sets and ill fitting dies. Your order takes a month or more to be received, and if you have a problem there is no customer service. You are just out your hard earned money. These companies are so shady they even use Stampin' Up!s images and only blur out the Stampin' Up! name. Ugh! 

Don't be fooled. You are buying from copycats who don't have an original idea of their own! Stampin' Up! has Concept Artists who design their original stamps, dies, and papers. The really sad part is, I recently saw an American online retailer allowing these crooked Chinese companies to sell their poor quality products through them. They will be sorry in the long run that they have associated with these crooks in my opinion.

Now you may be saying to yourself, but many products are made in China. Yes, you are correct. Stampin' Up! has good working relationships and high standards with the Chinese companies that manufacture their high-quality products. Did you know Stampin' Up! manufactures their own stamps in Kanab, Utah? These are not the Chinese companies I'm referring to in my plea to you.

Please, please, please if you care about the cards and gifts you make and share with others, only use high quality Stampin' Up! products. I would be more than happy to help you learn how to use what you purchase properly, so you are happy and confident. 

I will step off my soap box now. I hope I have given you some food for thought.

Do you agree with me about the quality of Stampin' Up! products compared to these crummy knock-off so-called companies? Post in the comments, I'd love to know your thoughts.

Shop or Join at https://evadietz.stampinup.net/

Please contact me anytime if you have any questions 
or  write me at
stampinwitheva@gmail.com

Thursday, July 28, 2022

Are You a Cardmaker Who Wants to Make Their Own Christmas Cards but Can't Find the Time?

We all say we never have enough time to do things, but we are only fooling ourselves. We make the time for the things we really want to do. 

If you think of your cardmaking as a process to organize, and break the steps down like a project manager or mathematician would, you would be amazed at what you can accomplish in a short amount of time. 

Here's how to think about breaking down the task of making Christmas cards into manageable chunks.


Using the card above as my example...

The first thing to think about is how many pieces can be cut out of one sheet of 12" x 12" Painted Christmas Designer Series Paper (DSP). That helps to be efficient with your use of paper.

The strip of the pretty pinecones design is 2" x 5-1/2".


So you can make 12 Christmas cards from one sheet of this Designer Series Paper.

********

Next you'll need 6 sheets of Soft Succulent Cardstock, cut crosswise at 5-1/2" x 8-1/2", then score all 12 pieces at 4-1/4". You have 12 card bases. Use a bone folder or your fingernail to crease the fold line when matching the cardbase corners.

********
The next piece to prepare is the Evening Evergreen cardstock 2-1/2" x 5-1/2" layer pieces. You will need 2 sheets of cardstock.


********
Next step is to cut your Soft Succulent ribbon pieces. You will need 4" pieces. Cut 12.

********
Since the Double Oval Punch was used in this card design, 2-3 strips of 1-1/4" x 11" of  Basic White cardstock will be perfect for the stamped greeting done in Evening Evergreen ink. The greeting used was from a retired stamp set called Arrange a Wreath, but you could use a stamp set similar that would fit into the plain edge oval. Stamp 5-6 images per strip horizontally. Remember to turn the punch over in your hand so you can see the alignment of each stamped image in the oval as you slide the stamped strip through the punch and you will have a portion of the cardstock strip to hold on to as you punch.

Next prepare 3 strips of 1-1/2" x 11" of Evening Evergreen cardstock, and punch out 12 scalloped ovals from the three strips.
********
3 sheets of Basic White cardstock are needed to make 12  4" x 5-1/4" pieces for the inner card layer for your personal greeting.  


***************
Using the Tasteful Textile Embossing Folder and your Die Cutting Machine, run just the front of the card in the embossing folder through your machine, while the back of the cardbase is exposed on the back of the embossing folder.
********
The No Naked Envelope Suggestion - Two Optional Choices you can do:
1)  Cut Designer Series Paper Envelope Flap pieces 2-3/8" x 6". 10 pieces can be cut from one 12" x 12" piece of matching Designer Series Paper. Adhere with adhesive to envelope flap and trim excess with paper snips.
 
OR 2) Stamp in matching ink on your envelope flap or on the lower left corner on envelope front with coordinating images or greetings.
********
NOW you are ready for your Card Assembly Production Line. You'll be just like Santa's elves!

1. Adhere the two narrow strips together - Pinecones and Evening Evergreen, making 12 sets.

2. With scotch tape secure 1 ribbon piece ends to back of double layer done in step 1. Repeat 11 more times.

3. Adhere this unit directly to embossed card front with 1/2" left margin spacing. Total 12 cards.

4. Adhere both oval tag (1 stamped plain oval and 1 scalloped oval) pieces together making 12 sets. 
Use 2 Dimensionals to raise each tag up on each card front similiar to photo.

5. Add 3 Rustic Metallic Adhesive Backed Dots to each card as shown in photo.

6. Adhere Basic White inner card layer to the inside of each card.

7. If you have your own personalized stamp, stamp the back of each card. If you don't, handwrite your name and year on the card back.

8. Decide what (if anything) you will be do with your Basic White envelopes from the previous suggestions. Pair one envelope with one card.
TA-DA You now have 12 cards made. Well Done!


The following products are retired:
You may be able to purchase them from Ebay or Etsy

152587 Arrange a Wreath Stamp Set for greeting
152718 Tasteful Textile Embossing Folder for subtle texture on the Soft Succulent card base

I'd love to read a comment from you. Was the detailed process and pictures helpful for you? Making one card at a time takes a LONG time, but using the assembly line method will result in time well spent. I use this assembly line method every time I prepare card kits for my classes.

Shop or Join at https://evadietz.stampinup.net/

Please contact me anytime if you have any questions 
or  write me at
stampinwitheva@gmail.com

Wednesday, July 27, 2022

Learn This New Hack - You Can Stack and Whack Any Of Stampin' Up!s Designer Series Papers to Create a Faux Quilting Techique for your Christmas Cards This Year

Do you happen to sew? Do you make Quilts? If you have done either of these, then this card design will be a "piece of cake" for you to create multiples of. You can make groups of 4 cards with each attempt.

The Stack and Whack technique is easy. Only 3 cuts will be made.
Cut out 4 matching pieces of Designer Series Paper 3-3/4" x 5".
Stack them on top of each other and place in your Paper Trimmer. 
With firm pressure on the blade, make your first cut. Set aside the first set of pieces still in their stack.
Keeping the remaining stack neatly together, rotate and make your second cut. Set those aside still in their stack.
Continuing to keep the remaining stack neatly together, rotate and make your third cut. Set both of the remaining stacks aside.

Now arrange your stacks back together with the top layer being the same original starting piece of paper.


With your stacks arranged to begin "quilting" start in the upper left corner of the pattern diagram above.

Start with stacked piece #1 and "deal" like you would with a deck of cards, through that stack of four papers, placing each piece in the positions shown in the other three diagrams moving clockwise around. 

Repeat with each numbered stack until the four different card fronts match the above diagram. 

I suggest to use little pieces of scotch tape to assemble each mini quilt layer on the reverse side. 

With the Stitchery stamp set, mount the Zig-Zag stamp and do your best to stamp the "stitching" on top of your pieced seams in an ink color that matches your paper.

After the stitching stamping is finished then adhere to the 4" x 5-1/4" cardstock layer. 

After those two layers are together, then it is time to wrap your choice of ribbon around and secure with scotch tape on the reverse. 

Then secure the double layer to the card front with adhesive.

Select your choice of tag, stamp, ink and either die cut or punch out. Attach to the card front with Dimensionals. Embellish as desired.

Finally decorate your envelope flap with matching paper and cut 2-3/8" x 6". Adhere and trim off excess.


The following products are retired:
You may be able to purchase them from Ebay or Etsy

Seaside Spray cardstock
Seaside Spray Classic Ink
Feels Like Frost 6" x 6" Designer Series Paper
145372 Stitched Shapes Framelits
144213 Metallic Edge Ribbon
156449 Encircled in Warmth Stamp Set
159396 Rhinestone Waves Basic Jewels

*******


Another color combination I tried out before I settled on the one above. 
This card was not used in my Christmas in July card class, but it is still a fun one to see what different papers might look like.


The following products are retired:
You may be able to purchase them from Ebay or Etsy

153512 Snowflake Splendor Designer Series Paper
159396 Rhinestone Waves Basic Jewels
153548 Snowflake Splendor 1/4" Ribbon

I'd love to hear if you give this Stack and Whack technique a try. It's so fun! Leave me a comment if you plan to make some.

Shop or Join at https://evadietz.stampinup.net/

Please contact me anytime if you have any questions 
or  write me at
stampinwitheva@gmail.com

Tuesday, July 26, 2022

Wanna Make Your Own Handmade Christmas Cards? It Isn't that Hard. Let Me Show You How To Do It!

Today's card designs are very easy to reproduce with whatever cardstock, Designer Series Papers, and Dies you have on hand. You might be surprised at the amazing holiday creations you turn out.  

This layout idea is a quick one, so you can make many similar cards for the upcoming holidays and get a jump on eliminating some holiday stress for yourself.

Won't your family and friends be amazed at your creativity and thoughtfulness 
when they receive your cards!


Production Directions for both cards:

Shaded Spruce Cardstock cut 5.5" x 8.5", scored at 4.25"
Designer Series Paper layer cut 3.75" x 5"
Soft Suede Cardstock cut 3.5" x 4.75", then run through embossing folder, and then cut out center with die of your choice.
All three of these layers are adhered directly to the card base.

Stamped Tag is 1.25" x 2.5", then die cut out and raised up with Dimensionals on card front.
Add rhinestones or other embellishments of your choice.

Decorate your envelope flap with matching paper cut 2-3/8" x 6", adhere and trim off excess.


The following products are retired:
You may be able to purchase them from Ebay or Etsy
153456 Celebration Tiding stamp set
 133723 Star Dies
 149596 Wrapped in Plaid 6"x6" Designer Series Paper
 Pinewood Planks 3D Embossing Folder


The following products are retired:
You may be able to purchase them from Ebay or Etsy
 149596 Wrapped in Plaid 6"x6" Designer Series Paper
 Pinewood Planks 3D Embossing Folder
147773 Nothing Sweeter stamp set
139665 Perfect Pines Dies

I'd love to read a comment about my card designs. Do you think they seem easy enough to make? Will you give them a try?

Shop or Join at https://evadietz.stampinup.net/

Please contact me anytime if you have any questions 
or  write me at
stampinwitheva@gmail.com

Monday, July 25, 2022

Christmas in July Card Ideas for Cardmakers Who Never Start Early Enough Making Their Own Cards

We all like to give thoughtful gifts for the holidays, especially when we take the time to make beautiful handmade cards. 

But often we get behind on our to-do list and sometimes those cards never get made at all, or only partially finished, or we don't make enough, and have to choose which special people will be the lucky ones for this year. 

That's why I've designed ten great card layout ideas for you to try. They will help you make some easy, but beautiful holiday cards. You can start now and get a head start on your Christmas Card to-do list for those special handmade cards you want to send in December!

The best part is you can repeat these layouts with a variety of stamp sets and fancy paper you may have on hand. My card designs are made with Stampin' Up! products - stamps, inks, Designer Series Papers, and embellishments. They are the best products around in my opinion! Color Coordinated, sturdy papers, and beautiful designs to work with.

As a Stampin' Up! Demonstrator I have a stash of products in my craft room. Some are retired now, since I didn't use them up before they retired from the various catalogs. However, you can still recreate the layouts easily and that is why I'm sharing them with you to help you with your holiday cardmaking.


The only item retired on this card layout is the Peaceful Prints Designer Series Paper #156628, but maybe you can find some through Ebay or Etsy.

You will also need a 1/4" handheld hole punch.

To purchase the items used in the card above, just click the image links.


Quick Cutting Measurements:
Real Red Cardstock - 5.5" x 8.5", scored at 4.25"
Basic Black Cardstsock - 4" x 5.25"
Designer Series Paper - two pieces of coordinating paper. Cut each 3.75" x 5". Then stack both pieces together and slice diagonally with the Paper Trimmer. You actually have enough for two cards!
Basic White Cardstock inner card layer - 4" x 5.25"
Basic White Cardstock for tag 2.75" square
Envelope flap piece of matching Designer Series Paper - 2-3/8" x 6"

********************


The only retired items on this card layout are the Peaceful Prints Designer Series Paper #156628, Flurry of Wishes Stamp Set #139732, Stitched So Sweetly #151690,and the Frosted & Clear Epoxy Droplets #147801, but maybe you can find them through Ebay or Etsy.

To purchase the items used in the card above, just click the image links.


Quick Cutting Measurements:
Thick Basic White Cardstock - 5.5" x 8.5", scored at 4.25"
Designer Series Paper - 4" x 5.25"
Basic White Cardstock for tag 2.5" x 3"

Thanks for checking out this post, I hope you will be inspired to give these designs a try this week.

I'd love to read a comment about my original card designs. What do you think of them?

Shop or Join at https://evadietz.stampinup.net/

Please contact me anytime if you have any questions 
or  write me at
stampinwitheva@gmail.com

Wednesday, July 13, 2022

Wonderful World Sale-a-Bration Stamp and Designer Series Paper Set

The Sale-a-Bration product Wonderful World Stamp set and matching Designer Series Paper are just simply gorgeous. View this short video from Stampin ' Up! to get some inspiration on why you are going to want this Sale-a-Bration reward.


The two photos below are revisiting a card I made with these items. Not my typical color combination but I like how it turned out. 


I'd love to read a comment about my original card design. What do you think of it?

Shop or Join at https://evadietz.stampinup.net/

Please contact me anytime if you have any questions 
or 
stampinwitheva@gmail.com

Tuesday, July 12, 2022

You'll Love Sale-a-Bration's Happiest Hippos Stamp Set

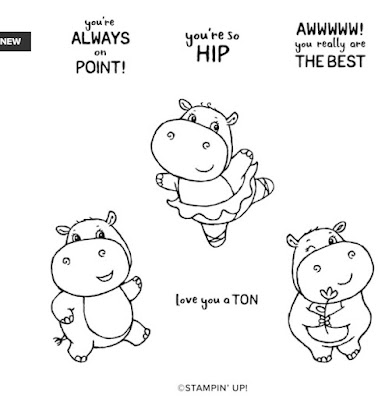
Hello Friends! Sharing a short cute video  from Stampin' Up! about one of the choices of Sale-a-Bration products you can select when you place a qualifying order.  This set has sooooo many possibilities!


If you want to get your Hippos now, all you need to do is think about what cardstock, envelopes, adhesives, ink refills you might need and put together your order. During the check out process you can select the Happiest Hippos stamp set and/or dies.

 Order # 159921

  Order #159928

Order at my online store at the link below, just click the Shop Now tab.

Shop or Join at https://evadietz.stampinup.net/

Please contact me anytime if you have any questions 
or 
stampinwitheva@gmail.com

Monday, July 11, 2022

Sweet Sunflowers Paper Pumpkin Kit for August

 Since I LOVE Sunflowers I can't wait to receive my August Paper Pumpkin kit. I might even order a second kit! Check out the images below to see the best sneak preview ever and a hint on how to stamp the sunflower image to its best advantage.


Stamp and Twist technique

Did you know you get original artwork with every Paper Pumpkin kit? Yes, you do! That's one of the reasons I'm such a fan of this subscription box! Here's what is coming with the August kit:

  • All the supplies you need to create 9 cards: 3 each of 3 designs; and coordinating envelopes.
  • An all-occasion stamp set to express words of gratitude, friendship, greetings and beautiful wildflower designed images.
  • 2 Classic Stampin’ Spots (Crushed Curry and Soft Suede) for a Two-Step stamping experience with a twist!  That makes stamping while you are traveling easy with the Ink Spots!
  • FREE GIFT: 8 Gold Foil Honeycomb Sheets  (this is the second one of this year! WOW)
  • Coordinating Stampin’ Up! colors: Blackberry Bliss, Crushed Curry, Evening Evergreen, Melon Mambo, Mossy Meadow, Night of Navy, Pumpkin Pie, Soft Suede

Don't forget that it is Sale-a-Bration time between now and the end of August is here. That is the best time to purchase a prepaid multiple month subscription because you get EXTRA rewards. 

With every $50 USD/$60 CAD (level 1 free item) or $100 USD/$120 CAD (level 2 free item) you spend (before tax and shipping) you get FREE goodies to add to your cart! This is a great time to purchase prepaids:
A 3-month subscription ($67.50 USD/$90 CAD) earns a level 1 product.
A 6-month subscription ($122.50 USD/$171 CAD) earns a level 2 product or two level 1 products.
A 12-month subscription ($235 USD/$325 CAD) earns two level 2 product or, two level 1 products and a level 2 product.

 Shop for Prepaid kits here by August 10th or Join at https://evadietz.stampinup.net/  

Then you'll receive the prepaid code in an email to put into the link below:

Paper Pumpkin Website

Please contact me anytime if you have any questions 

or 
stampinwitheva@gmail.com

Friday, July 8, 2022

Nourish & Flourish Kit


Each year, Stampin’ Up! supports a designated cause through special limited-edition products or promotions. This tear they have chosen to support organizations that are working to end food insecurity by releasing a special Nourish and Flourish Kit (item 160230).

  • It will be available 1 July 2022 – 4 January 2023


The Nourish & Flourish Kit is made of your spring picnic dreams. With a deliciously bright color palette you’ll love creating the springtime/summery cards while knowing your crafting is making a difference! 
  • This Kit includes 9 embossed card bases—3 each in 3 designs—and 9 coordinating envelopes
  • Includes sticker sheets, die cuts, and die-cut labels
  • Finished card size: 5-1/2" x 4-1/4" (14 x 10.8 cm)
  • Coordinating colors: Calypso Coral, Daffodil Delight, Old Olive, Petal Pink, Pool Party, Shaded Spruce
  • Plus the kit comes in an insulated 9" x 6-1/2" x 6-1/4" (22.9 x 16.5 x 15.9 cm) lunch bag! It's so cute and very well made!


I had fun assembling the cards that come in the kit and they are very easy to do! No stamping needed at all! Punch out the artwork and layer following the directions and Voila! You have 9 beautiful cards before you know it!


If you add another $11 worth of products to your order you would be eligible to select a free Level 1 Sale-a-Bration product (from now through August 31, 2022) when you are checking out online. Who doesn't love a Freebie?!  Besides you know you'll be helping a good cause of ending food insecurity.

Shop or Join at https://evadietz.stampinup.net/

Please contact me anytime if you have any questions 
or 
stampinwitheva@gmail.com

Thursday, July 7, 2022

Baseball Themed Angled Gatefold Latch Cards

My dear demo friend, Lori, held her June Christmas Spirit Club sharing the Angled Gatefold Latch Card but I was unable to attend virtually via Zoom due to a double booked commitment. Following that appointment, I went to work and made four of this fun fold since I had recently received my "Last Chance" order from the Jan. - June Mini Catalog. 

I really liked the "Hey Sports Fan" Designer Series Paper (now retired) and had been meaning to order it, so I finally did before it sold out. My friend Lori, loves the San Diego Padres, so I was thinking of her when I made these cards. 

Cardstock used - Bumblebee (retired), Night of Navy, Very Vanilla

Colored Cardstock: 5 1/2” X 11”, score as shown in the diagram. Then trim angles as shown.

 4” X 5 1/4” Very Vanilla for inside greeting layer.


Designer Series Paper: two complementary pieces 3 1/8” x 5 1/4” (be mindful of paper directionality and which side you want facing out. You may have to reverse the pattern below.) 


How to make the Baseball by hand:

Gather either a 1-3/4" and 2" circle punch or similar sized Circle Dies.
Gather 2-1/4" squares of cardstock - 1 piece Night of Navy, 2 pieces Very Vanilla.

Create 2 Very Vanilla Circles with the 1-3/4" Punch or 1-3/4" Circle Die. One circle will be used as a curve template to draw the sewing seam lines and the other piece will be used to make the actual ball that will go on the Night of Navy 2" Circle.

Create a Night of Navy Circle with the 2" Punch or 2" Circle Die.

With a Night of Navy Stampin' Write Marker, fine tip end, use the Very Vanilla circle template to draw the two curved seam lines as shown in the photo.

With a Poppy Parade Stampin' Write Marker, fine tip end, you will draw by hand the "V" stitching marks on both sides of the curves. I found it was easy to do only one side of the "V" at the time and go back and do the opposite side, so I could try for an even stitched look.

When finished with both Stampin' Write Markers, you will stamp the Happy Birthday sentiment in Night of Navy ink from the "A Grand Kid" stamp set.

Then adhere both layers together. Dimensionals will only go on the left side as you look at the ball, to create the closure mechanism. You will have to "bend" the card front a little bit to go under the baseball, but it is a great way to keep the card closed.


Here's the finished cards below - Enjoy! Don't forget to decorate your envelope flap too with a piece of 2-3/8" x 6" coordinating Designer Series Paper. Adhere and trim off excess with paper snips.

Part of the package of Hey Sports Fan Designer Series Paper had these great baseball ticket and Play Ball saying that I fussy cut out and adhered to the card front. 
The Resin Star embellishments were added on the finished card.


Here's the Products I used to create these cards: Some are retired, some are current. You may be able to find some of these products on Ebay or Etsy if they are not in my online store. This list is for reference only, no clickable links.


I encourage you to give this fun fold a try with whatever products you have on hand in your papercrafting stash. 


Please contact me anytime if you have any questions 
or 
stampinwitheva@gmail.com

Wednesday, July 6, 2022

Perfect Time to Join Offer with Free 18 month Planner

Stampin' Up! continues to make their Join Offers really over the TOP! And this one is no exception. During the second Sale-a-Bration period (July 1 to August 31) is when this offer is valid. However, as always, this Making Plans Collection extra is while supplies last. 

 This 18 month Planner is TOP Quality in every way. The Making Plans Collection has a retail value of $45 and you get it FREE when you join Stampin' Up! and my Sunflower Friends Team. 
 

I had never considered joining Stampin' Up! until November, 2010 when the demonstrator I'd been attending classes with for several years said to me, "Hey did you know the Starter Kit is a really good deal right now?" "No," I said. However, I was having a particularly hard year in my teaching career, and I needed something to take my mind off it, so I thought "Why NOT!"  

Gosh, that has been one of the best decisions I've ever made. Stampin' Up! holds a very treasured spot in my heart after 11.5 years. It got me through my final five years of teaching, now after retiring 6 years ago, it has been such a blessing in my life. I love being my own boss! Who's retired? Not me really!

Stampin' Up! is such a great company, they have the absolute best customer service, and products that are the best in the business. I love their color-coordinated "families" of cardstocks and inks. They make creating cards and more so easy! 

My life has been enriched by all the wonderful people I've met, the conventions I've attended around the county, the card swaps I've signed up for, and the collection of wonderful products I have accumulated. I have grown as a leader, learned a ton about technology, become empowered in my creativity and confidence. All done in a setting of positivity and encouragement. 

Maybe my story will help you make your decision...

Let's add up the Value of this Opportunity:
Your cost - $99 Kit plus sales tax - value of items you choose $125
Making Plans Collection $45
Free Past Paper Pumpkin Kit $23
Free Kit shipping $20 value
Total Value nearing $210

After you receive your kit:
Demo Discount of 20% minimum on every order you and your customers place.
Small quarterly sales requirement of $300 (that's two $150 demo orders 
and you get more free products with Stampin' Rewards $15 per order when you order $150 or more in one order before shipping and tax.) But you get 20% back on those orders, so it's not really a full $300 that you are spending!

You can also sign up for two free months of Stampin' Up!s Demonstrator Website - that's another $25.90 value!

You are receiving more Value every day with the ability to place a preorder when new catalogs begin ahead of the general public, receive training from Stampin' Up! and me, meet new people, make social media connections, have creative therapy me-time, enjoy recognition when you achieve certain milestones, and so much more!

THIS OPPORTUNITY IS REALLY PRICELESS!

I'd love to talk with you about it. Or if you want to jump right in Join Here


The planner is larger than 6" x 8" but not 8.5" x 11" The cover is beautifully designed and padded with a magnetic latch.


There are multiple pockets to put your notes, credit cards, business cards and more. The monthly tabs are numbered to use how you would like.


Here's an example of what the inner pages look like.


The Making Plans stamp set and 3 additional notebooks come with the planner.


You get more pages to cover the 18 months, but they will not all fit in the planner at once. There are two pages of stickers to help with your planning notes.


Once the 18 months of planner supplies are used up, a quick Google search revealed that there are commercial supplies available to continue using this gorgeous binder indefinitely.
I can't wait to team up with YOU!

All you need to sign up is a credit or debit card, and a bank account to 
receive your earnings, and an email address!


Please contact me anytime if you have any questions 
or 
stampinwitheva@gmail.com