Pages

Friday, April 30, 2021

Unfinished PHD Card Projects?

Do you have a PHD? I have several, but not the collegiate type, but Projects Half Done. What I’m sharing today falls in this category.

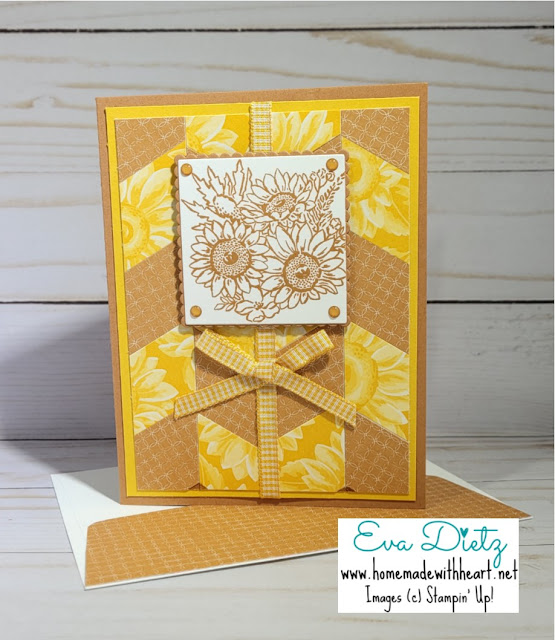
Last summer I had seen a post by Song of My Heart Stampers. Lyssa Griffin Zwolanek developed the Chevron Quilt Strip Background Technique using 1" x 6" paper strips. I thought cool! I have several paper packs of the Flowers for Every Season 6” x 6” Designer Series Paper and I gave her technique a try. It is harder than it appears! (at least for me) I had a heck of a time making the joints line up! They didn’t turn out quite as perfectly aligned as I hoped they would, so I set them aside.

 Months and months passed as the paper “quilts” got moved around my desk top multiple times. But one day not too long ago, I said, “These are good enough. No, they aren’t perfect, but isn’t that what cardmaking is all about?” Handmade with Love. It’s my attempt at this technique. I decided they weren’t half bad after all.

So I went ahead and finished them into cards to share here on my blog with you, my readers. 
My desk is happy! Some of the clutter is cleaned up. I am happy they are done!

Sunflower Mason Jar Birthday Card

The Products I used in the card above:

Bumblebee cardstock
Flowers for Every Season 6x6 Designer Series Paper
Basic White layer to stamp Happy Birthday on in Just Jade from the Sweet Ice Cream stamp set
Basic White to build the strips on
Jar of Flowers Stamp Set
Assorted Stampin’ Blends to color the bouquet image
Cinnamon Cider cardstock and ink
Jar Punch
1/4” Bumblebee Gingham Ribbon
2020-2022 InColor Enamel Dots

Sunflower Bouquet Chevron Quilt Card

Almost all the the ingredients above plus the Layering Squares Dies for the rest of the cards shown.

Cinnamon Cider Sunflower chevron quilt Card

Cinnamon Cider Chevron Quilt Technique Card

If you would like to read more, here’s the link to Lyssa’s blog, then go to her search box and type in “Chevron Strip Technique” and the post from 7/30/20 will come up. 

If you are a quiltmaker like I am, you should give this technique a try. Paper or fabric it’s worth the challenge!  Have fun, just don’t let them go unfinished like I did.

Have a happy day!

If you enjoyed this post, please be sure to click on the buttons below…


#stampinwitheva #stampinupproducts  


Thursday, April 29, 2021

Seed Packet and Gift Card Pocket Cards

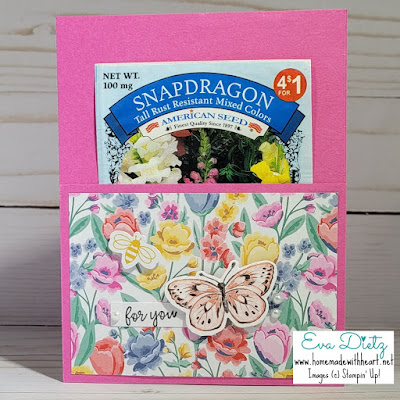
Here’s a twist on an idea I saw online not too long ago. The artist made a flat pocket of cardstock, then slid in a seed packet as a quick, cute gift for a friend.

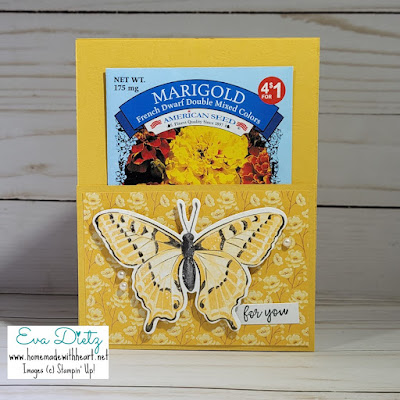
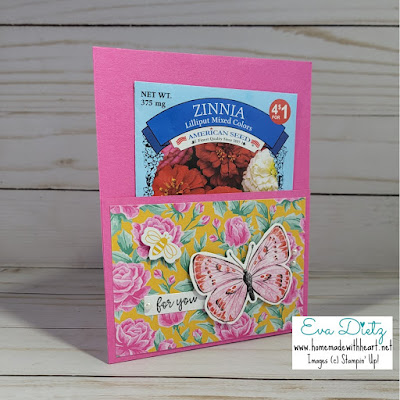
I thought it was a great idea, but I personally don’t care for “cards” that don’t stand on their own, so I “new and improved” the idea by making a two pocket card. A pocket on the front for the seed packet and a second pocket on the inside for a gift card to a garden center so the recipient can get whatever else they may need to garden with.  (Please excuse the use of Dollar Tree seed packets, they are only to give you the idea, I would include a high quality seed packet, it I were giving to a friend.)

Magenta Madness Seed Pocket Card with butterfly on front


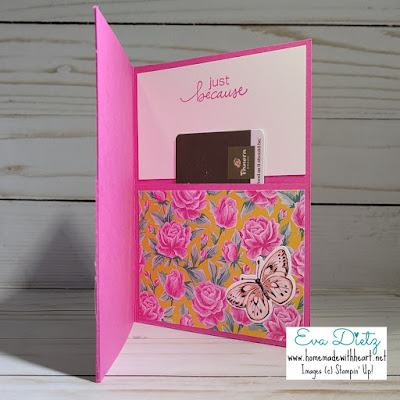
Inside of Magenta Madness Pocket Card

I intentionally tried to coordinate cardstock with the seed packet I used. The two colors of cardstock were Magenta Madness and Bumblebee.

The Flowers for Every Season 6” x 6” Designer Series paper coordinated so well.

Unfortunately the butterflies I used were die cut from Butterfly Bijou 6” x 6” Designer Series Paper that has already sold out. I’m not kidding it was gone in like two weeks! I feel fortunate to have purchased two packs to use in my classes.

The “For You” is from the Timeless Tulips Stamp set. The “Just Because” is from the Lovely You stamp set.

Bumblebee Seed Pocket Card with large yellow butterfly on fron

Inner of Bumblebee Seed Pocket Card with small butterfly

Magenta Madness cardstock pocket card with butterfly

Inner Magenta Madness Gift pocket Card


Butterfly Gift Card and Seed Packet Card in bumblebee cardstock

Inside of bumblebee cardstock Butterfly Seed Pocket Card

Pocket Card Cutting and Scoring Diagram

Here’s my sketch with dimensions of how my card works. The only thing I couldn’t show well in this line drawing, is you may need to cut a very narrow upside down “V” where you slit the cardstock to create the pockets, so it will take a bit of the bulk out when you want to close the card. Use a bone folder to crease the score line well prior to gluing.

I would recommend using a narrow bead of the Multipurpose Liquid Glue close to the edge of each pocket for maximum room to insert the seed pack and gift card.  Let it dry well and weight it down with one of your clear stamping blocks.

You will need two pieces of the Designer Series Paper 2-3/4” x 4”.
One Piece of Basic White 2-1/4” x 4” along with a small scrap for the front.

Maybe you have other “retired” butterfly stamps or dies in your collection that you can substitute for the decorations. Or even use the Daisy punches if you have them. Raise the decoration up on dimensionals for added effect.

I hope this gift idea will be something you will make for all your flower loving friends!

Happy Stamping and Gardening!

If you enjoyed this post, please be sure to click on the buttons below…


#stampinwitheva #stampinupproducts  

Wednesday, April 28, 2021

Pretty Perennials Happy Cards

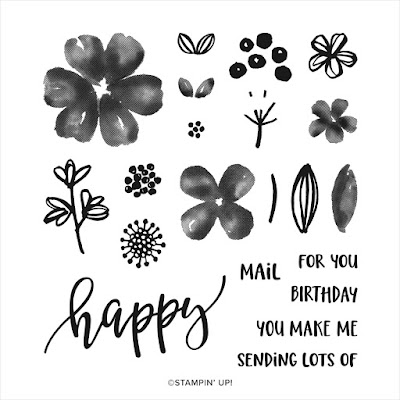
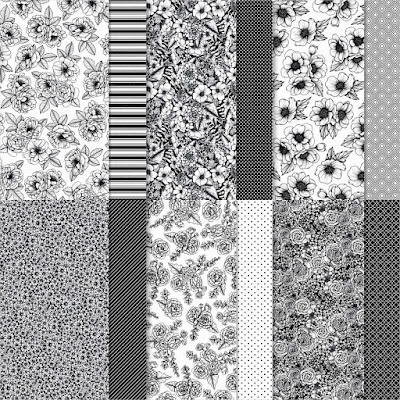
On June 30th, the Spring Mini Catalog will be ending. It has definitely been one of the greats!  I encourage you to purchase the True Love Designer Series Paper and the Pretty Perennials stamp set before they are gone. There are so many options you can do with these two products, especially if you like to color. These cards use what I call the negative effect. You color the background so the black and white flowers POP!

Patty Bennett gets credit for the first card layout using the True Love Designer Series Paper with the Pool Party coloration with the Stampin' Blends. But I made the rest of the cards my own by using the Pretty Perennials Stamp Set and another Stampin' Blends colors or changed up the card direction.

Cutting Directions:
Cardbase - 5-1/2" x 5-1/2", scored at 4-1/4"
First True Love layer - 3-3/4" x 5-1/2"
Colored True Love layer - 3-1/2x 5-1/4
True Love Strip - 1-1/4" x 3-3/4"

Vertical Mint Macaron black and white floral You Make Me Happy Card


Sending Lots of Happy card made with Mint Macaron cardstock and Black and White True Love Designer Series Paper Pretty Perennials stamp set Card


Seaside Spray cardstock with Pretty Perennials  stamp set true love designer series paper Happy Birthday Card


Seaside Spray cardstock card that says Happy for You stamped with Pretty Perennials stamp set includes true love designer series paper

I also had fun learning to use my Silhouette Cameo cutting machine to cut out the word happy because there are no dies for that stamp.  I am happy with the happy word and how it turned out.

I also had fun using the variety of word combinations to go with happy.

Pretty Perennials Stamp Set from Stampin' Up!


Stampin' Up! True Love Designer Series Paper


Think about giving these card designs a go. They are fun to assemble and you can put your twist on it easily. Practically any color of Stampin' Blends alcohol markers would look fab with this paper.

 Happy creating!

If you enjoyed this post, please be sure to click on the buttons below…


#stampinwitheva #stampinupproducts  

Tuesday, April 27, 2021

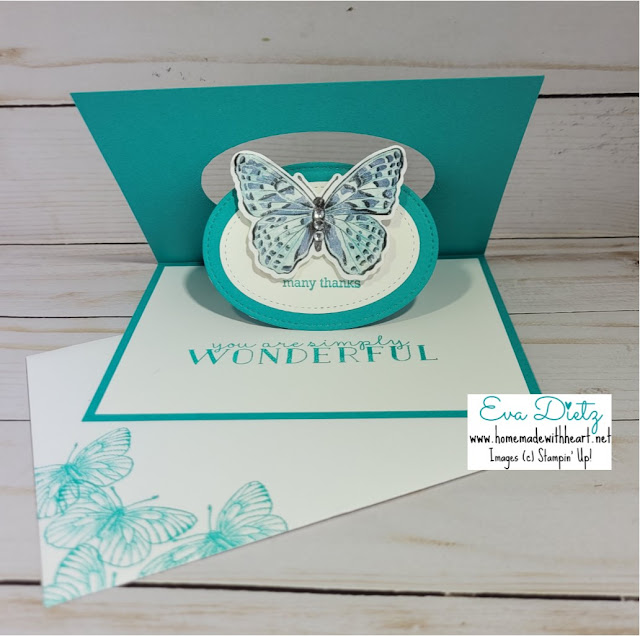
Surprising Pop and Flip Card

Butterflies are another sign of Spring. I love their symbolism of being born again from caterpillar into butterfly. Stampin' Up! introduced their Butterfly Brilliance Bundle as a sneak peak for the upcoming (it's almost here) 2021 Annual Catalog launching on May 4th. 

What they didn't anticipate, was how fast their special promotion of the Butterfly Bijou 6' x 6' Designer Series Paper flew, and I mean FLEW out of the warehouse. It is already ALL GONE! I feel fortunate to have purchased two packages. 

Shortly after my purchase I learned about Dawn Griffith's Pop and Flip card design, I had to CASE it myself. It is so smart and clever.

If you are interested, I have taken the time to write a five page tutorial with lots of photos on how to make this card if you are like me and need a paper copy to refer to. I have placed the link to purchase the pdf through paypal in my right sidebar. I will email you your pdf following purchase. It is not an immediate digital download. (I still have to learn how to do that! It's on my to-learn list!)

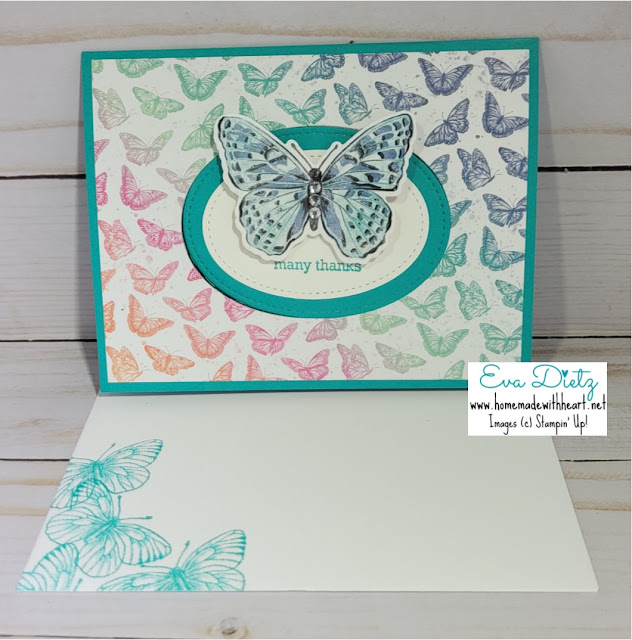
Moving Butterfly which moves and fills the oval opening of the pretty bermuda bay card with mini butterflies flying all over the designer series paper

beautiful bermuda bay card with floating butterfly in the pop and flip mechanism

Pop and Flip Card Birdseye View

Pop and Flip Card Mechanism View

Butterfly Brilliance Bundle showing stamp set and butterfly dies


What some people are doing is purchasing a second stamp set to cut the butterflies apart so you can stamp them individually. I admit to this!


By cutting the stamp set apart that is how I got the individual butterfly on the envelope.

This card is fast to make and before you know it, you'll have several made! I hope you give it a try.

Happy Stamping!


If you enjoyed this post, please be sure to click on the buttons below…


#stampinwitheva #stampinupproducts