
I'm sad that Sale-a-Bration is about to be over (at midnight MT) until next January. Stampin' Up! had a lot of great rewards to choose from with a qualifying order.
One of the choices was this darling A Day at the Farm Designer Series Paper (DSP) . When I saw the geese on that special patterned paper, I knew I must combine it with the Silly Goose Stamp Set in the current Spring Mini Catalog. It is such a fun combination together for a birthday card layout.

Silly Goose Stamp Set
Comes in two choices:
Photopolymer 160866 $25 (Click the image to go to online store to order.)
Cling 160866 $25

A Day at the Farm Designer Series Paper
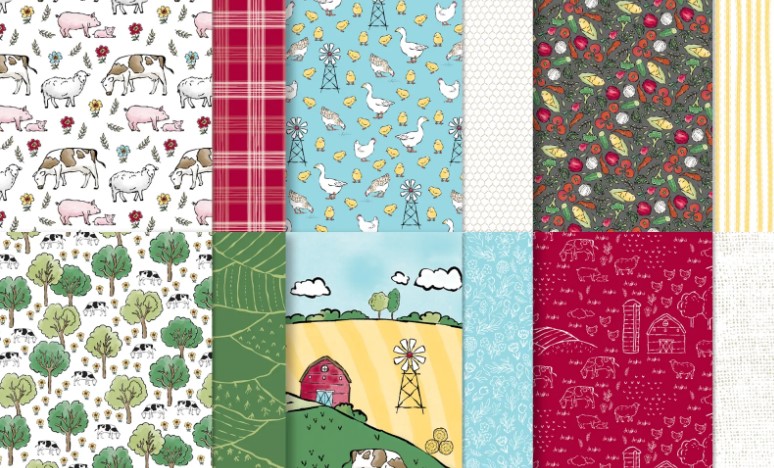
Images © 2023 Stampin' Up!

Supplies and Directions:
1. Balmy Blue cardstock base 5 1/2" x 8 1/2", scored at 4 1/4", then scored like template above. (Use light pencil tick marks to see where to score on your Paper Trimmer.)
2. Farm DSP 4" x 5 1/4" - You'll be creating two pieces when you cut it just like the template above but at 3 1/4" on each corner side. (Use light pencil tick marks to see where to cut on your Paper Trimmer.)
Adhere the larger piece of the DSP to the card front, then use a larger Dimensional to stick the folded corner to the card front.
3. Cut a 3 1/4" square piece of Daffodil Delight cardstock and adhere the corner you cut off of the DSP showing the chicken wire patterned side to the upper left corner as you look at it. Trim off any little "tails" so they don't show. The chicken wire side will be showing on the inside of the card when applied. Now adhere the solid Daffodil Delight colored square to the folded down corner flap leaving only 1/8" margin on the bottom and left side as you look at it.
4. Cut a 3" square of Basic White and with Memento Ink stamp the goose in the center. Use your choice of coloring tools to color in the goose as shown. (I used Stampin' Blends Alcohol Markers.) When finished coloring apply to Daffodil Delight square with 1/8" margin all the way around.
5. Cut a 1/2" x 4 1/4" strip of the yellow stripe that you'll find on one of the sides of the DSP pack. Adhere to card front as shown.
6. With a small piece of Basic White stamp in Memento Ink the greeting shown. Use the Double Oval Punch to out. Raise up on dimensional on the striped piece.
7. Embellish as desired. You can also adhere a Basic White cardstock inner card layer cut at 4" x 5 1/4". If you would like to add a matching piece of DSP to your Basic White envelope flap, cut it 2 3/8" x 6".
All Done! Isn't it cute!
If you don't already have your own Stampin' Up! Independent Demonstrator, I'd love to be yours!
Learn how to get more done in less time by signing up for my exclusive "Insider" bi-monthly newsletter. Twice a month the news will share card class information, Stampin' Up! promotions, hot tips from me, and free tutorials! Subscribe to my Bi-Monthly Newsletter today. Plus you’ll receive a FREE 14 Card One Sheet Wonder Tutorial to download when you receive my thank you email for signing up.
Please contact me or email me at stampinwitheva@gmail.com if you have any questions about products, techniques, or card designs. Comments below are welcomed too!


