
Pages

Showing posts with label floral card. Show all posts

Saturday, October 29, 2022

Easy Triple Fun Fold Using Stampin' Up!s Awash in Beauty Designer Series Paper. Just Exquisite and Great for Any Occasion! Check This Out!

One of my dear Demonstrator Friends includes me in her monthly Zoom events. I try to make it most months, but lately I've been double booked. I still try to send her a photo of what I create to share the creativity she inspired in me. I'm hoping you will be inspired with this incredibly easy Triple Fun Fold with a Belly Band.

Closed View with Belly Band On.

Inside View with Belly Band Off.

I encourage you to experiment with a variety of Designer Series Papers (DSP) you might have in your stash and see what results. I just love how this card turned out. I'm going to save it for a special friend's Birthday.

Here's the Cutting Dimensions:
Coordinate your cardstock color with whatever DSP you choose. I chose Merry Merlot to coordinate with the Awash in Beauty DSP. I fussy cut out the large floral image to go on the top of the belly band Basic White 2-1/2" square and embellished with some Pearl Jewels.

Card Base - 5-1/2" x 11", scored on the long side at 1-1/4", 5-1/2", and 9-1/4".
Matching Cardstock pieces needed:
    Belly Band 1-1/4" x 10"
    Large Square 3-1/2" that Belly Band will be attached to
    Medium Square 2-3/4" that Basic White square will attach to

Designer Series Paper pieces needed:
    Belly Band 1" x 10"
    Cut one piece of DSP 5-1/4" x 7-1/2" then slice it into four pieces. One piece 1-1/2" x 5-1/4", another piece 4" x 5-1/4" and two pieces both 1" x 5-1/4"

Basic White cardstock needed:
    Inner layer - 3-1/2" x 5-1/4"
    Top Square 2-1/2"

Use my photos as reference to lay out the cut pieces before you adhere any down. 

Helpful hint - do not wrap the belly band so tight around the closed card that it will not slide easily. You need to be able to slide it up and down and reinsert the card into the belly band.

I only used Dimensionals to raise up the floral fussy cut image. Everything else is adhered with Stampin' Seal adhesive. 

Good luck and have fun!

******************

Learn how to get more done in less time by signing up for my exclusive "Insider" weekly newsletter. Each week the news will share card class information, Stampin' Up! promotions, hot tips from me, and two free tutorials! Subscribe to my Weekly Newsletter today. Plus you’ll receive a FREE 14 Card One Sheet Wonder Tutorial to download when you receive my thank you email for signing up.


Please contact me or email me at stampinwitheva@gmail.com if you have any questions about products, techniques, or card designs. Comments below are welcomed too!
Wednesday, June 29, 2022

Wonderful World Sale-a-Bration Preview Card - June Stamp and Chat Class

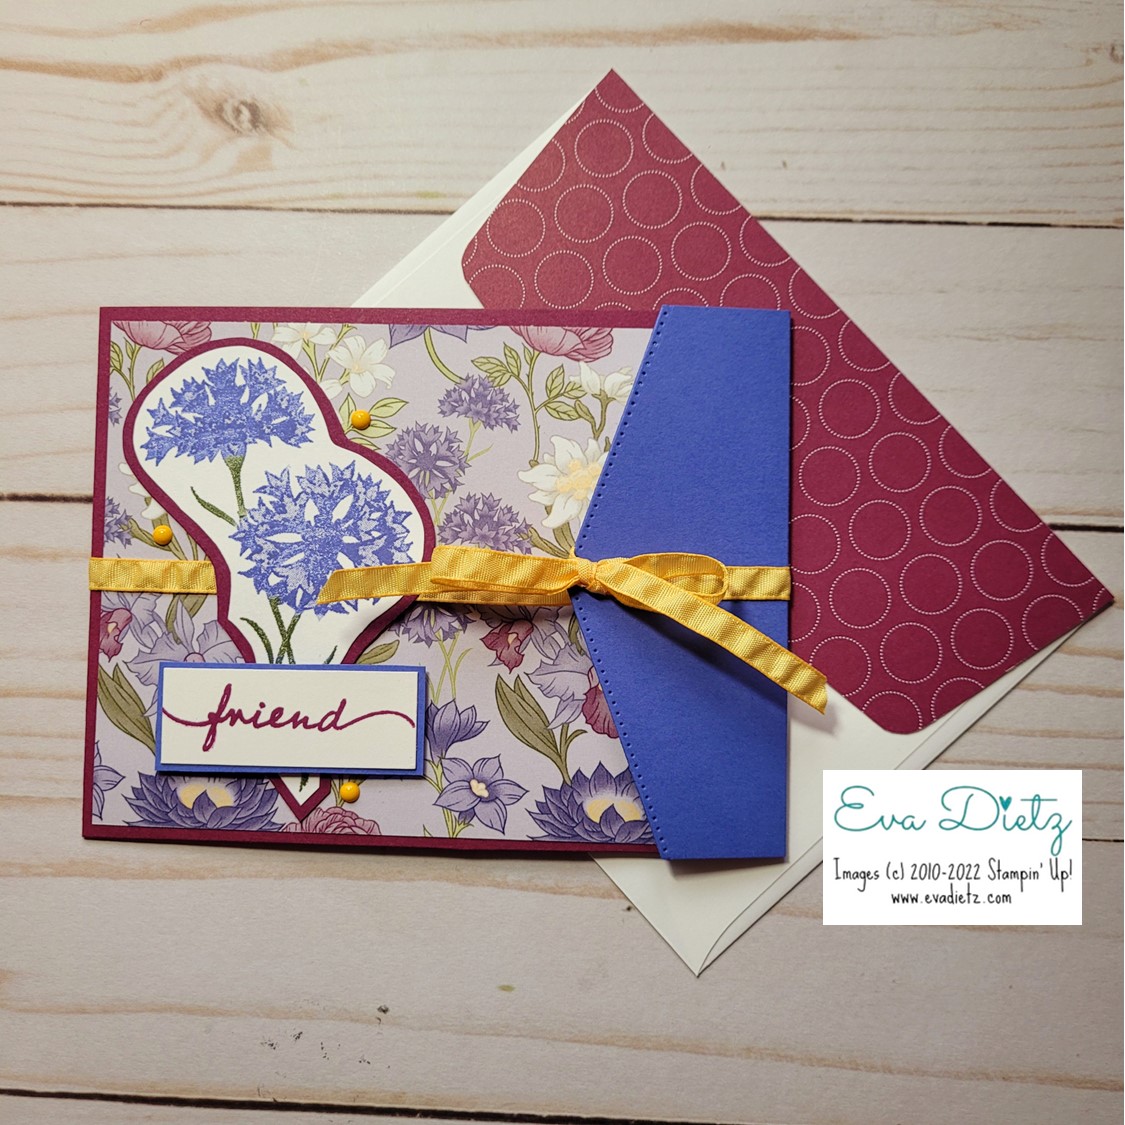
As I was creating cards for my June Stamp and Chat classes, I wanted to share a card from the upcoming (on July 1, 2022) Second Sale-a-Bration offering. This original card design used the Wonderful World stamp set and matching Designer Series Paper which will be free with a qualifying $100 purchase. These two products have a total value of at least $28. 

The bachelor button floral stamp caught my eye first, so I designed with that in mind. I used Orchid Oasis and Mossy Meadow Stampin' Write Markers to color the cling stamp in their individual sections and then gave it "the breath of life" to stamp it on the Basic White cardstock piece. I fussy cut around the image and mounted it on Rich Razzleberry cardstock and mirrored my previously cut edge. Set that aside for a few minutes.


This Rich Razzleberry card base is 4.25" x 11", scored at 5.5". 

The Wonderful World Designer Series Paper layer is 4" x 5.25". Adhere to card front.

Use a 4" x 5.25" layer of Basic White cardstock adhered on the inside of the card to write your personal message.

The Orchid Oasis Flap starts out as a 4.25" x 2.25" piece.  Use the "pocket" edge die from the Basic Borders Die set to create the "flap". Then score 1/2" on the opposite long side which will be attached to the back of the card opening. Using a 1/4" hole punch, punch a hole near the pocket tip of the flap for the ribbon to thread through.

A 22" long piece of Daffodil Delight Ruched ribbon is wrapped around the card. Feed the top piece ot ribbon through the hold in the flap, even up the ends, then tie a bow on the Orchid Oasis flap area.

Now attach your prepared Bachelor Button piece directly to the card front, as that is what will hold the closing ribbon in place.

The Friend tag is a 2" x 3/4" piece of Basic White cardstock stamped in Rich Razzleberry ink, mounted on a 2-1/8" x 7/8" piece of Orchid Oasis cardstock. Raise on dimensionals placing it over the base of the floral image.

Embellish with bling of your choice.

Decorate your Basic White envelope flap with a 2-3/8" x 6" piece of coordinating Designer Series Paper. Adhere and trim off excess.

Now you have a unique, one-of-a-kind card!


Go Straight to My Online Store with Filled Shopping Cart for You

The shopping cart is filled with the current products used to make this card.  You will need to creatively substitute for products not on the list which have retired. The tools listed below are not added, but you sure can. You can delete anything out of the cart you already have or add additional products you need.

Flap Over Fun Fold Card

115316 Rich Razzleberry Cardstock $9.25

159267 Orchid Oasis Cardstock $9.25

155558 Basic Border Dies $29

159238 Happiness Abounds Stamp Set for greeting $23

147091 Rich Razzleberry Classic Stampin’ Pad $8

159276 Basic White Cardstock $10.25

147158 Set of Neutrals including Mossy Meadow Stampin’ Write Marker $30

159219 Set of 5 including Orchid Oasis Stampin’ Write Marker $15

159236 Basic White Medium Envelopes $7.50

Retired – Daffodil Delight Ruched Ribbon

Retired – It’s My Party Enamel Dots (Daffodil Delight)

¼” hole punch – non Stampin’ Up!

9 products without the Sale-a-Bration freebie, cost $141.25
Select 159918 Wonderful World Stamp Set & Wonderful World Designer Series Paper – FREE with $100 purchase before Ship/Tax

If the shopping cart doesn't match my quantity and total above that means some items are currently unavailable, but should be returning to inventory pretty soon when more are received. 


Adhesives

104430 Stampin’ Dimensionals $4.25

144108 Mini Dimensionals $4.25

152803 Stampin’ Seal Adhesive $8

152814 Stampin’ Seal Refill $5.50

103683 Glue Dots $5.25


Tools

152392 Paper Trimmer $25

152391 Cutting Blades Multipack $12

103579 Paper Snips $11

149653 Cut & Emboss Machine $125

150673 Mini Cut & Emboss Machine $63

144107 Take Your Pick Tool $10

147042 Simply Shammy $8.50

Clear Stamp Blocks various sizes on page 149 of Annual Catalog

I'd love to read a comment about my original card design. What do you think of it?

Join my Sunflower Friends team at https://evadietz.stampinup.net/

Please contact me anytime if you have any questions 
or 
stampinwitheva@gmail.com

Wednesday, May 12, 2021

A Week of Hand-Penned Cards for YOU

I hope you love floral cards as much as I do!
Over the next week or so I will be sharing a new card 
daily with you made with products from the 
Hand-Penned Suite. The floral designs are so 
fabulous, I couldn't stop creating new cards to 
share with you!


This card uses the Hand-Penned Memories and More 
Card Pack. Those ready to use cards make card making 
a snap! Cutting the Scalloped Contour die from the 
Hand-Penned Designer Series Paper makes for a 
great look to try yourself.


The Memories and Mores Card Pack even comes with some 
stickers, so I put two on the inside of the card to give it a 
finished look. It's also a lovely surprise to the recipient!


It's always a great idea to give your card some height and 
using Dimensionals does the trick!

I've put together the list of products used at this link

Have fun making this easy card.


#stampinwitheva #stampinupproducts