Pages

Showing posts with label highland heather. Show all posts

Tuesday, September 13, 2022

Stampin' Up!s Amazing Silhouettes Stamp Set Makes the Prettiest Happy Birthday Card When Paired with Hand-Penned Petals Designer Series Paper. Give This a Try!

Us cardmakers never have enough ideas to create from and we are always looking for more ideas to try. So today I'm bringing you two versions of a "Window" or "Peek a Boo" Card. 


You will be able to make a bunch of these cards easily. They are quite simple.

CARD DIRECTIONS:

Cut Cardstock Base - 8-1/2" x 5-1/2", score at 4-1/4", top fold
Basic White for inner layer 4" x 5-1/4" and glue inside
Cut your choice of Designer Series Paper 3-1/4" x 5-1/2" along with 
another piece 3/4" x 5 1/2" for the inner card layer (go ahead and glue this strip inside)

3" x 3" Basic White to stamp the butterfly image on in your choice of matching ink

To make the window, decide if you are using a punch or a die. Pay attention to the amount of space you have on your left edge. (When you look at my two cards, you'll see the heart punch has more room on the left side than my circle die does.)

After you cut or punch your window, you will place your butterfly image in the window to see how it looks. You will be attaching your butterfly with dimensionals to the back of the patterned paper before applying it to the card front. You may find you'll need to trim some of the excess from the 3" square so it won't show in spots. After you have the butterfly attached, then add dimensionals to the patterned paper on each side of the butterfly and close to the corners, so when that section is applied to the card front the layer will be one consistent height.

3/4" x 3" Basic White for greeting of choice from the Go To Greetings Stamp set. Stamped in Memento Tuxedo Black Ink. Banner ends of tag were cut by hand with paper snips.

Finish with embellishing your butterfly with Pearl Basic Jewels.


I hope your card turned out beautifully!

At the link below I have compiled an extensive shopping list for this card and the needed tools. You have several options when you use this shopping list. You can add all to the cart if you want everything. But if you already have some of the items in your stamping collection, just uncheck each box by the items you have, and the rest of the items you need will go to your shopping cart when you click the "add to cart" button. Once in the online store you can set up a free account or check out as a guest. Either way this link goes to my store and I appreciate your business so much! Thank YOU!

One Retired Item is the Hand Penned Designer Series Paper but you can substitute any other patterne paper you already own.
**************

**************
Learn how to make beautiful cards by signing up for my exclusive "Insider" weekly newsletter. Each week the news will share card class information, Stampin' Up! promotions, hot tips from me, and two free tutorials! Subscribe to my Weekly Newsletter today. Plus you’ll receive a FREE 14 Card One Sheet Wonder Tutorial to download when you receive my thank you email for signing up.


Please contact me or email me at stampinwitheva@gmail.com if you have any questions about products, techniques, or card designs. Comments below are welcomed too!

Tuesday, May 24, 2022

Introducing the Wisteria Wishes Stamp Set

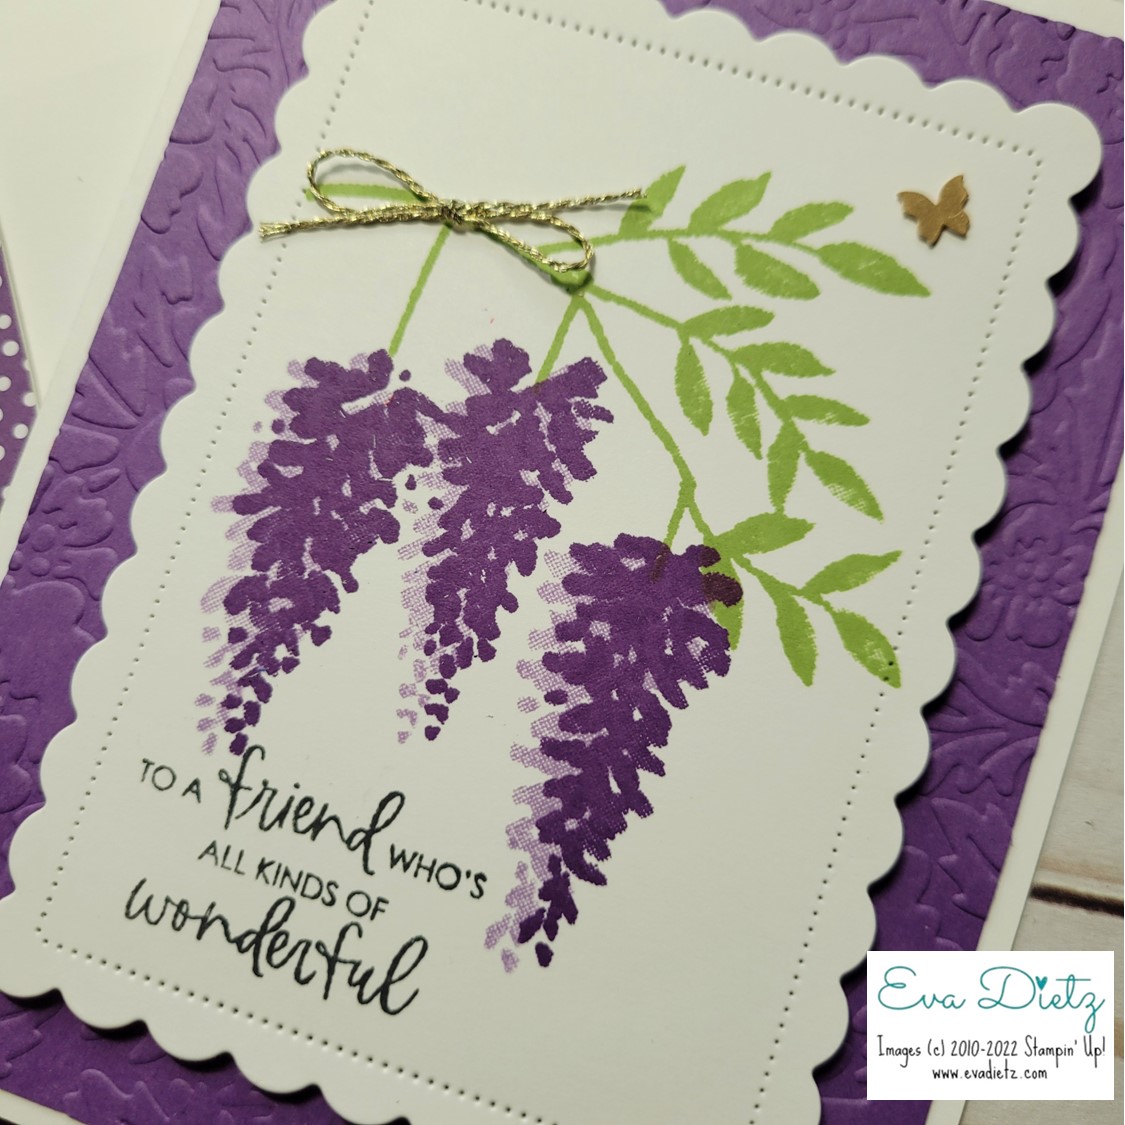
 Have you ever grown Wisteria? I haven't, but I have always admired those that can. So when Stampin' Up! placed the Wisteria Wishes stamp set in the new Annual Catalog, I had to get it. That way I can "grow' some beautiful Wisteria cards instead! You can "grow" some too!


Cutting and Assembly Directions:
1. Basic White cardbase 5.5" x 8.5" scored at 4.25"
2. 4" x 5.25" Gorgeous Grape cardstock embossed with the Pretty Flowers folder. Adhere to cardbase.
3. Die Cut Basic White cardstock 3.5" x 4.25" with Scalloped Contour Die as shown. 
4. With Pear Pizzazz ink stamp branch.
4. With Highland Heather ink stamp triple flower stamp.
5. With Gorgeous Grape ink stamp triple flower stamp over just a smidge.
6. With Memento ink stamp greeting.
7. With Dimensionals raise Scalloped stamped layer on Gorgeous Grape layer.
8. Add gold bow and butterfly
9. Decorate envelope flap with 2-3/8" x 6" piece of matching Designer Series Paper.

One thing I learned is you have to pay attention to stamp the leaf branch so the wisteria stems hang vertically. Stamp  the triple floral image first in Highland Heather, then again moved just a bit to the right in Gorgeous Grape ink.


Products Used to Create this Card:

159434 Wisteria Wishes $18.00 

159276 Basic White Cardstock $10.25

146987 Gorgeous Grape Cardstock $9.25

155428 Pretty Flowers Embossing Folder $7.50

155560 Scalloped Contour Dies $35.00

132708 Memento Tuxedo Black Ink $6

147099 Gorgeous Grape Classic Stampin’ Pad $8.00

147103 Highland Heather Classic Stampin’ Pad $8.00

147104 Pear Pizzazz Classic Stampin’ Pad $8.00

158136 Brushed Brass Butterflies $10

Retired – Fine Gold Cording

159236 Basic White Medium Envelopes $7.50

Envelope Flap paper is retired

Adhesives

104430 Stampin’ Dimensionals $4.25

144108 Mini Dimensionals $4.25

152803 Stampin’ Seal Adhesive $8.00

152814 Stampin’ Seal Refill $5.50

103683 Glue Dots $5.25

Tools

152392 Paper Trimmer $25.00

152391 Cutting Blades Multipack $12.00

103579 Paper Snips $11.00

149653 Cut & Emboss Machine $125.00

150673 Mini Cut & Emboss Machine $63.00

144107 Take Your Pick Tool $10.00

147042 Simply Shammy $8.50

Clear Stamp Blocks various sizes on page 149 of Annual Catalog


Please contact me anytime if you have any questions 
or 
stampinwitheva@gmail.com

With love and gratitude,

Thank you for taking the time to comment on my post, you've made my day!

Tuesday, March 22, 2022

Beautiful Spring Sampler Class Coming

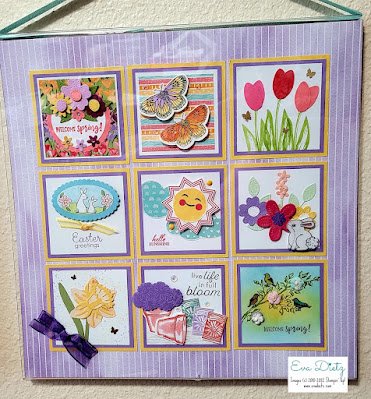
A group of my customers has requested making some seasonal samplers this year. So here is the spring one we will be making in early April.

This sampler incorporates over 60 different products in it! WOW! Some of the products are current and others retired, but for this one-of-a-kind masterpiece, it doesn't really matter. (My stamp studio is like a reference library of products for this project!)

It is my original design and took several days of working a bit, then coming back to it until I was happy with the final result.


The sampler always looks better in a frame!

Layout Sizes:

Left column of three squares: Basic White are 2-3/4" square, Highland Heather Layer are 2-7/8" square, and Crushed Curry layer are 3-1/8" square.

Top Middle Rectangle: Basic White is 3-1/2" x 4", Highland Heather Layer is 3-5/8" x 4-1/8" and Crushed Curry layer is 3-7/8" x 4-3/8".

Lower Middle Rectangle: Basic White is 3-1/2" x 5", Highland Heather Layer is 3-5/8" x 5-1/8", and Crushed Curry layer is 3-7/8" x 5-3/8".

Top Right Rectangle: Basic White is 2-3/4" x 6", Highland Heather Layer are 2-7/8" x 6-1/8", and Crushed Curry layer is 3-1/8" x 6-3/8".

Lower Right Square: Basic White is 2-3/4" square, Highland Heather Layer is 2-7/8" square, and Crushed Curry layer is 3-1/8" square


Stamp Sets Used:
Little Lady Bug
Jar of Love
Dragonfly Garden and matching punch
Blossoming Basket
Soft Spring
Wildly Happy
Under My Umbrella and matching punch
Colorful Seasons
Butterfly Basics
Inspiring Iris
Abstract Impressions
I'll Bee Yours 1/2020, Lovely Day 2/2020, and Bouquet of Hope 2/2021 stamp sets from previous Paper Pumpkin kits for bee, raindrop and small flower

Designer Series Paper:
Flowering Fields
Bird Ballad
You're a Peach
Botanical Butterfly and Butterfly Duet Punch

Designer Series Paper Selections for Purple 12 x 12 backing:
Hydrangea Haven
Sweet Talk
Hand Penned


Cardstock:
Granny Apple Green
Crushed Curry
Highland Heather
Basic White

Tasteful Label Dies

Black Embossing Powder
Versa Mark ink pad
Heat Tool

Stampin' Blends:
SU300 - shade of skin tone
Light Granny Apple Green
Light Old Olive
Light Highland Heather
Light Calypso Coral
Light Flirty Flamingo
Light Smoky Slate
Light and Dark Daffodil Delight

Stampin' Write Marker in Granny Apple Green

Ink Pads:
Gorgeous Grape
Granny Apple Green
Old Olive
Calypso Coral
Flirty Flamingo
So Saffron
Soft Sea Foam

Ribbon:
3/8" Gorgeous Grape Sheer Ribbon
1/8" Calypso Coral Sheer Ribbon

Embellishments:
Garden Gem
Holiday Rhinestone Jewels
Iridescent Rhinestones

Tools:
Paper Trimmer
Paper Snips
Fringe Scissors
Cut and Emboss Machine
Assorted Clear Stamp Blocks
Stampin' Seal Adhesive
Art Glitter Glue (available on Amazon)

Thanks for stopping by. I'd love to know in the comments who is your life would love a spring sampler as home decor?


Monday, March 21, 2022

Spring Sampler Home Decor Idea

Here's a fun home decor piece that you can make with your crafty friends. 

This Spring Sampler project was a swap organized by Debbie Henderson from Maine on Facebook. I was in Group F and eight other people besides myself signed up to make 9 identical squares with a spring theme using the colors Highland Heather, Daffodil Delight, and Basic White. By the set deadline, we agreed to mail the 8 squares to each person on the list along with keeping one for ourselves.


The Daffodil Delight was 3-1/4" square, the Highland Heather 3" square, and Basic White  2-3/4" square are your building squares. The margin around the edges was 1" so that is why the squares fit tightly on the background paper.

When all the squares were received then you could organize them however you thought best and mount them on a 12" x 12" piece of Designer Series Paper. The photo above is my finished result. I put my sunny square in the middle, with the swapped 8 arranged around mine. I love how it turned out.

So if you wanted to get a group of 8 friends plus yourself together, you could get a Spring Sampler of your own design made in a couple of hours. Each person brings their supplies and makes one square design then swaps them around the table. Pretty fun!

Use my sampler as inspiration for your own! 

Happy first Monday of Spring!


#shareyourmoment

Wednesday, January 26, 2022

Sweet Conversations Double Heart Card

 Hello Stamping Friends! Sorry to be absent here on the blog for the last couple of days, but I have been training my replacement at my church bookkeeping job. I only have two more training days and I am "free" starting Feb. 1, 2022!  I hope I've taught her everything she needs to know!

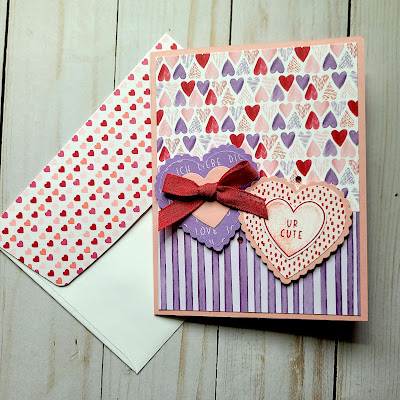
Last weekend I held my in-home stamping classes with a great group of 14 ladies over three sessions. This cute card I cased from Simply Sweet in Ink Designs because it was so darn cute! It was a popular one in class too!

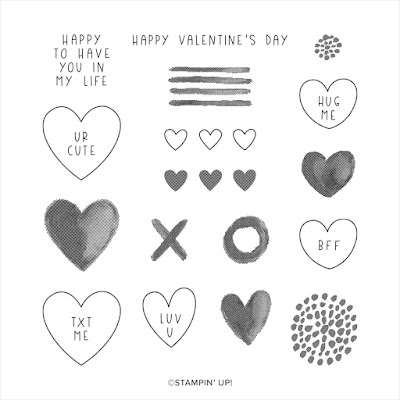
The Sweet Talk Suite in the January - June 2022 Mini Catalog makes up a beautiful card.


The envelope flap paper was retired "From My Heart" Designer Series Paper. Cut a piece 2-3/8" x 6." Adhere and trim off excess.


The Sweet Conversations stamp set makes for a cute inner card greeting and accent!


Here are the details you'll need to make your own cute card:

Cutting and Assembly Directions:

Blushing Bride card base - 5-1/2" x 8-1/2", scored at 4-1/4"

Sweet Talk Designer Series Paper (DSP) - two pieces - 1) 2" x 4" and 2) 3-1/4" x 4"

Scotch tape the two DSP pieces together on the backside before adhering to the card front.

Basic White cardstock cut 4" x 5-1/4" for inner card liner. 

Stamp with word greeting and heart border in Real Red ink, and the heart shading in Blushing Bride ink before adhering to the card inside. 

Next, you'll need 2-3/4" square of Highland Heather and Blushing Bride cardstock for the scalloped heart using the Heart Punch Pack.

Two DSP pieces 2-1/2" square with the plain heart punch from the Heart Punch Pack
.
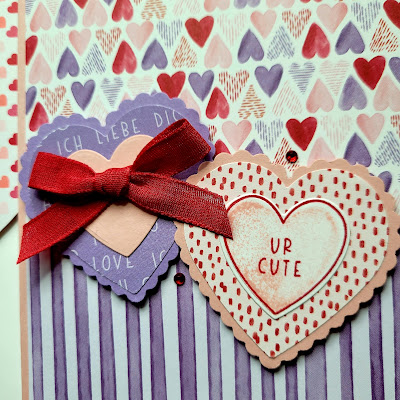
Using the Sweet Heart Dies you'll die cut one 1-1/2" square piece of Blushing Bride cardstock. Then with a 1-1/2" piece of Basic White stamp another heart like you did on the inner layer exactly the same, then die cut.

Assemble the three heart layers like the photograph. Using Dimensionals arrange and attach to card front as shown.

Tie a pretty bow with the Real Red Faux Linen Ribbon and attach it to the left heart with a couple of glue dots.

Finish the card with two red rhinestone jewel embellishments as shown.

What do you think? Darling card isn't it? Perfect to give to someone you LOVE for Valentines Day.

All the products used in this card can be purchased at the yellow box link below in my online store. 
If you don't have your own Demonstrator, I'd love to be yours! 

Have a Sweet Day!


#stampinwitheva #sudemo

Wednesday, January 12, 2022

Sweet Talk and Ladybugs Oh My!

Over the last couple of days, I've been designing, making, and planning for my monthly card class later this month. It is happening later than usual this month due to my Family European Vacation in the second half of December, serious jet lag upon returning home, and working four mornings a week training the new gal who will be taking over for me at my church bookkeeping job which I've resigned from as of Jan. 31. After 5-1/2 years there part-time, which I took to decompress after my teaching career, I realized I am decompressed enough and ready to focus solely on my Stampin' Up! business. The hubs would also like to travel to more National Parks and such, so I need the flexibility to do that.


The Hubs loves to take panoramic photos, so here is one of our Viking River ship docked in the town of Decin, Czech Republic. If you have never taken a Viking River Cruise, I highly recommend it. I have loved every trip we've taken with them!

**********
Are you one of those crafters, who loves to shop for beautiful products to make cards with? Well, you have come to the right place. Let me introduce you to two of my most favorite bundles
 in the Jan.-June 2022 Mini Catalog.

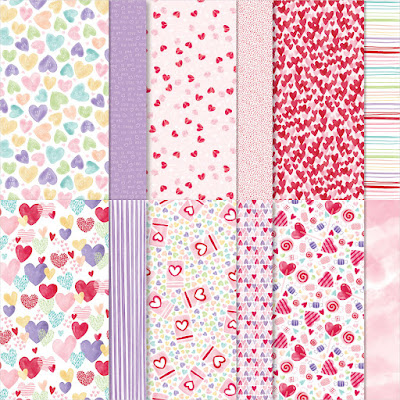
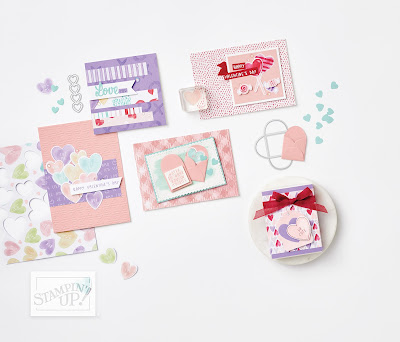
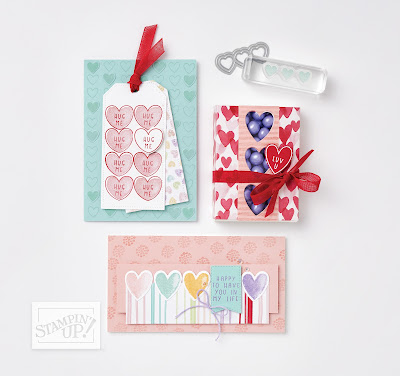
My first LOVE is the Sweet Talk Suite. The colors (Real Red, Petal Pink, So Saffron, Granny Apple Green, Pool Party and Highland Heather) are so vibrant and the stamps and paper are so fun. These products will definitely make anyone's Valentines the sweetest yet! And you'll not have any trouble mixing and matching the stamps and papers to create some beautiful cards as shown in the catalog images below.


The Suite Collection costs $86.25 with order # 157629


The Sweet Conversation Bundle costs $42.25 (a 10% savings) with order # 157624


12" x 12" Sweet Talk Designer Series Paper costs $11.50 with order # 157616

Sweet Conversations Stamp Set cost is $18.00 and order # is 157618


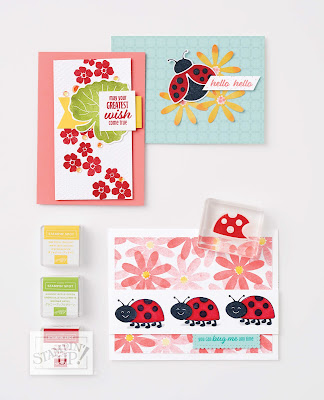
Some fun card ideas above and below


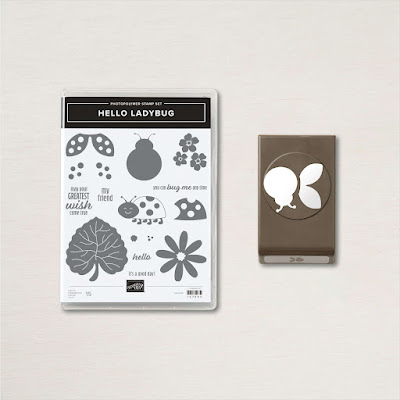
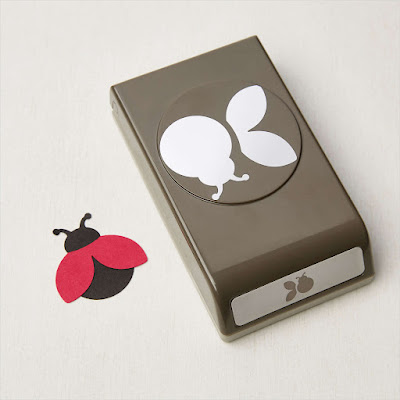
Now my next favorite new products are the Hello Ladybug Bundle. Stampin' Up! is so smart to make a ladybug punch for this darling stamp set. Assembling the ladybugs with their wings are super easy.


Hello Ladybug Bundle is $32.25 (10% savings) and order # 157699


The Ladybug Builder Punch is $18.00 and order # 157698

Hello Ladybug stamp set is photopolymer which makes it so easy to line up your images. This set costs $18.00 and the order # is 157693


Here's a couple fun card designs you can case from the catalog.

Be sure to come back to my blog here on Jan. 24 as that is when I'll be showing my card class designs complete with measurements and products used.  You'll still have plenty of time to make some Valentine's for your family and friends.

You can get a head start and order any of these products at my yellow link below. With every online order over $50 before shipping and tax, you'll earn Loyalty Points with me PLUS a free gift if you use January's Host Code of  MHCYEERS (Visit my page tab above "Shop Online Today" to read all about the special gift) PLUS Sale-a-Bration rewards now through the end of February. 

Now that's how you make your money go farther these days. 

If you don't have your own Stampin' Up! Demo, I'd love to be yours! You can be anywhere in the USA and we can be friends!


#stampinwitheva #sudemo #valentines
 

Friday, June 4, 2021

Sweet Ice Cream Impossible Card

Does this card look impossible to make? It isn't really. Plus I put the impossible portion on an actual card base so you can write a note and include a gift card for the lucky birthday boy or girl.

The Ice Cream Cone Builder Punch makes the cutest "Disney-ish" popsicles, by turning the scoop 180 degrees. Credit goes to Patty Bennett for designing these popsicles.

So grab your Sweet Ice Cream Stamp Set, the cone punch, and Ice Cream Corner Designer Series Paper and let's get started!


After you get your Highland Heather cardstock scored and cut like my diagram shows, all you have to do is gently take hold of the side that is split in two and flip one half of that side over 180 degrees. The center piece will stand up and you'll have the base correct like it is shown in my card photos. 

I went ahead and glued the impossible piece to my Soft Sea Foam card base to hold it in place while I worked on adding the Designer Series Paper pieces and making the two Disney popsicles.


Start with the Designer Series Paper:
You will need two pieces of each pattern, and glue as you go.
Striped - 1" x 1-7/8"
Sprinkles - 1-7/8" x 2-1/2"
Ice Cream Cones - 1-7/8" x 2-3/4"

Stamp the dotted image with Highland Heather Ink as shown before 
attaching the Happy Birthday greeting.

Greeting:
Basic White cardstock - a piece 2" x 2-3/4" will allow you to stamp both sayings using Memento Tuxedo Black ink. You'll have space to fussy cut the large saying and snip the little saying into three parts. Mount the greetings on scraps of Poppy Parade cardstock. Fussy cut out the larger greeting. Mount the small words and trim as needed. Glue the little words flat to card base. Raise up the larger greeting with dimensionals.

Building the 2 Disney Popsicles:
Punch out two scoops in Early Espresso with the Ice Cream Cone Builder punch.
If you have a small heart punch and regular hole punch, 
create the bow in Poppy Parade and attach to one scoop. (Or you can make it by hand if needed.)
With another scrap of Poppy Parade cut slightly less than half of the circle end of the scoop to make the "shorts" and attach.  If you have some Bumblebee enamel dots add those to the shorts as shown.
For the popsicle sticks - stamp two narrow scraps of Cinnamon Cider with stick outline stamp in Early Espresso ink. Stamp woodgrain also in Early Espresso. Fussy cut out and scotch tape to back of scoops. Mount popsicles on upright piece with mini dimensionals.


So now you've done the impossible! You've made your own Impossible Card! 
This fun fold works for any occasion so have fun with it.

Order the products used in this card with this link.

Happy Stamping,


#stampinwitheva #stampinupproducts   

Saturday, May 29, 2021

Sweet Ice Cream Bundle Card #2

Everyone loves a good party, and this birthday card will go perfect with any style birthday party you have coming up! You can whip out a bunch of these quick if you do it in an assembly line fashion.

The Ice Cream Cone Builder Punch is just so versatile! Turn the cone upside down and you have a party hat! This simple design can be made in any color your heart fancies!


I did not write down who's card I Cased for this layout, so if it is yours, please let me know so I can give you the credit you deserve.


A quick peek inside for another added party hat! So fun!

The Products used in this card are available at my online store by clicking on the button below.

Blackberry Bliss Cardstock
Highland Heather Cardstock
Basic White Cardstock
Ice Cream Cone Builder Punch
Ice Cream Corner Designer Series Paper
Layering Circles Dies
Retired Itty Bitty Shapes Punch Pack
Retired Dots Embellishments
Cut and Emboss Machine
Dimensionals
Seal Adhesive
Glue Dots

Thanks for visiting today. Happy creating!


#stampinwitheva #stampinupproducts   

Wednesday, May 12, 2021

A Week of Hand-Penned Cards for YOU

I hope you love floral cards as much as I do!
Over the next week or so I will be sharing a new card 
daily with you made with products from the 
Hand-Penned Suite. The floral designs are so 
fabulous, I couldn't stop creating new cards to 
share with you!


This card uses the Hand-Penned Memories and More 
Card Pack. Those ready to use cards make card making 
a snap! Cutting the Scalloped Contour die from the 
Hand-Penned Designer Series Paper makes for a 
great look to try yourself.


The Memories and Mores Card Pack even comes with some 
stickers, so I put two on the inside of the card to give it a 
finished look. It's also a lovely surprise to the recipient!


It's always a great idea to give your card some height and 
using Dimensionals does the trick!

I've put together the list of products used at this link

Have fun making this easy card.


#stampinwitheva #stampinupproducts