Pages

Showing posts with label scalloped contour dies. Show all posts

Monday, January 30, 2023

Stampin' Up!s Country Floral Lane Suite Creates the Most Lovable Valentine Card Ever for Your Special Someone

Valentines is just a couple weeks away, so please help yourself to my original card layout as inspiration for what you have in your papercrafting stash. (The Stamp Set and Punch Bundle are currently sold out and Stampin' Up! is predicting it will receive more inventory by April 17, 2023. However, that doesn't really help you make Valentines right now, thus my suggestion to use what you already have in your stash.)

Your loved one will appreciate any beautiful handmade card you create when it is given with love. But if you do already own the Country Floral Lane Bundle and some of the Country Floral Lane Designer Series Paper then you will be ready to create this card that's full of love card very easily with my directions below.


Close Up of Hearts and Leaves arrangement.


Country Floral Lane Bundle
Images (c) Stampin' Up!

Country Floral Lane Designer Series Paper
Images (c) Stampin' Up!

Supplies and Cutting Dimensions

1. Petal Pink cardstock card base cut 5-1/2" x 8-1/2", scored at 4-1/4"

2. Sweet Sorbet cardstock layer cut 3-7/8" x 5-1/8" and adhere to card front.

3. Country Floral Lane Designer Series Paper (DSP) cut 3-3/4" x 5" and adhere to Sweet Sorbet Layer.

4. Basic White cardstock 2-3/4" x 4", die cut with the Scalloped Contours Dies using your die cutting machine.

5. Stamp the "With Love" in Sweet Sorbet ink first on the scalloped rectangle before adhereing the hearts and leaves as shown in the photo. Using Dimensionals you can adhere the Basic White scalloped rectangle to the card front.

6. Assorted Scraps of Basic White that will become the two large punched hearts, two small punched hearts and two leaves stamped with the Country Floral Lane stamp set in Petal Pink, Sweet Sorbet, and Mint Macaron ink pads using clear stamp blocks. Then use the Country Bouquet Punch and punch out the stamped images.

7. Arrange the punched images as shown in the photo using Glue Dots, Tombow Multipurpose Glue, and Mini Dimensionals. Add Basic Pearl Jewels for embellishment.

8. Inner card layer in Basic White cardstock cut 4" x 5-1/4", stamped with the Happy Valentines Day greeting in Sweet Sorbet ink. You can also add a couple hearts inside punched out using one of the coordinating pieces of the DSP.

9. Decorate your Basic White Medium Envelope flap with a piece of the matching DSP cut at 2-3/8" x 6", adhere to exterior of envelope flap and trim off excess with paper snips.

Other Tools You will Need:
Paper Trimmer
Take Your Pick Tool
Stampin' Seal adhesive

Have fun making this card your own. You could try a landscape positioned card too. Happy early Valentines Day!

***************

Learn how to get more done in less time by signing up for my exclusive "Insider" bi-monthly newsletter. Twice a month the news will share card class information, Stampin' Up! promotions, hot tips from me, and free tutorials! Subscribe to my Bi-Monthly Newsletter today. Plus you’ll receive a FREE 14 Card One Sheet Wonder Tutorial to download when you receive my thank you email for signing up.


Please contact me or email me at stampinwitheva@gmail.com if you have any questions about products, techniques, or card designs. Comments below are welcomed and appreciated too!

Wednesday, May 25, 2022

Color & Contour Teepee Fun Fold Card

 A long time ago I was given a Teepee Fun Fold Card similar to my photo below. I set the card on my display shelf and often admired it. For Stamp and Chat class earlier this month I decided to finally give it a go with my customers. My fears and worries were unfounded. Everyone did great making theirs.


Standing with it's coordinating envelope.


A better front view.


Fully open, laying flat. Notice the location of the white brad closure.

Cutting Dimensions:
The base is made from three 4" squares of Basic White cardstock, scored diagonally and glued as shown.
With the Sweet Sorbet ink, stamp the floral image randomly all over the card base.
Follow with the Memento ink with floral outline image matched each previously stamped flower.
The Sweet Sorbet triangle is cut diagonally from a 3-3/4" square. Adhere to card front.
The Basic White triangle is cut diagonally from a 3-1/2" square. Stamp the sentiment on the Basic White Triangle. Then adhere to Sweet Sorbet triangle.
Finish with the embellishment.
The extra flower needs a 2" square scrap of Basic White raised with dimensionals after stamping and die cut.

Form the teepee, mark a small pencil dot where you want the mini hole punch to be, punch the hole, and place the brad.

During class we discovered it was very hard to have the greeting be level, due to the teepee shape when assembled. It doesn't matter in my opinion, but if it does to you, just draw a light pencil line to help you aim the sentiment stamp. Then erase with a white eraser after you have allowed the ink to dry well.


When folded in half to make this shape, it fits perfectly into our A2 envelope.


Products used to create this card and available at my online store (link below):

159276 Basic White Cardstock $10.25

154994 Color & Contour Stamp Set $21.00

155560 Scalloped Contour Dies $35.00

159268 Sweet Sorbet Cardstock $9.25

159216 Sweet Sorbet Classic Stampin’ Pad $8.00

132708 Memento Tuxedo Black Ink $6

159236 Basic White Medium Envelopes $7.50

132708 Memento Tuxedo Black Ink $6

159186 2022-24 In Color Matte Decorative Dots $8.00

Retired White Brads

1/16" hole punch - not SU

Adhesives

104430 Stampin’ Dimensionals $4.25

144108 Mini Dimensionals $4.25

152803 Stampin’ Seal Adhesive $8.00

152814 Stampin’ Seal Refill $5.50

103683 Glue Dots $5.25

Tools

152392 Paper Trimmer $25.00

152391 Cutting Blades Multipack $12.00

103579 Paper Snips $11.00

149653 Cut & Emboss Machine $125.00

150673 Mini Cut & Emboss Machine $63.00

144107 Take Your Pick Tool $10.00

147042 Simply Shammy $8.50

Clear Stamp Blocks various sizes on page 149 of Annual Catalog


Please contact me anytime if you have any questions 
or 
stampinwitheva@gmail.com

With love and gratitude,

Thank you for taking the time to comment on my post, you've made my day!

Monday, February 28, 2022

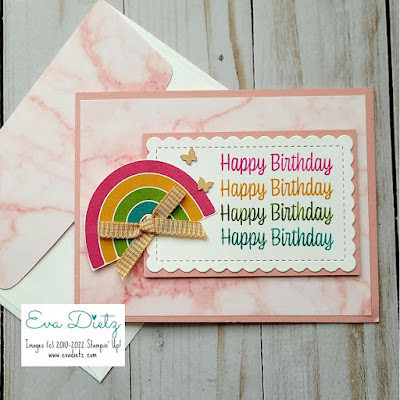
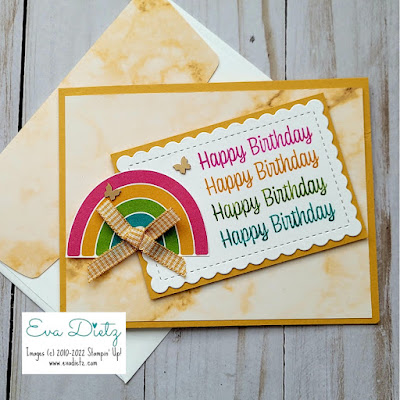
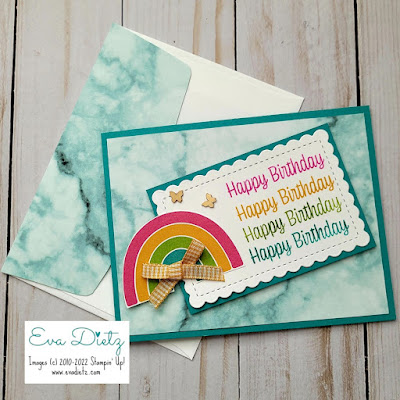
Simply Marbleous Rainbow Birthday Card

Wahoo! I have made another YouTube video! These cute cards I'll be sharing today are made with the Sunshine & Rainbows Designer Series Paper and the Simply Marbleous Designer Series Paper from the current Sale-a-Bration brochure. 

If you love these cards, then you won't want to miss out on getting the products I used, since today is the last day to select Jan. & Feb. 2022 Sale-a-Bration rewards with a purchase of $50 before shipping and tax.  You can order using the link at the end of this post.

Cutting Sizes and Supplies needed to make these cards:

Blushing Bride or Bumble Bee or Bermuda Bay cardstock for the card base
 cut 4-1/4" x 11", score at 5-1/2"

Simply Marbleous Designer Series Paper (DSP) layer cut at 4" x 5-1/4"

Blushing Bride or Bumble Bee or Bermuda Bay cardstock cut at 2-5/8" x 3-7/8"

Basic White cardstock cut at 2-3/4" x 4"
Scalloped Contour Dies - 3rd size die
Cut and Emboss Machine

Stamp Happy Birthday greeting from Sweet as a Peach photopolymer stamp set 
using clear stamp block H with Magenta Madness, Bumble Bee, Granny Apple Green, and Bermuda Bay ink pads.

Fussy cut the rainbow image from the Sunshine and Rainbows Designer Series Paper.

Adhere the smaller cardstock rectangle to the stamped scalloped rectangle, the with liquid glue affix the rainbow to the side as shown in the photo at whatever angle you think looks best. Raise this grouping up with Dimensionals.

Tie a bow with the 1/4" Bumblebee Gingham ribbon and affix it with a glue dot to raised layer.

Using a Take Your Pick tool add two Brushed Brass Butterflies to finish the card front.

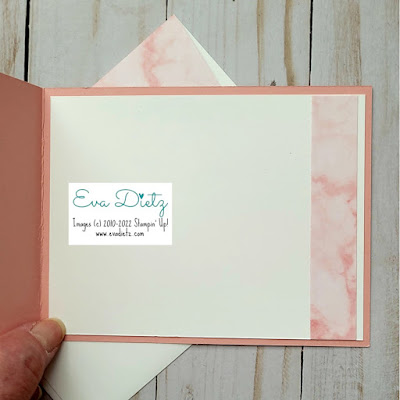
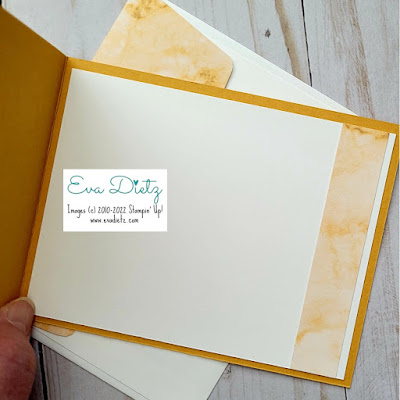
For the inside of the card - cut a piece of Basic White 4" x 5-1/4" and a strip of the Simply Marbleous DSP cut 3/4" x 4" to the side of the inner layer as shown in photos.

Be sure to stamp your name stamp on the back of your card.

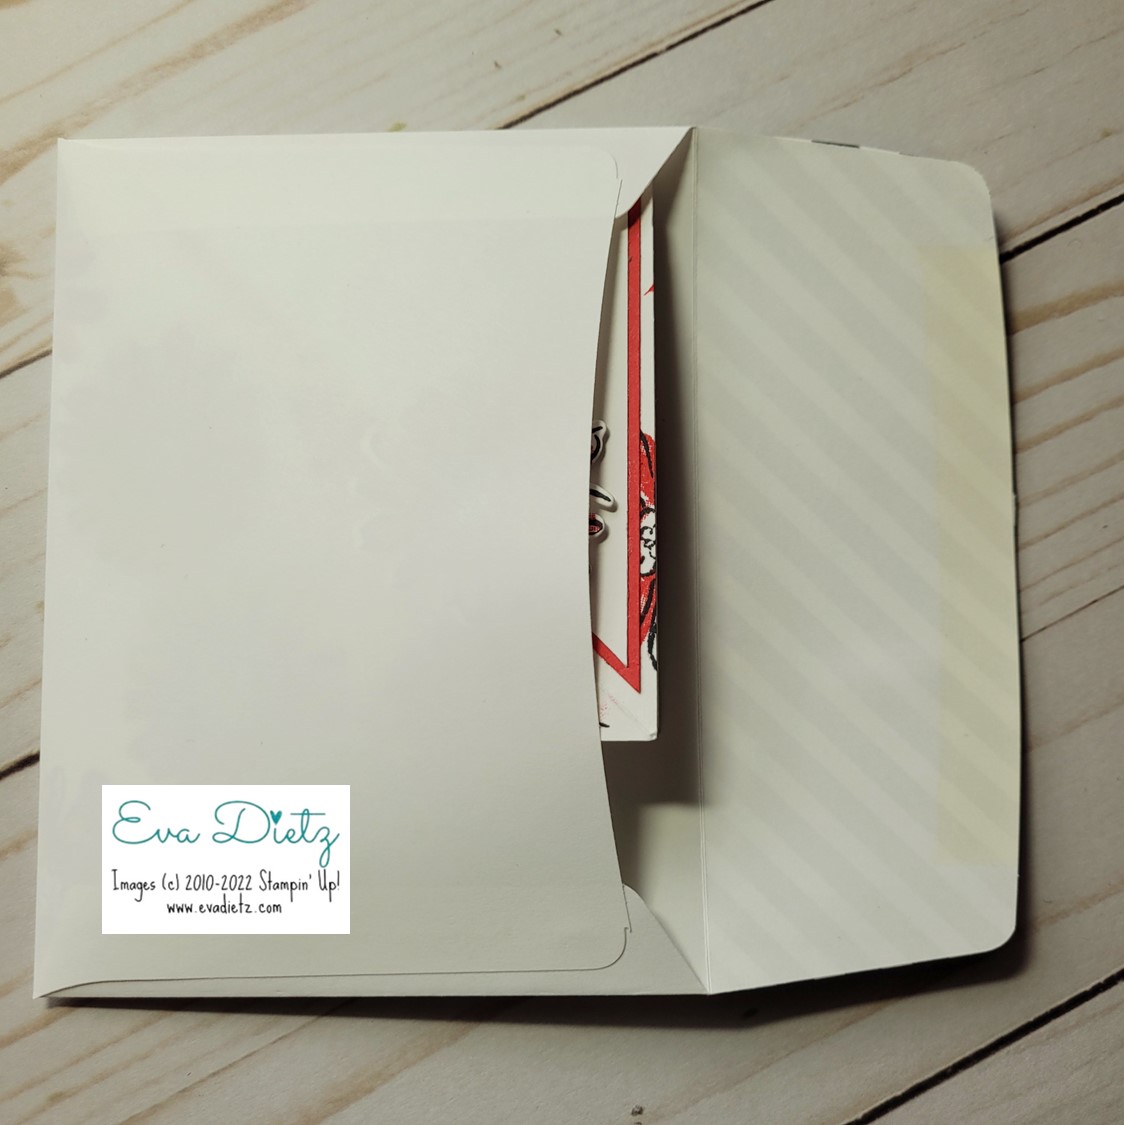
For the matching envelope flap, use the Simply Marbleous DSP cutting a piece 2-3/8" x 6", adhere securely to the exterior of the Basic White envelope flap, then trim off excess using paper snips.

All done! 


Have fun creating these cards. Leave me a comment too!


Monday, January 31, 2022

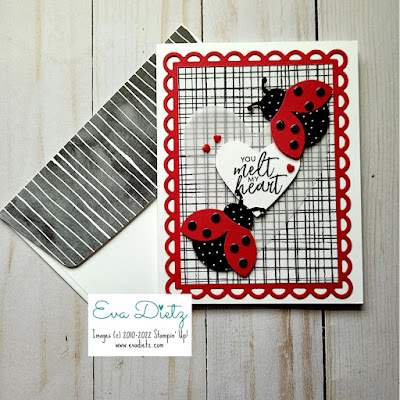
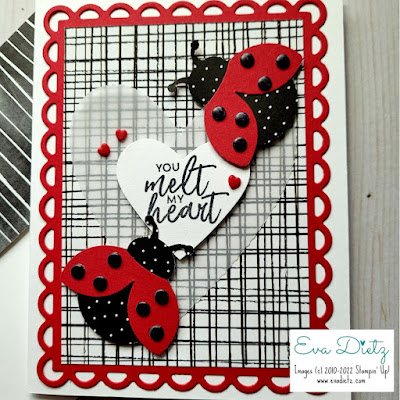
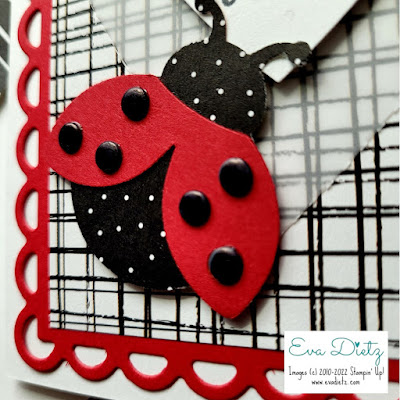
Hello Ladybug Valentine to Melt For

Have you ever caught a ladybug? These Ladybugs are easy to catch and make into a beautiful card. 

Ladybugs are a promise that spring is just around the corner. But in the meantime, they sure make a fun Valentine to give family or friends. This card was inspired by Christie Redding but I made it my own with a different greeting and different black dots on the wings.


Don't you just love the bold color combination of Black, White and RED? It is one of my favorites!


Products used in creating this card:

Basic White cardstock for card base
Real Red cardstock for layer and ladybug wings
Scalloped Contour Dies
Ladybug Builder Punch
Pattern Party Designer Series Paper for plaid layer (3-1/4" x 4-9/16") and ladybug bodies
Cardstock Vellum
Retired Stitched Be Mine Dies
Sweet Ice Cream stamp set for greeting
Memento Tuxedo Black Ink
Retired Heart Punch
Resin Hearts embellishments
Mini and Regular Dimensionals
Paper Trimmer
Take Your Pick Tool
Paper Snips for trimming Vellum Heart
Your favorite Adhesives

Envelope Flap - 2-3/8" x 6" piece of Hand Penned Designer Series Paper


A little story...

This ladybug's spots are actually very retired flat metal adhesive dots that came in a variety of color families at least 7-8 years ago when I was a newish demonstrator. As the years have passed, I have used a few here and there, but for this class card I needed 12 dots per card and my customers wanted a total of 22 cards over those three class sessions I had last weekend. So I needed 264 dots! I didn't have 264 black dots! So what did I do? I pulled out my black Sharpie pen and started coloring those dots. That worked perfectly! So I solved two problems at once - use up some old dots and create plenty of black ones for those ladybugs! Once again - Sharpies came to the rescue!

I encourage you to give this card layout a try and make it your own! The majority of the products used in this card are current and available at my online store at the yellow box link below.

Happy Stamping!


#stampinwitheva #sudemo

Wednesday, November 24, 2021

Diagonal Double Pocket Fun Fold Card

When my dear friend and downline, Anne, and I got together at her home to watch Stampin' Up!s virtual OnStage at Home convention, we planned to have a day of card making prior to the event starting. We agree to bring three cards each to teach the other. We had a big laugh when we both revealed the Double Pocket fun fold cards we brought.  

Upon closer inspection, hers is different than mine, but it mainly has to do with which way you fold the flaps and card base section. Don't forget to affix the flaps down and glue up the sides to keep the pocket cards in their pockets.


Decorate the card front however you would like. For this sample, the Scalloped Contour Dies were used along with a retired Sale-a-Bration stamp set called A Touch of Ink. Little flowers from the Hydrangea Haven stamp set were stamped in Balmy Blue ink and Rhinestones were added to the flower centers for some "bling."


On a piece of Basic White you can stamp the large hydrangea flower in Highland Heather ink and Old Olive ink, then die cut and attach with dimensionals to the inside front of the card. 
With the same size Basic White cardstock from yesterday's card, stamp the little flower collection on each pocket page for a fun touch!

*********************

You can use the same templates I shared in yesterday's post for cutting and folding. The difference is in the direction you fold to the front or to the back.
Template 1: 
The smaller upper left fold is the same folded to the inside. The larger lower right fold is folded towards the other side of the paper, NOT folded to the inside like yesterday.

Template 2:
Step 2 is the same with folding that section up. Step 3 is different instead of that piece becoming the card back it becomes the card front, so the pockets are hidden until the card is opened.

*****************
I think this Double Pocket Fun Fold is cool because now you have two ways to use your Designer Series Paper for making beautiful cards for any occasion!

If you like what you see here, don't forget to sign up for my email list at the tinyurl link below. You'll receive a free 14 card One Sheet Wonder Tutorial!
Have a blessed day!


#stampinwitheva #sudemo 
#funfolds #pocketcards

Monday, November 15, 2021

Cute Snowflake Holiday Card

I am still crushing on the Gingerbread and Peppermint Suite from the July-December 2021 Fall Catalog. This layout was inspired by Ann Krucek, but I changed up a bit with the ribbon and bow addition.

This Suite makes it so easy to create beautiful cards that are sure to be well received. The color scheme of Cinnamon Cider, Real Red, and Old Olive along with Basic White goes together very well.


Products Used to Create this Card:

Cinnamon Cider card stock card base.

Basic White 4” x 5-1/2” die cut with largest scallop contour dies -
then adhere to card base.

Gingerbread and Peppermint Designer Series Paper (DSP) cut 3” x 4-1/4”

Retired Basketweave Metallic ribbon combo pack - cut a 5-1/2" piece to wrap around DSP layer, scotch tape ends to back of DSP.

Basic White  2-1/2" square cut out with 2-1/4" Layering Squares die.

Frosted Gingerbread stamp set sentiment stamped in Real Red Ink. 

Adhere flat to DSP/ribbon combo.

Tie a separate bow and affix with glue dots next to the scalloped square as shown in the photo.

Use Gingerbread and Peppermint dies to cut out snowflake from DSP and raise on dimensionals.

Fussy cut two "mints" and glue one flat and raise one with mini dimensionals.

Finish with retired Cinnamon Cider InColor enamel dots.

Die cut one more snowflake and cut in half to replicate the inner card layer.

So there you go! One very cute card you too can make. Get these some of these products on sale between Nov. 16-18 by visiting my online store at the yellow box link below. Happy shopping!

Thursday, June 24, 2021

Hand Penned and Foil Butterfly Card

Yesterday I shared my tent/top fold version of my original card design. Today is the side fold/vertical version. Now you have two designs to make or chose between. They both are stunning in my biased opinion. 


This card has a blank basic white liner to write your own message on.


Here's the Products I used that are available at my online store (click below).

Basic White and Pale Papaya cardstocks
Scalloped Contour Dies
Tasteful Textures Embossing Folder
Cut and Emboss Machine for Dies and Embossing Folder
Hand-Penned Designer Series Paper
Double Oval Punch
Champagne Foil
Butterfly Brilliance Bundle
Dragonfly Garden stamp set for greeting
Genial Gems for spine of butterfly
Dimensionals

Today also happens to be FREE SHIPPING DAY with Stampin' Up! so you could save a minimum of $6.95 with a $50 qualifying order USD at my online store link below.

I hope you have a wonderful day!


#stampinwitheva #stampinupproducts