
Pages

Showing posts with label gold metallic thread. Show all posts

Tuesday, May 24, 2022

Introducing the Wisteria Wishes Stamp Set

 Have you ever grown Wisteria? I haven't, but I have always admired those that can. So when Stampin' Up! placed the Wisteria Wishes stamp set in the new Annual Catalog, I had to get it. That way I can "grow' some beautiful Wisteria cards instead! You can "grow" some too!

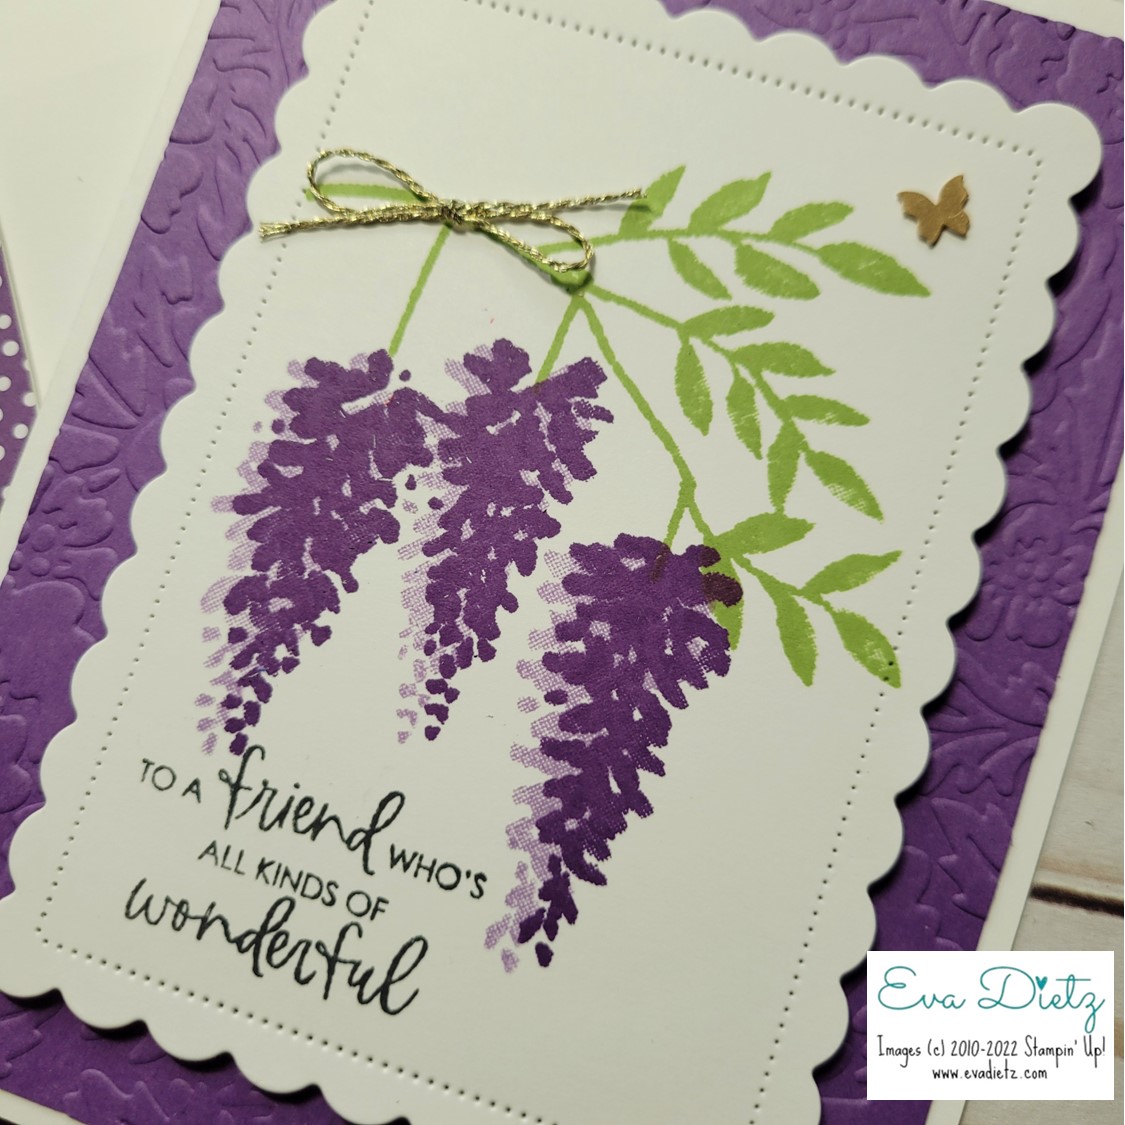
Cutting and Assembly Directions:
1. Basic White cardbase 5.5" x 8.5" scored at 4.25"
2. 4" x 5.25" Gorgeous Grape cardstock embossed with the Pretty Flowers folder. Adhere to cardbase.
3. Die Cut Basic White cardstock 3.5" x 4.25" with Scalloped Contour Die as shown. 
4. With Pear Pizzazz ink stamp branch.
4. With Highland Heather ink stamp triple flower stamp.
5. With Gorgeous Grape ink stamp triple flower stamp over just a smidge.
6. With Memento ink stamp greeting.
7. With Dimensionals raise Scalloped stamped layer on Gorgeous Grape layer.
8. Add gold bow and butterfly
9. Decorate envelope flap with 2-3/8" x 6" piece of matching Designer Series Paper.

One thing I learned is you have to pay attention to stamp the leaf branch so the wisteria stems hang vertically. Stamp  the triple floral image first in Highland Heather, then again moved just a bit to the right in Gorgeous Grape ink.


Products Used to Create this Card:

159434 Wisteria Wishes $18.00 

159276 Basic White Cardstock $10.25

146987 Gorgeous Grape Cardstock $9.25

155428 Pretty Flowers Embossing Folder $7.50

155560 Scalloped Contour Dies $35.00

132708 Memento Tuxedo Black Ink $6

147099 Gorgeous Grape Classic Stampin’ Pad $8.00

147103 Highland Heather Classic Stampin’ Pad $8.00

147104 Pear Pizzazz Classic Stampin’ Pad $8.00

158136 Brushed Brass Butterflies $10

Retired – Fine Gold Cording

159236 Basic White Medium Envelopes $7.50

Envelope Flap paper is retired

Adhesives

104430 Stampin’ Dimensionals $4.25

144108 Mini Dimensionals $4.25

152803 Stampin’ Seal Adhesive $8.00

152814 Stampin’ Seal Refill $5.50

103683 Glue Dots $5.25

Tools

152392 Paper Trimmer $25.00

152391 Cutting Blades Multipack $12.00

103579 Paper Snips $11.00

149653 Cut & Emboss Machine $125.00

150673 Mini Cut & Emboss Machine $63.00

144107 Take Your Pick Tool $10.00

147042 Simply Shammy $8.50

Clear Stamp Blocks various sizes on page 149 of Annual Catalog


Please contact me anytime if you have any questions 
or 
stampinwitheva@gmail.com

With love and gratitude,

Thank you for taking the time to comment on my post, you've made my day!

Saturday, October 16, 2021

Bring on Winter with this Snowflake Ornament Card

Christmas card sending season is coming quickly. Here’s another easy idea to make with similar supplies you may have in your collection, if you don’t already have the Textures and Frames Sale-A-Bration stamp set or Peaceful Prints Sale-A-Bration Designer Series Paper.  You may find people selling these items on Etsy or Ebay as two places to check.

Ornament portion of card cased from Kathryn Brown. Rest is my design.


Products Used in creating this Card:

Basic Black cardstock cardbase
Bsaic White cardstock layer
Recently Retired - Peaceful Prints Designer Series Paper layer 
Black and White 1/4" Gingham Ribbon
Basic Black cardstock layer
Bsaic White cardstock layer
Recently Retired - Textures and Frames Sale-a-Bration stamp set - 
Circle image stamped in Real Red ink
Gold heat embossed Ornament Hanger comes from Retired Embellished Ornaments stamp set
White heat embossed Snowflake comes from  Retired Stitched with Cheer stamp set
Christmas Wishes greeting comes from Banner Year stamp set
Gold Embossing Powder
White Embossing Powder
Versamark ink
Heat Tool
Memento Tuxedo Black ink
Retired Fine Gold Braid Thread


Here’s a close up of the fun stamped and embossed "Ornament.". If you don’t have the stamp set, but have similar materials, one trick you could try is take some scrap cardstock, then punch or die cut a similar size circle in it and use it as a stencil to sponge dauber your ink through to create a round ornament. Any snowflake stamp you own that would fit inside your circle would be just fine to heat emboss with the white embossing powder. Try some different combinations for yourself! That’s the fun of being creative. Seeing what results from the ideas you have in your head!

Thanks for stopping by!


#stampinwitheva #sudemo
#stampinup #christmascard

Monday, September 21, 2020

Pick a Punch Holiday Banner Card

Here's an incredibly easy holiday card you can make using any holiday paper you have on hand. This card was cased from www.happystampin.nl.  I used the Pick A Banner Punch from Stampin' Up! All I had to do was slice 1/2" strips of the Heartwarming Hugs Designer Series Paper, then punch the banner end and then snip to the length. I wanted on the raised layer of Whisper White cardstock. You can't see it here in the photo, but I used mini-dimensionals to raise the banner ends up a bit to give a "flying in the wind" effect. Then I wrapped the gold cord around the layer twice, tied a knot, then tied a bow. I recommend that you tie a knot at the end of the cord when you cut it to keep it from fraying. Any holiday greeting stamp can be used, but I used the Wrapped in Christmas stamp set and Mossy Meadow ink.


Stampin' Up! supplies used in today's blog post - Click on any link to be directed to my online store for easy ordering.


I love hearing from you! Please leave your questions or comments below.


Follow me on this Blog over in the right column.

                     Follow me on Pinterest.

                     Follow me on Instagram.

                     Subscribe to my You Tube Channel for paper crafting tutorials.

 Thank you for visiting today! As always, thank you for choosing me as your Stampin’ Up! Demonstrator!!


Saturday, January 27, 2018

Original Valentine


This elegant Valentine's card was an experiment with an assortment of products I had on hand. Some are retired and some came from the January 2017 Paper Pumpkin subscription kit leftovers I still had. The color scheme was Powder Pink and Rose Red cardstocks, paired with Gold Foil and Gold metallic thread.  Thanks for taking a look. Hope the layout inspires you!


Sunday, July 12, 2015

July Club Card #1 - an Original


This was a fun card to design. I used two new stamp sets - Remarkable You (Calla) and Watercolor Words. The new Brick Embossing Folder was fun to work with too on the Big Shot with the lighter weight Whisper White. I used the Oval Framelits to cut out the lightweight Whisper White cardstock, which were stamped with Tuxedo Black Memento Ink for the images. I used Crushed Curry and Pear Pizazz to color the stem and stamens. Then I traced the outer edge of the same framelits and cut out the English Garden Designer Series Paper by hand to mount the stamped images on.

I used the new heavier weight Whisper White to make the card base. Cut the sheet lengthwise at 4.25". I scored the paper at 1", 2", and 6.5". Then I glued on the two pieces of embossed bricks on. Then I used Dimensionals to raise the ovals off of the bricks. The only tricky part is to have an envelope near by so you can place the calla oval exactly where it needs to go, so it will fit in the envelope all folded up!  The bee was fussy cut out of the English Garden DSP and then the new Gold Metallic Thread was looped around the bee back multiple times with the help of a glue dot or two to hold it in place. Then the bee and thread were mounted on the card with another Dimensional.

Classy and simple, I just love it! Thanks for taking a look!

post signature