Pages

Showing posts with label paper pumpkin. Show all posts

Friday, May 6, 2022

Gorgeous April Change is Beautiful Paper Pumpkin Kit

Wahoo! My April Paper Pumpkin Kit is done! The Change is Beautiful kit has a gorgeous color palette, but the subject matter wasn't quite to my liking, but I powered through and am very happy with my results. I was inspired by several other Demonstrators who shared their creations in the Facebook group - Paper Pumpkin Fan Club.

I did use other greetings and leftover pieces from other previous Paper Pumpkin kits to make these creations. I did not make any cards according to the directions.


I was inspired by the Stampin' Butterfly for the trio of cards on the left using the Good Feelings stamp set. I used Bermuda Bay and Melon Mambo ink on a card base of Bermuda Bay or Crushed Curry.

The Stampin' Butterfly also had a similar card for the night sky ones on the right side, but for she had a blue moon and blue stars and I thought it was a no brainer to mount the night sky on Crushed Curry to remind me of a summery harvest moon concept and help it to POP!


The Stampin' Butterfly also inspired the trio of floral cards on the right, but I changed them into Happy Birthday cards. I tried to use the light Melon Mambo Stampin' Blends marker on the middle card but wasn't crazy with my result so stopped before doing the other cards.

On the right side, the top card is my original design, the next two cased an idea from Rachel Tessman, and the bottom card was inspired by the Stampin' Butterfly. 


Better photo of the top right card and its inner layer.


The two right middle cards opened up.

(True Confession time - With the cocoon card above, I had stamped the black butterfly where the Crushed Curry cardstock is, but when I closed the card, it SHOWED! Ugh! Thus the piece of Crushed Curry to cover the mistake and another butterfly stamped in a better position.)


The lower right card has the same inner layer as show in the top right card.

********

I cased one other amazing Demonstrator - Vy Tran (Crafting Daily Dose) for this incredible Waterfall Technique Card. I have never made this kind of card before, but I finally felt brave enough to try. I am happy with the result.


The last panel shown below is different because I had already used all the separate flower punch outs on another card design above. Luckily I hadn't used the large butterfly punch outs, so one went here!


Vy's You Tube video and the dimensions on her website were wonderful to follow. 
********

I am saving one more Paper Pumpkin card to share with you on Monday, so be sure to visit again to see the masterpiece!


Have a lovely day!

Tuesday, January 11, 2022

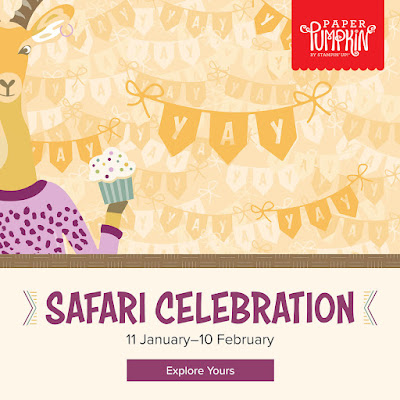
Let's Go on Safari with Paper Pumpkin

 Do you have friends that could use some encouragement? Children or Grandkids you would like a project to make with them? Do you want to expand your crafting fun?  Well, a monthly subscription to Paper Pumpkin is the perfect answer! Check this out!


Did you see that? It’s a mischievous monkey swinging from tree to tree! What about that elephant marching through the mud? Can you catch an antelope galloping in the grass? Grab your binoculars, buckle up, and hop into our off-road truck—there’s so much to see on this safari!

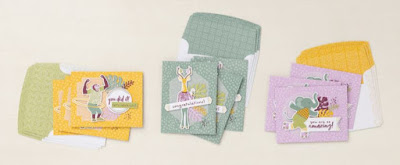
Answer the call of the wild—and your creativity—with the Safari Celebration Paper Pumpkin Kit. This playful, party-themed kit includes all the goodies and gear you need to create nine cards and coordinating envelopes in safari-inspired shapes and patterns you’ll go wild for! Make every occasion a celebration with this month’s amusing animals, beautiful botanicals, and celebratory sentiments.

Don’t monkey around and miss this amazing adventure! Unleash your creativity with February’s wildly fun kit.


Details:

  • This month’s kit contains enough elements to create 9 cards—3 each of 3 designs—and 9 coordinating envelopes. This all-inclusive kit includes printed card bases, die-cut paper pieces, embellishments, adhesive, and more!
  • The Safari Celebration Paper Pumpkin Kit includes a Rich Razzleberry Classic Stampin’ Spot!
  • This kit’s stamp set is an uplifting one! Make every occasion a celebration with sentiments that say “yay!”, “fantastic!”, and other fun phrases.
  • Explore each of our current In Color collections with this colorful kit! Discover designs and paper pieces in Bumblebee (a 2020–2022 In Color), Fresh Freesia (a 2021–2023 In Color), and Soft Succulent (a 2021–2023 In Color).
  • Card size: 4-1/4" x 5-1/2" (10.8 x 14 cm)
  • Envelope size: 4-1/2" x 5-3/4" (11.4 x 14.6 cm)
  • Coordinating colors: Bumblebee, Fresh Freesia, Pear Pizzazz, Rich Razzleberry, Soft Succulent, Soft Suede


Now is the best time to subscribe because you can receive extra Sale-a-Bration rewards with a prepaid subscription.  Order here
Once you've purchased, Stampin' Up! will email you a coupon code to enter here 
Set up your online account and add the coupon code and you'll be receiving your first kit before the end of February!

Then share the fun of making your kit with your friends. Start a kindness movement!


#stampinwitheva #sudemo #paperpumpkin


Monday, January 10, 2022

Don't Miss Out on January Paper Pumpkin

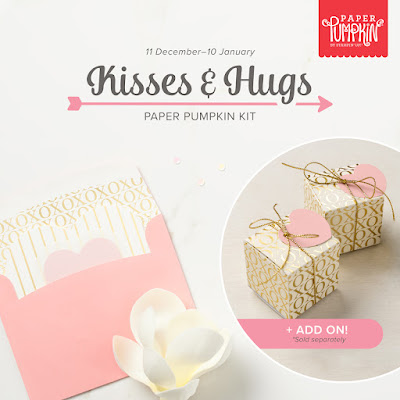
Hey Friends! Today is the last day to sign up for January's Kisses and Hugs Paper Pumpkin Kit. It looks so cute for Valentines', but it will also be awesome for weddings, anniversaries, and surprise gifts.


We have heard that this kit will be a little delayed in it's shipping due to supply chain issues, but that means if you sign up today you won't miss a thing!

On Jan. 25th the darling little boxes that are shown above are an add-on item you can purchase through the online store only if you are a Paper Pumpkin subscriber.

Watch this short video to see more about this cute kit!


ABOUT THE KIT

Details:

  • Kit contains enough supplies to create 10 cards—5 each of 2 designs—and 10 coordinating envelopes
  • Kit features an exclusive Two-Step photopolymer stamp set
  • Kit includes a Gray Granite Classic Stampin’ Spot
  • Card size: 4-1/2" x 4-1/4" (11.4 x 10.8 cm) heart-shaped cards; folded
  • Coordinating colors: Blushing Bride, Flirty Flamingo, Gray Granite, Very Vanilla

    ADD-ON

    Name: Kisses & Hugs Mini Treat Boxes 

    Item number: 160147 | $10.00 USD | $13.75 CAD

    Details:

    • Contains 20 mini treat boxes and 20 heart tags
    • Gold cord: 10-1/2" yards (9.6 m)
    • Finished size: 1-3/4" x 1-3/4" x 1-3/4" (4.4 x 4.4 x 4.4 cm)
    • Printed with gold foil

    These coordinated treat boxes are not included in this month’s kit and are only available for purchase separately as an add-on online starting 25 January. You must be a Paper Pumpkin subscriber to purchase and they are only available while supplies last.

    For a by the month subscription:

    If you purchase a prepaid 6-month subscription in my online store - you can also qualify for two Sale-a-Bration rewards! Following check out, you will be emailed a code to enter in the sign up link above to start your subscription. This is the best time to sign up! Who doesn't want some free product?!

    Once you sign up, you'll be invited to join my Paper Pumpkin Facebook group where I share alternative ideas each month with the kit. You should could also join the Paper Pumpkin Fan Club Facebook group to get lots more great alternative ideas!


    #stampinwitheva #sudemo #paperpumpkin

    Sunday, October 31, 2021

    Happy Halloween With One Extra Card for YOU


    I hope everyone has a Halloween that they love!


    I had not tried a Criss Cross Card Fun Fold before. Oh my, they are so easy! 

    You need one piece of 4-1/4" x 11" cardstock, scored at 5-1/2". Then you will make one diagonal cut on your paper trimmer from the scoreline to the downward front corner. The cardstock piece you cut off is flipped over and will become the other front piece once the Designer Series Paper is attached.

     However, don't use one-directional Designer Series Paper like I did. I wanted to use the Cute Halloween Designer Series Paper, but guess what? It was one-directional, so I ended up using two pieces instead of the one 4" x 5-1/4" piece that you need to slice diagonally and flip over one side. Both of the scalene triangles will fit precisely on the front cardstock pieces.

    I also dug through my leftover Paper Pumpkin kit materials and came up with the cute Boo and skeleton to decorate the Scalloped Rectangle Die shapes that I die cut out. You can position those rectangles however you'd like. They are meant to cover up whatever you stamp inside on your card liner.


    Just search YouTube for Criss Cross Cards as there are many videos to show you this fun fold.

    Of course, don't forget to decorate your envelope flap either!

    Have a Happy Halloween!


    #stampinwitheva #sudemo
    #stampinup #crisscrossfunfold

    Wednesday, September 29, 2021

    Some Quick September Kit Alternatives

    The September Paper Pumpkin Kit called Haunts and Harvests was very fun to put together! I used most of the supplies in making the treat favors I'll be using at my next Stamp Class.


    I had to fussy cut a nose for my pumpkins from the extra black sticker paper that the eyes and mouth came off of.


    I flipped over the punch-out leaf frames and used a blending brush to smoosh ink into an artsy result. Then I dived really deep into my hanging 12x12 Designer Series Paper files and came up with this fall paper from at least five years ago! It was fun to just see what spoke to me and what resulted. I hope you like these samples.


    #stampinwitheva #sudemo
    #hauntsandharvests #stampinup

    Monday, September 27, 2021

    Paper Pumpkin Kits are Great for Family Craft Night

    Are you a busy family that sometimes just needs a quiet night at home doing something different besides electronic devices? 

    Would you like your children to learn how to send birthday cards and write thank you notes? This is an idea that I'd be happy to help you with. Stampin' Up!s Paper Pumpkin Kits are a perfect solution to help you raise thoughtful caring children and have quality family time together. 

    I have been a Paper Pumpkin Subscriber from the beginning, but I did take a few breaks early on. But not anymore. Every month is better than the last! Here's a review of the kits we've had so far this year. They have been so amazing! The great part is you can use the contents to make the cards or crafts just as described with the included directions or you can be creative and make alternative designs that work just for you!


    The Video above helps you see the types of things that come in the monthly kit. It's an example of the value you receive to help with family crafting.


    The October Kit is called Peaceful Christmas and contains enough elements to create 10 Christmas cards—5 each of 2 designs—and coordinating envelopes. This all-inclusive kit includes printed card bases, die-cut paper pieces, embellishments, adhesive, and more!
    October’s kit arrives in a cute collectible box covered with enchanting evergreen trees. Use this special, limited-edition box to store your holiday handicrafts, or transform it into a well-wrapped package for a present!
    The kit’s contents pair perfectly with the Peaceful Place Suite Collection (item 156277). To continue your Christmas crafting, combine the kit’s components with the suite’s patterned paper, shimmery sequins, and more!
    Card size: 4-1/4" x 5-1/2" (10.8 x 14 cm)
    Envelope size: 4-1/2" x 5-3/4" (11.4 x 14.6 cm)
    Coordinating colors: Basic Gray, Real Red, Shaded Spruce, silver foil
    You get everything you need, all you provide are scissors and glue. It is such a value to make 10 cards for $22 plus tax (shipping is included in the price!) (That's less than $2.50 per card!)

    Sign up now at this link so you won't miss out!

    The deadline to sign up for the Peaceful Christmas kit is October 10th. 


    Here is the coordinating Peaceful Place Collection if you are interested. 

    I have a Facebook Group of my subscribers that you can join when you become a subscriber where I post alternative designs to inspire you.

    I hope crafting with your family is something you'd like to try and I'd be happy to assist you along the way. 

    Happy Creating!


    #stampinwitheva #sudemo
    #paperpumpkin # stampinup

    Friday, August 6, 2021

    July 2021 Paper Pumpkin Alternates to Share

    The July Paper Pumpkin kit sure had lots of possibilities to make alternative designs. Take a peek below and let me know which ones you like.


    I was inspired by many people who are part of the Facebook Paper Pumpkin Fan Club group, but there are some originals here too. I love Christmas so I thought the card bases lent themselves to a holiday theme.


    I thought adding Basic Black to these cards really helped them to POP! I used retired Snowflake Splendor ribbon. Retired stamp Itty Bitty Christmas on top left card, retired stamp Butterfly Wings for the circular greetings, and the lower right is from retired Santa's Sleigh stamp set.


    I couldn't stop putting bows on the lanterns. I know in real life that isn't a practical thing to do, but on paper, it was so much fun!  The hexagon tag was from a previous Paper Pumpkin kit. The Merry Christmas is from retired Celebration Tidings. The Let it Snow is from Snowman Season stamp set.


    The reindeer came from retired sets - Santa's Sleigh stamp set and Dies and Detailed Deer Die (just used a scrap of an unknown piece of Designer Series Paper from long, long ago.) Back ground polka dots are from retired Feels Like Frost Designer Series Paper. 


    The upper left card has a close up in the photo beneath this one.

    The upper right card, I went all out on! Added fussy cut trees from retired Let It Snow Designer Series Paper. Added a fussy cut wreath for the trailer door from retired Trimming the Town Designer Series Paper, plus added retired Snowflake Splendor Designer Series Paper behind the trees and trailer.

    Lower left card is a result of using part of the kit envelope for a night sky. I punched out a "moon" with a retired circle punch. Plus sponge daubered the edge of the tag.


    Made an easel card with a graduation or new job theme.

    So I hope I inspired you to get creative with your July kit, don't wait another minute your August kit will be here before you know it!

    If you want to sign up to receive your own Paper Pumpkin kit, visit here.

    Have a lovely day!


    #stampinwitheva #stampinupproducts  

    Tuesday, July 13, 2021

    August Hope Box Paper Pumpkin Kit Video

    With our lives starting to feel more normal than they have in the last 16 months we have hope that brighter days are ahead. Shelli Gardner, Co-founder of Stampin' Up! and currently Chairman of the Board has helped design this August kit called Hope Box.

    She shares what she has put in her Hope Box after making the nine cards that come in the kit. This is one of the most personal videos I have seen her share in my 10 years with the company. 


    The ideas she offered has me thinking what do I want to do with my hope box after I finish making the cards. How about you? What ideas might you include in your Hope Box.


    Here's another image showing some of the coordinating colors in the kit - Bermuda Bay, Blackberry Bliss, Bumblebee, Petal Pink, Melon Mambo, Pool Party and Poppy Parade.

    If you are not a Paper Pumpkin subscriber or want to re-subscribe you can do so at this link for only $22 per month plus tax. Shipping is included in the price. You receive so much value each month with all the necessary supplies, the enclosed stamp set and ink spot that you can use again and again. All you need to provide are scissors and some double stick tape.

    If I can be of service with your subscription please let me know. Have a hopeful day!


    #stampinwitheva #stampinupproducts  

    Tuesday, June 29, 2021

    June 2021 Paper Pumpkin Alternate Card Designs

    Each month when I receive my Paper Pumpkin subscription, I like to make alternates that are different from the included directions. I like to challenge myself to see what I can come up with. I made 8 originals and I cased Rachel Tessman's idea for the last card, but I still changed it up a bit.

    I apologize for the darkness of my photos. I took them in natural light, but it was a very hot day so maybe the camera didn't like that. I did try to correct in the editing process, but not as great as I'd like!


    Card 1: Stamped the included floral image all around the edge of the included layer. Then made a tag using the Create with Friends stamp set (Happy) and Biggest Wish stamp set (Birthday) stamped in Evening Evergreen and mounted the white tag on Evening Evergreen cardstock raised up with Dimensionals. Accented with the included sequins.  Stamped floral image on Envelope in Evening Evergreen ink for Cards 1, 2, and 3.


    Card 2: Did the same as Card 1 for creating the floral layer. Then for the "thanks" I adhered a piece of adhesive sheet to the back and attached it to Basic Black cardstock, then fussy cut out and raised with dimensionals. Accented with sequins.


    Card 3: I used a piece from my Expressions in Ink Designer Series Paper added to the note card front. Then made the same tag as Card 1, but mounted it on Gold Foil. Embellishments are 2021-2023 In Color Jewels.


    Card 4: Made my own card base in Polished Pink. Added a 4" x 5-1/4" piece of Expressions in Ink Designer Series Paper, but extended it with two 3/4" x 4" strips of Gold Foil. I sponge daubered Polished Pink ink to the back of the Thanks Vellum. When dry, I used my Fine Tip Glue Pen to adhere to the card front. Finished off with a gold braid bow and the provided sequins.


    Card 5: Super simple. Used provided base and added tag like above but stamped in Polished Pink ink. Added sequins.


    Card 6: On provided base, added a piece of Blackberry Bliss cardstock and attached the vellum flowers. Wrapped both layers with the gold braid and raised up with dimensionals. Using a previous Paper Pumpkin stamp set, I stamped in Tuxedo Black ink on the included small tags. Raised those tags up with Mini Dimensionals. Added sequins to finish.


    Card 7: On provided base, I added adhesive sheet to the back of the leaf vellum and attached to entire card front. Using Polished Pink, Fresh Freesia and Evening Evergreen inks, I sponge daubered on the back of the vellum to colorize the image. Let it dry. Using the provided glue dots, carefully placed them where they would show the least and attached to card front. Stamped provided tag in Polished Pink ink and raised with Dimensionals. Added provided sequins.


    Card 8:  Repeated the card front vellum application. Added a scrap piece of Fine Art Floral Designer Series Paper. Added the birthday tag and provided sequins. Fast and easy!


    Card 9: Cased from Rachel Tessman
    Using a Basic White card base and additional layer, I placed 3/4" x 3-3/4" strips in the pattern shown. I stamped the floral image on a scrap of Basic White cardstock in Blackberry Bliss ink. Added a strip of the Expressions in Ink Designer Series Paper so I could have some more gold accenting the card front. I added a small banner to the floral image strip just to fill it in more. I wrapped gold braid around the top strip layer three times and tied a bow. Then raised that layer up with dimensionals.  Finished the envelope with the floral image stamped in Fresh Freesia.

    I hope these cards are an inspiration to you and help to show you the amount of value you can get from subscribing to Paper Pumpkin monthly. Use the link below to sign up.


    Have a crafty day!


    #stampinwitheva #stampinupproducts