
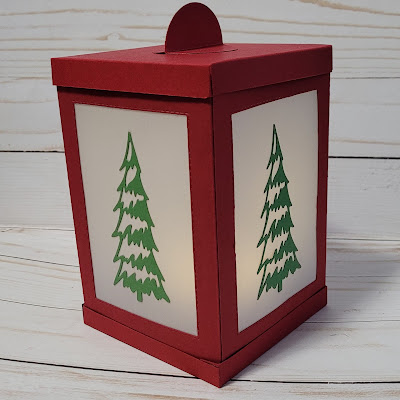
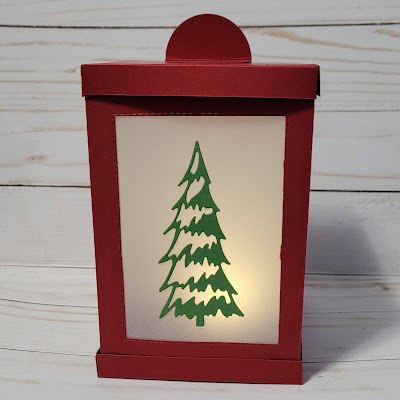
Anne, my downline, shared this cool holiday paper and vellum lantern with me when we were together last month. It glows with a flickering battery-powered candle inside.
Here are the basics on how to construct this lantern:
Cherry Cobbler cardstock - 2 pieces cut 6" x 8-1/2", score at 4" and 8" on the long side. That 1/2" section will be what connects the two sections together later.
Use the bone folder to fold the score lines well on each piece.
With more Cherry Cobbler for the top and bottom- cut 2 pieces 5-1/8" square.
Score at 1/2" on all 4 edges. (We will come back to this in a bit.)
You'll need the 3rd largest Stitched Rectangles Die to die cut the "window" in each lantern section before you assemble the lantern pieces into one unit.
Cut 4 pieces of vellum cardstock for windows - size 3-3/4" x 5"
The windows will be attached on the inside with tear and tape around all 4 edges of the window opening. Use the bone folder to guarantee good adhesion.
Using the Christmas Tree Dies, select which tree you'd like to use and die cut four matching trees out of Garden Green cardstock. Using the Tombow Liquid Multipurpose Glue, very carefully apply small dots of glue to your tree die cuts. Let the glue dry thoroughly.
To assemble the lantern you will put tear and tape on each 1/2" section. Line up the section carefully and attach the two sections together. Use the bone folder to guarantee good adhesion.
Now for the lid and base. Use the bone folder to fold the score lines well. Cut into the 1/2" corners to create a tab for gluing the edges together. Use a paper clip on each corner to let the glue dry well and hold the shape for both the lid and base pieces.
With a 1-3/4" circle punch, punch out two pieces of Cherry Cobbler that will become the "pull" for the top lid, so you can turn your battery-operated candle on and off easily. Score the circle through the middle on each circle piece. Only glue one-half of the circles together to form a "tab" and the other half will be glued to the lantern top when it is finished drying.
To attach the base to the lantern, put some pieces of tear and tape around the inside of the entire 1/2" lip and set the lantern inside the base when you've peeled the protective strip off the tape. Put your hand inside the lantern and gently press the sides to the 1/2" section until well secured.
Attach your lid tab with glue. Let dry. Set your battery-operated candle inside and place the lid on top of the lantern. All done! So pretty! These would be fun to make and set in your window sills on Christmas Eve!

#stampinwitheva #sudemo #christmaslantern
No comments:
Post a Comment
Thanks for taking the time to leave me a comment! I appreciate hearing from my readers. If you have a question or anything I can help with please let me know. Have a wonderful day!