Since we are still in the season of summer for a little while longer, and cherries grow in the summertime, do you have a friend who would love to receive this birthday card from you?
I love to work in Black and White and one (or two) other colors. But if you are going to nit-pik, technically there is a fifth color, but it is used so little, I'm not counting it.
Now matter how many colors you include, this card design is an easy one to put together by following the photo below.
Do you like Black and White card designs? Let me know in the comments.
Those cherries look almost good enough to eat!
This list of Supplies are available to order at my online store. Click each photo to shop.
Retired Products used – Pattern Party Designer Series Paper & Scalloped Seasonal Layers Dies. You may find these items offered on Ebay or Etsy, or feel free substitute what you think looks pleasing to you.
Project Directions:
Cut Sweet Sorbet cardstock card base 5-1/2" x 8-1/2", score at 4-1/4".
Cut Basic White cardstock layer - need two pieces - one for front layer
and one for inner layer 4" x 5-1/4".
Cut Pattern Party Designer Series Paper (DSP) black diamond pattern - 3/4" x 4".
Cut Pattern Party Gingham pattern 2-1/2" x 4" and 3/4" x 4" strip for inner card layer.
Take one piece of the Basic White layer and lay (do not glue) the two pieces of black and white on the front in the position shown in the photo.
Stamp the images shown. If you are successful on the first try. Then go ahead and adhere the black and white pieces to the Basic White piece.
Cut Granny Apple Green cardstock for the scallop die 3/4" x 4". After die cutting adhere to card front as shown.
Use some Basic White scraps for cherry parts. I recommend three various size pieces. One pieces large enough to stamp two cherries at each end say 2" x 5". Another piece a half inch wide by 5 inches long for the stems being stamped also one at each end. Lastly a 1" wide by 4" piece for the two leaves, again stamped at each end. By doing it this way, you will have a "handle" to hold on to when using the Cherry Builder Punch.
After stamping and punching the cherry parts start assembly using glue dots to stick the stems on, put the leaves together and later add the bow. The cherries and leaves portions are raised up with mini dimensionals on the card front.
Finish by adding your Rhinestone Jewels. Add the second piece of Basic White to the inner card and add the small strip of DSP for an accent.
Add a coordinating piece of DSP for the envelope flap cut at 2-3/8" x 6". Adhere and trim excess.
Well Done You!
*************************
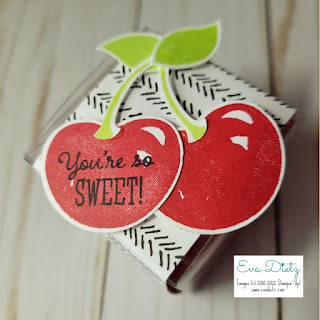
In case you missed this fun Sour Cherry Treat Box from a while back, take a look!
Would YOU like to receive a couple exclusive "Insider" card tutorials each week in your email inbox? Subscribe to my Weekly Newsletter!. Plus you'll receive a Free14 card One Sheet Wonder Tutorial as a Subscriber bonus!
Please contact me or email me at stampinwitheva@gmail.com if you have any questions about products, techniques, or card designs.


This is so cute! I love the cherries!
ReplyDeleteThank you so much! I love cherries too!
ReplyDelete