
Pages

Showing posts with label lovely lipstick foil. Show all posts

Friday, February 4, 2022

A Wagon Full of Valentine Love

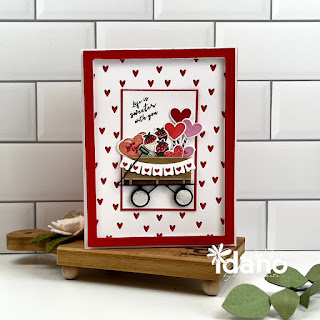
Do you ever have a day where you see someone else's card idea or a product from another company and think to yourself, "I could make a similar idea!" I'll try using my Stampin' Up! products in my stamp room and see what results.

My inspiration was from Becky Roberts of Inking Idaho 
and her card design using Papertrey Ink products.
Here's my result below and I have to say I'm very pleased with my original design! I used a combination of current,  retired, and very very retired products. Let me know what you think in the comments. How did I do?
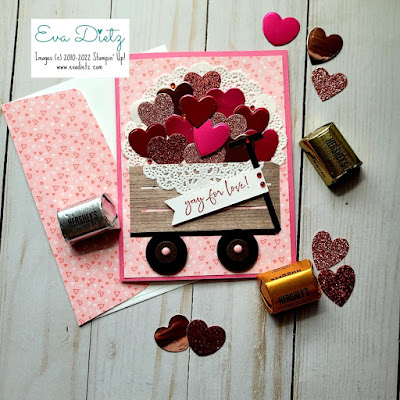
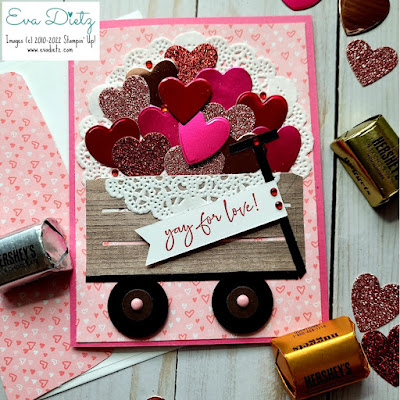

This wagon full of love was made using the Happy and Heartfelt stamp set, Sweetheart Dies, Wood Crate die, Circle punches, Red Rhinestones, and lots of dimensionals.
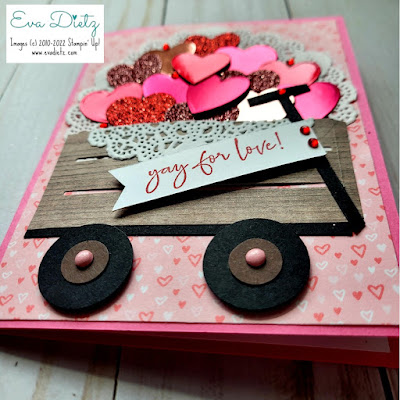

The wagon was fashioned from one portion of the Wood Crate die with Woodgrain Designer Series Paper. The 1" wheels were layered Circle Punches in Basic Black and 1/2" circle Early Espresso cardstock with a very old Pink brad put through to hold them all together. Basic Black narrow cardstock strips made the wagon frame and handle. A retired white doily became the background for the heart collection and was wrapped over the edge of the wagon. Basic White cardstock stamped in Real Red ink created the banner on the wagon handle.

The card base is Polished Pink Cardstock. Retired All my Love Designer Series Paper was the background behind the wagon and doily.  All the hearts in the wagon were made from Red Foil, Lovely Lipstick Foil, Blushing Bride Foil, Real Red Glimmer Paper, and Blushing Bride Glimmer Paper. All were die cut with the trio of hearts in the Sweetheart Dies set using my Big Shot die-cutting machine.

Of course, you'll need your favorite liquid adhesive, tape adhesive, and assorted dimensionals to create the texture and depth of all the hearts in the wagon.

I hope my burst of creative expression encourages you to give something similar a try in your craft room soon!  Don't forget to pop in a comment too.

If you haven't already, sign up for my email list and receive a free 14 card One Sheet Wonder tutorial as a thank you for doing so. Sign up here.


#stampinwitheva #sudemo

Saturday, January 26, 2019

February 2 and 3 Card Class


I had fun designing these cards that were inspired by others as noted below. I can't wait to give my Valentines some of these cards!


This Double Z fold card design was CASED from Diane Barnes but I changed it up a bit with using the Happy Birthday Framelits. The It's My Party Designer Series Paper, black foil, and black shimmer ribbon are all retired, but the Lovely Lipstick foil is a bonus you can choose for free from the 2019 Sale-a-Bration brochure. Card base is Basic Black and Melon Mambo plus Whisper White. I am really loving the Multipurpose Adhesive sheets. I don't know why I haven't used them more. By using them, they make cutting out on the Big Shot and assembling the double layer of the Happy Birthday super easy. 


These next 4 cards all use stamps from the Meant to Be stamp set. Such a versatile set.

Su Mohr was the inspiration for the card above. I used the Lace Dynamic Embossing Folder on Whisper White. The card base is Powder Pink, with the Flirty Flamingo paper from the 6x6 Brights Designer Series Paper Stack. The ruched ribbon in Flirty Flamingo is retired. I used 3 different inks on the 3 hearts - top one is Flirty Flamingo, middle is Powder Pink, and bottom heart is retired Strawberry Slush. The "love you" is cut in red foil using the Well Written thinlits. Again the Multipurpose Adhesive sheets are a real lifesaver here. The card is finished off with some red rhinestone bling.


This card was inspired by Patty Bennett. She figured out how great the Lovely Lipstick foil would look being embossed with an embossing folder. I used the Swirls and Curls. The color scheme is Whisper White and Lovely Lipstick cardstock, along with the All My Love Designer Series Paper. A 1-3/4" circle punch added the sentiment stamped in Lovely Lipstick from the Meant to Be set. The card is finished with retired white satin ribbon with a silver edge and rhinestones. I love bling!


This card uses the Ultimate Glitter Technique by Tina Zinck. She made a You Tube Video to learn how to add a glitter layer on top of a purchased napkin using the Multipurpose Adhesive sheets. The color scheme here is Highland Heather and Read Red. Sentiment from Meant to Be, and cutouts were done with the Be Mine Stitched thinlets. The Highland Heather organza ribbon is available from the Sale-a-bration brochure with a qualifying order.


I am sorry but I don't have the designers name for this next card. Using the Rooted in Nature stamp set for the sentiment  plus the Pretty Label punch, and combining the All My Love Designer Series Paper, Merry Merlot and Sea Foam Green cardstock, then a Pearlized Doily and the All My Love Ribbon pack, this card is easy to make and very beautiful!


This Sympathy card was inspired by Terri Gaines fun fold method. I used the Share What You Love Designers Series Paper, Tranquil Tide, and Old Olive cardstock plus Whisper White for the color scheme. The sentiment came from Better Together stamped in Stazon on the Galvanized Metallic Paper punch with the Triple Banner punch. Two metallic pearls were added. I came up with the closing technique by piercing 2 holes in the left side card front, right next to the tag and threading two strands of the new Old Olive Linen Thread and tied a bow.

I hope these cards will inspire you to create some for yourself. Thanks for stopping by!