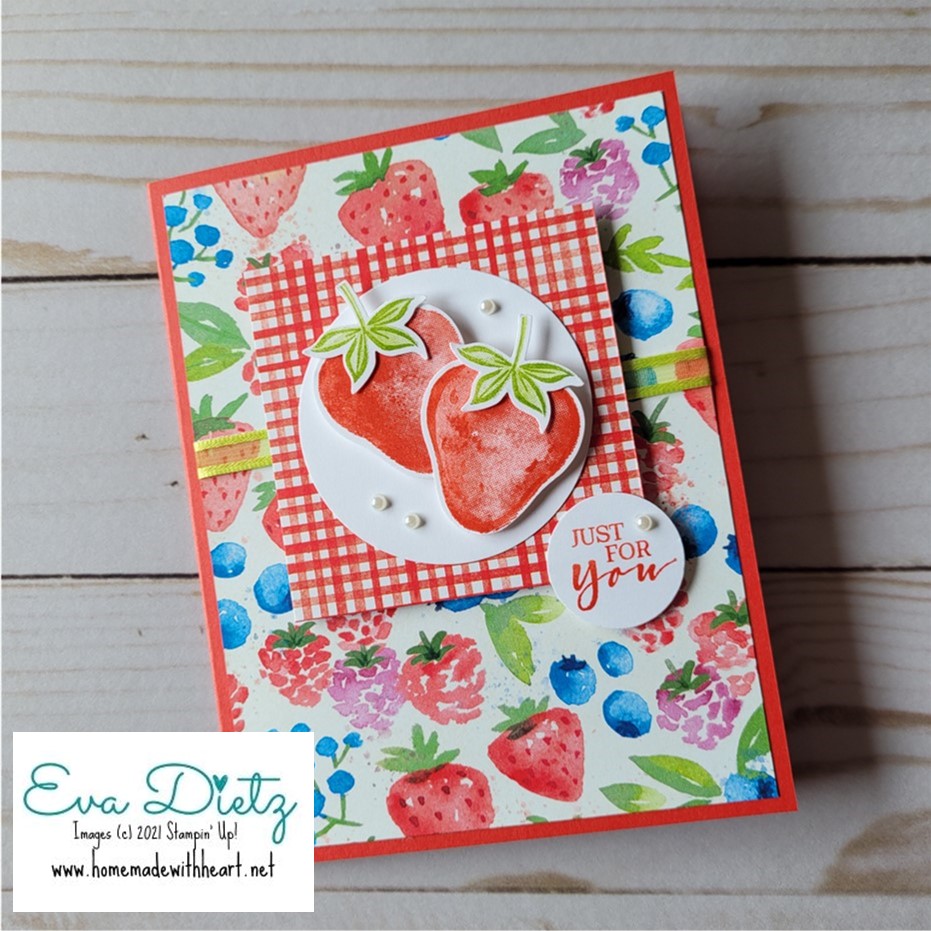
The minute I saw the Sweet Strawberry Bundle in the Jan.-June 2021 Mini Catalog and then saw the Berry Blessings stamp set and Berry Delightful Designer Series Paper in the Jan-Feb. 2021 Sale-a-Bration brochure I knew I HAD to have them both, because they reminded me of SUMMER, my GARDEN area, and the Triple Berry Cherry Yogurt that I adore to eat in June and July.
I grow strawberries in part of my raised garden beds that my wonderful hubby built for me about 5 years ago. They are the two far right beds. At the far left are blueberry and raspberry plants. So when summer comes each year, I love having a breakfast that includes filling a bowl with home grown sliced strawberries, blueberries, and raspberries that I've mixed with Dannon Greek Light & Fit Cherry flavored yogurt. YUMMMM!
Sweet Strawberry Bundle (above)
Level 2 Sale-a-Bration Reward for a $100 order before shipping and tax.
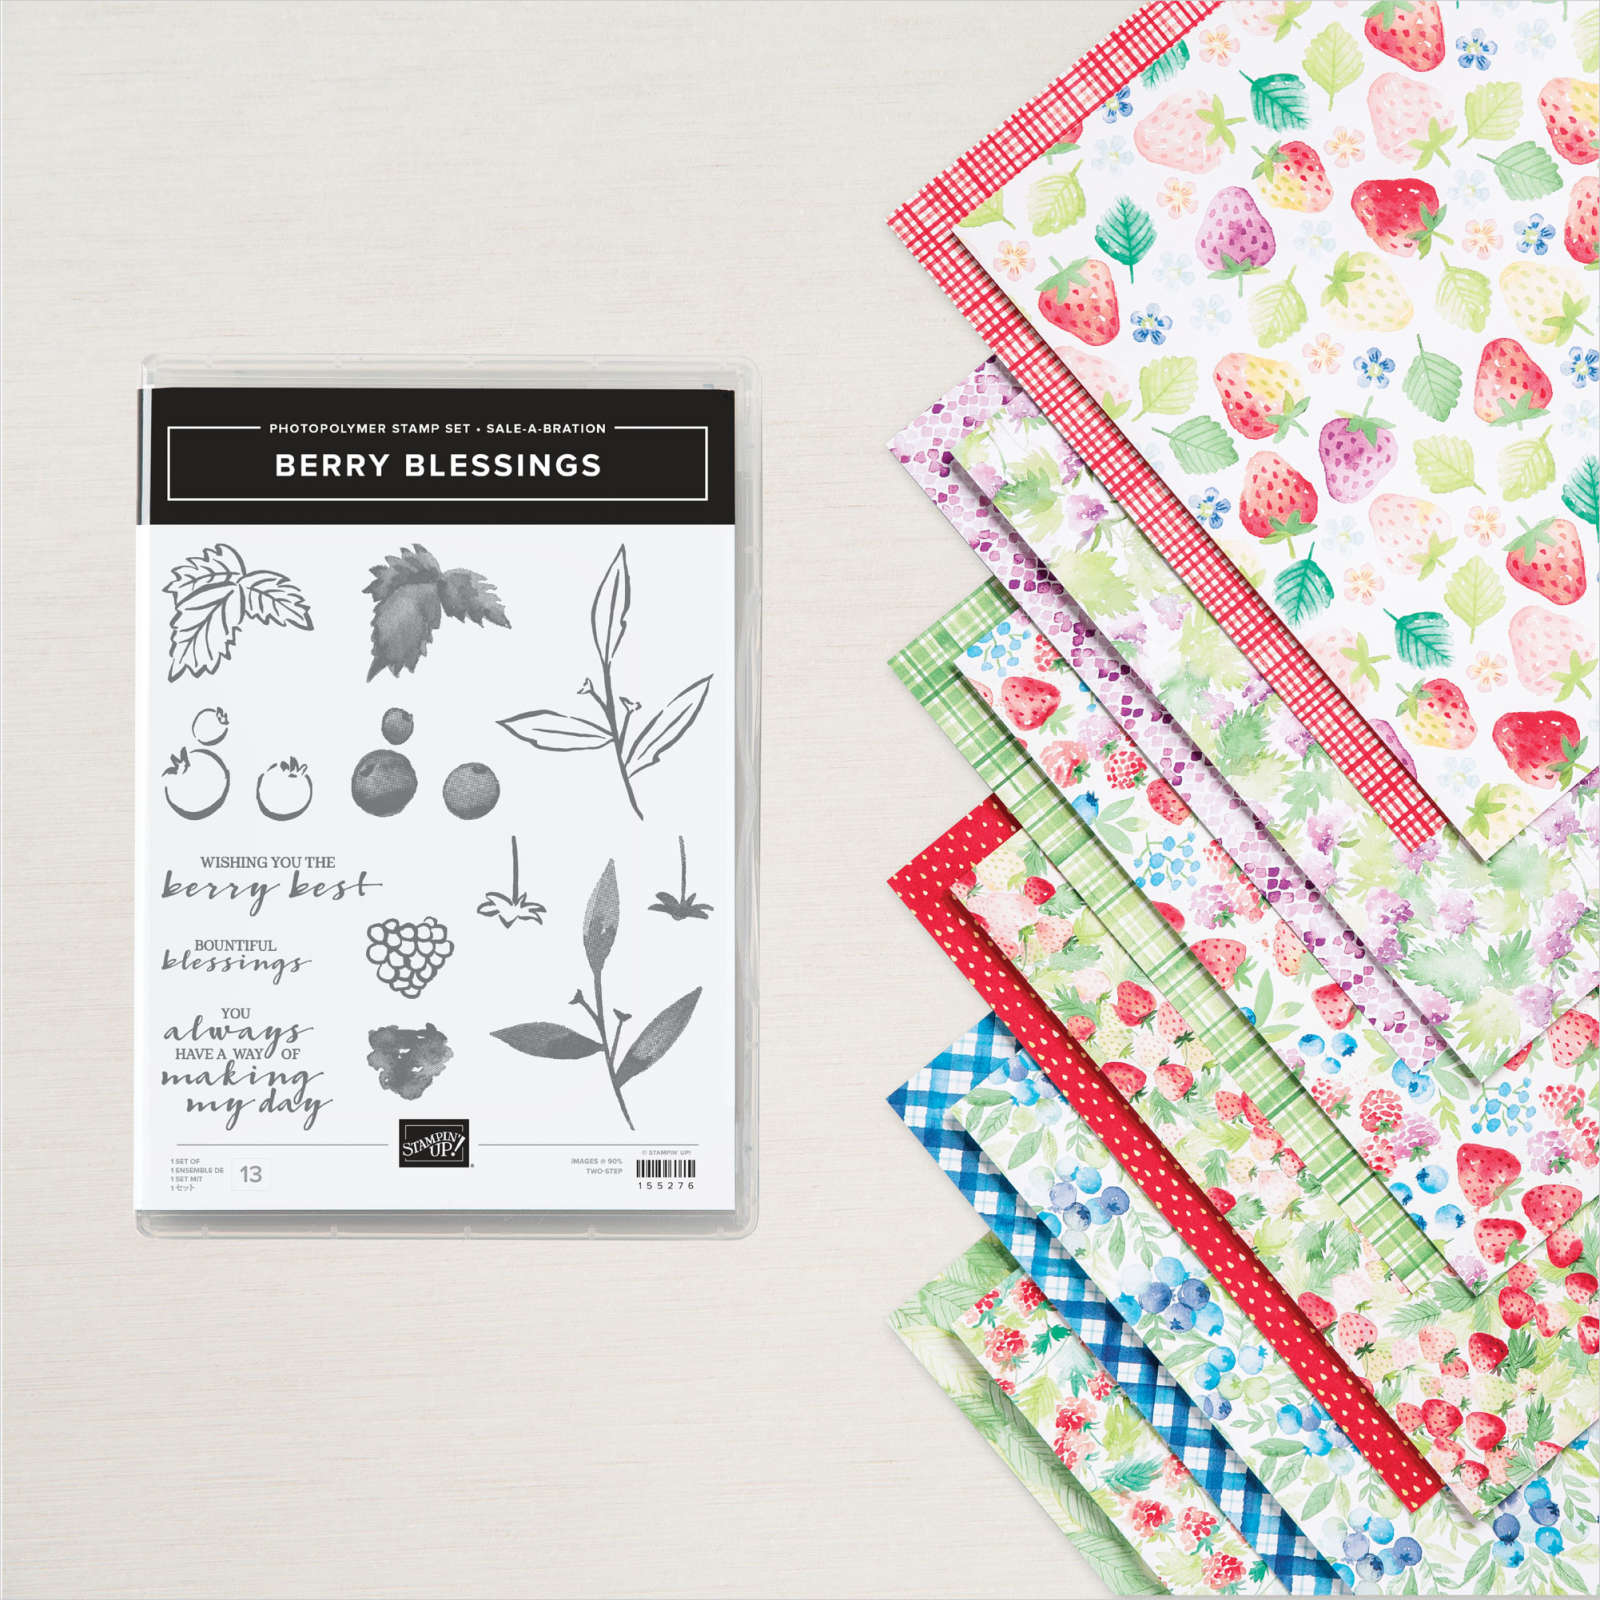
Berry Blessings Stamp Set
Berry Delightful Designer Series Paper
The Triple Strawberry card layout was inspired by Su Mohr, but I changed it up a bit with using the strawberry piece of the Designer Series Paper behind the largest Stitched So Sweetly rectangular scalloped die. Then I used the Basic Black Stampin' Write Marker to highlight the "seeds" on the three strawberries.
Additional supplies included Garden Green card base, Garden Green ink, Poppy Parade ink, the third largest Stitched So Sweetly rectangular scalloped die in Basic White along with the Sweet Strawberry Bundle.
Multiple Demonstrator's have shared their Corner Flip cards online lately, and since I had never tried one, I decided to use the Strawberry "collection" to make a couple. As you'll see below, what a difference in how a card looks when you flip the same sheet of Designer Series Paper over! LOL! It just depends on what look you desire.
These two cards above are not too hard to make, but there is a trick to conserve Designer Series Paper (DSP) and get the side you want to show cut correctly!
1) Start with a 5-1/2" x 8-1/2" card base, score at 4-1/4".
2) With a ruler and pencil mark 3-1/2" lightly from the top right corner when the card is folded, in both vertical and horizontal directions. Those two tick marks laid on the cutting line of your paper trimmer, then run the SCORING blade from end to end to create the diagonal fold. Burnish with a bone folder. (Don't glue down yet!)
3) Cut a 4" x 5-1/4" piece of the chosen DSP. Decide which side you want on the card front. THEN flip the paper over and place the approx. 2-7/8" (outside frame measurement) Layering Square die in the upper right corner. Run through your die cutting machine.
4) Adhere the remainder piece of DSP to the card front, just trimming with paper snips the small portions that cross over the diagonal score line. Then you may glue down the diagonal flap. Set a weight on it to dry.
5) While the card front is drying. Cut the 3" (outside frame measurement) Layering Square Scalloped Die from the contrasting cardstock that you will mount the DSP square on. Pay attention to which side you want up!
6) Cut a 3" square of matching cardstock and adhere the two layers you made in step 3 and 5.
7) Adhere the 3 square layers to the diagonal flap making sure left and bottom edges line up, but only placing glue on the flap portion, not the full square or else you'll have a mess!
8) Cut a 4" x 5-1/4" card liner from Basic White. Adhere inside card.
9) Cut a 4-1/4" x 1/2" strip of cardstock and adhere to card front as shown in photo.
10) Select greeting of your choice and punches or dies that will give you a two layer tag you can raise up with Dimensionals to finish the card.
Have fun with these products and making these cards!
Happy Stamping!
If you enjoyed this post, please be sure to…
Leave a comment, I love to read them! 
You Bet! I’ll Be a Follower of this Blog
Sure I’ll Connect with your Newsletter and Receive a FREE PDF tutorial
Yes! I’m Ready to Shop to Earn Loyalty Points for FREE Products!
Stop by Facebook to Visit homemadewithheartstampinwitheva
See What I’m Up to on Instagram at stampinwitheva
Discover My Pinterest Boards at Homemade with Heart—Stampin’ with Eva
Watch Informative You Tube Videos at Homemade with Heart-Stampin' with Eva
Buy on Etsy at homemadewithheartUS