
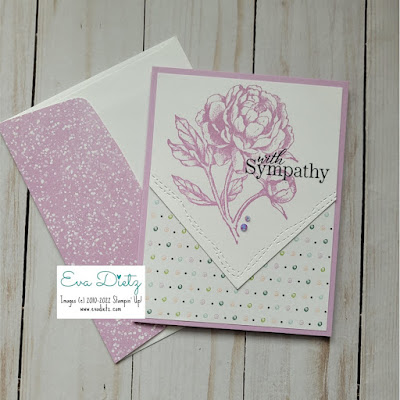
When I was designing the cards for my last stamp class I came up with a new edge effect using the largest Stitched with Whimsy Die. I'm calling it Easy Trick Point. I used my Paper Trimmer to cut the "V" point after I stamped the Peony and sentiment.
All you have to do is make sure only the two sides that need the stitching are under the die when you run it through your die-cutting machine. Make sure the top part of the basic white layer is threaded through the die and lays on top of the die so it won't accidentally get the stitching. You have a choice of which of the four corners of the die you use for your trick point. Each is a little different.
However, the ladies who made this card in class improved upon my idea. The ladies decided to fussy cut and mirror the stitched edge of the die. That result gave a much softer edge to this card design. So now you have two ways to do the edge on this card design.
Products used to Create this Card:
Fresh Freesia cardstock card base cut at 5-1/2" x 8-1/2", scored at 4-1/4"
Basic White cardstock 4" x 4-1/2" for the front image plus 4" x 5-1/2" piece for inner card layer stamped at shown with images from the Prized Peony stamp set
Stitched with Whimsy Dies - use largest one with your die-cutting machine
Friendly Hello Designer Series Paper 4" square
Prized Peony stamp set
Fresh Freesia ink
Special Moments stamp set for sympathy sentiment
Memento Tuxedo Black Ink
2021-23 In Color Jewels
Basic White Envelope with the exterior side of the flap having matching DSP- cut 2-3/8" x 6", adhere and trim off excess.
Make several of these cards to have on hand, as they will be flat to mail and ready at a moment's notice. Thank you for stopping by today.

